Table of Contents
Project Review by Period by Task
Acumatica Project Management
The documentation below is a quick guide to Acumatica
Project Management module and helpful Project tools.
To begin, navigate to the CCI Acumatica login page.
The link can be found on the employee home page or here:
https://clawsoncommunications.acumatica.com/Frames/Login.aspx?ReturnUrl=%2f
Once logged in, navigate to the “Project Management” module
You will find several hyperlinks under “Transactions”, all The first hyperlink is “Request for Information” Once you click “Request for Information” you will land on The columns & viewable data in Acumatica is by default, From here, you will see a list of “Available Columns” on the To add/remove columns from your view, click the description Once you have the “Selected column” descriptions added to You can edit/change your views at any time as you start to Back to RFI’s: The landing page will take you to all RFI’s In this example we are going to search for project 240248. You can also use the search to look up all RFI’s by owner Additionally, you can filter any column. For example, if you From here, you can “Clear All” statuses and select only To create a new RFI, click the + sign The RFI ID will default to “NEW”. To create the RFI, you will need to complete certain Next you have the option to add priority levels to your RFI. The owner information defaults to the user, but is editable The next required field is the “Project”. You can start Project task is an option but not required. It is probably The final required field is the “Contact”. This will be the The next part to complete is under the “Details” tab, and You also have the option to note if there is potentially a Next to “Details” you will see “Attributes”; nothing needs Next to “Activities” is “Relations”. Nothing needs to be You can select the appropriate drawing(s) from the list by You can also attach file(s) to your RFI. Click the “Files” To locate the file you want to attach, click the “Browse”, select Once you have completed all of the information for your RFI, You will then want to email the RFI to the appropriate Click the 3 dots next to “PRINT” at the top of the Select “Email”. “From” will default to “Accounting”. Click the scope Next choose “Select Template”. The following box will appear: Click the scope and select the template “E-Mail RFI” Then hit “Select” You can type in the text box of the email before sending if If you now navigate back to the “Activities” tab, you should The contact or the owner can enter the Once the RFI has been resolved, it is best practice to close The next hyperlink is “Project Issues”. Click to open. The format here is similar to the RFI’s. “All Records” will To create a new issue, click the + sign. The required fields are “Class ID” which are again a choice After choosing the Class ID, the “Priority” will default to The only other required field is the Project number. Choose It will be good practice to enter a summary for the issue. Another field to consider is the “Project Issue Type”. It is not necessary to enter a Project Task or Workgroup. You will enter details of the issue in the “Details” Next to “Details” you will note “Activities”, “Attributes” Upon completion, save your work. You will note that there is The next hyperlink is “Drawing Logs”. This will open Note that the information and success in this module is Required fields are “Drawing Number”, “Title”, “Project” and To view the drawing, click from the File Name under Note that we are able to export drawings (which will export You will also note that in each module there are 3 dots to To activate any of these actions, click the blue hyperlink. Daily Field Report is the next hyperlink. Clicking the To create a new record, click the + sign. Enter the Once you enter the project number & manager, you have a The next is “Progress Worksheets”. This one ties back The third section is “Change Requests”. You are able to The next section is “Change Orders” and behaves just like Next is Subcontractors. In order for vendors to appear in Select the vendor, then the next required field is the You are then able to enter the number of workers, time The next tabs are “Project Issues” & “Photo Logs” which Notes is next, and this is where you will primarily live in After you’ve entered your note, you can tell it is there Next to notes is Equipment. This is something we hope to This would be used if we ever get to the point where we bill After Equipment is Weather, this is self explanatory and Next to Weather is Visitors which may be helpful. Start by After Visitors is Approvals, there is nothing to do here. In the above screen shot, Approvals appears to be the last Clicking this tab brings up all remaining/unseen tabs. The Photo logs is finally a platform to store pictures that link To add a new photo log, click the + at the top of the When creating a new photo log, you must enter the project # Once you have saved your work, navigate to Once you have uploaded your photos, enter a description at If you are using the web version on your mobile device or Clicking on the Photo ID from a desktop or laptop opens a Open the Settings app on your iPhone or iPad. Scroll down and tap on Safari under the "Apps" Find the Block Pop-ups option. Toggle the switch off (it should turn gray) to allow Once you have allowed pop-ups, you should now be able to The final module is submittals. There will not be much to do The next sections will help you with general information The first place to navigate to is in “Projects” We suggest starring your most used / favorite modules, this There are a LOT of actions available in projects but you Once you click on the Projects hyperlink, you will see “All You can use any search and/or filter here for any column. Once you locate the project you want and click the There is a lot of data in this module, but you will mainly Another location for valuable information is under the “Cost Here’s an overview of the different columns that are Original Budgeted Quantity: This is the quantity the bidder UOM: Unit of measure Unit Rate: This is the cost the bidder has in their Original Budgeted Amount: This is the budgeted cost Actual Amount: This is the actual/invoiced dollar amount to Original Committed Quantity: This is the quantity that was Committed Invoiced Quantity: This is the quantity that has Committed Open Quantity: This is the quantity that has not Committed Invoiced Amount: This is dollar amount invoiced to Committed Open Amount: This is the dollar amount that has You will find that clicking on the blue hyperlink of the The next useful tab is under “Commitments”. This will Clicking on the hyperlink of the “Order Nbr” is helpful as Inventory ID Line Description UOM Order Qty Unit Cost Ext. Cost Billed Qty Unbilled Qty Billed Amount Unbilled Amount Those items should be sufficient for your needs but feel The “Invoices” tab is what we have invoiced to the customer. Another potential useful tab is “Change Orders”. Currently The final potentially useful piece of info is “Addresses” This is where the project address can be found, but *should* The next section that will have useful information is The Budget Details landing page will take you to All This is a General Inquiry that Rick has created for tracking Once you’ve entered your project number, it is suggested Original Budgeted Quantity – this is the quantity of labor Actual Quantity – this is the quantity of labor hours used Percentage – this is the percentage of labor hours used. The Original Budgeted Amount – this is the original dollar Revised Budgeted Amount – this is the revised dollar amount Actual Amount – this is the dollar amount used to date Note that this number is not synced up with WFG time sheets It is possible that when you enter your project number you The next section that will have useful information is located Clicking on this hyperlink will take you to a blank page. To The default will again list all projects, both active and This General Inquiry that Rick created will give you a 3 = Other 4 = Mileage E = Equipment / lift rental F = Freight L = Labor M = Material S = Subcontractor This tool summarizes our revenue to date (what we have Navigating to the Purchases module will take you to If you’re looking for PO’s for a specific project, enter the All PO’s will show up here. As mentioned earlier, you can Just as with the Projects module, the information here is 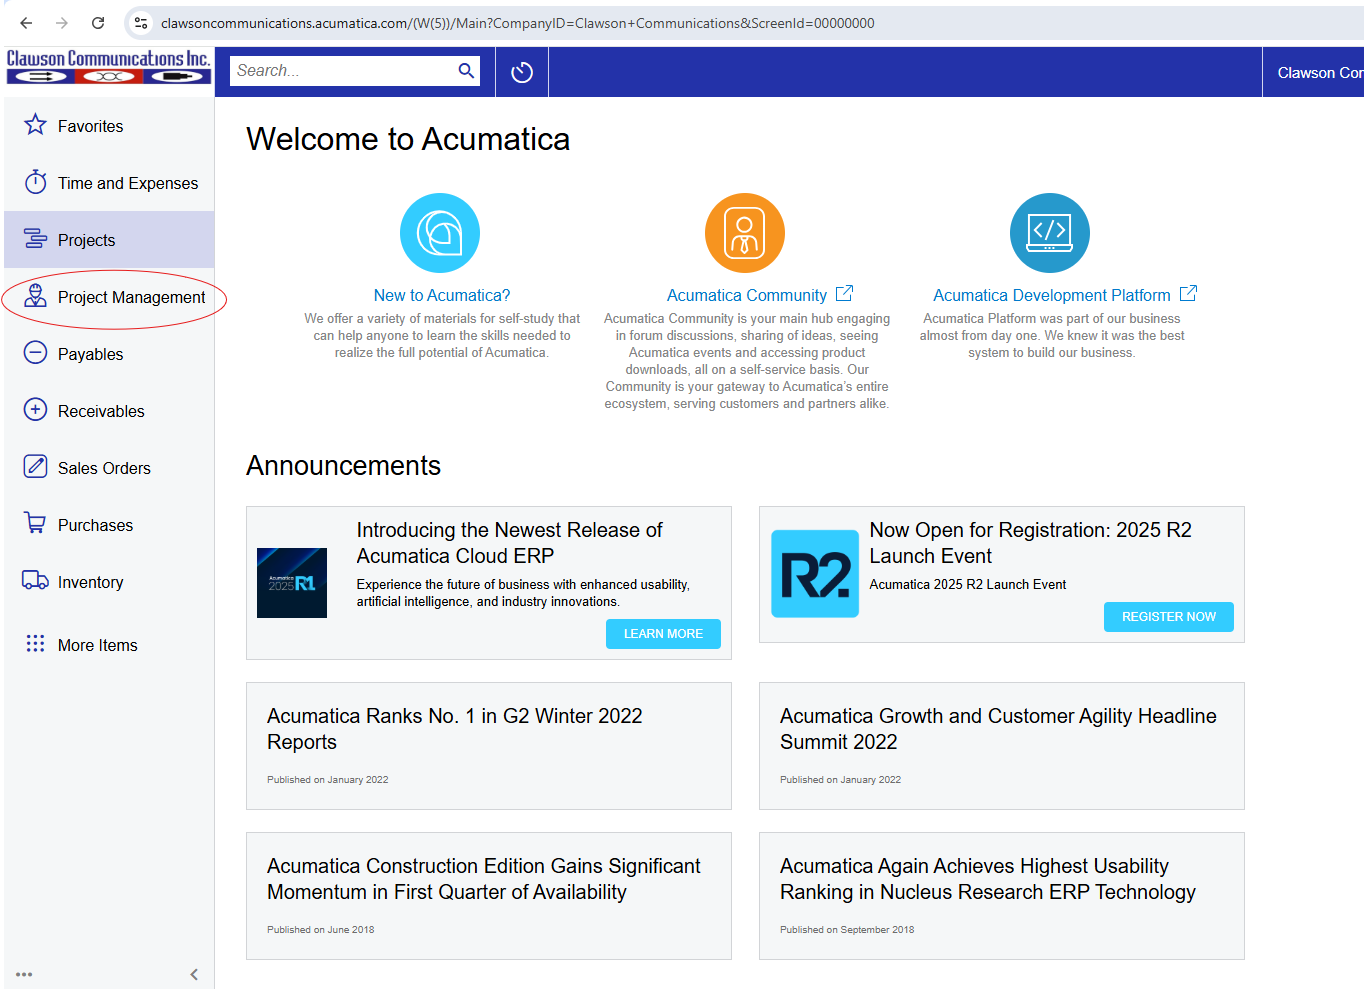
of which will be useful tools for project tracking. Request
for Information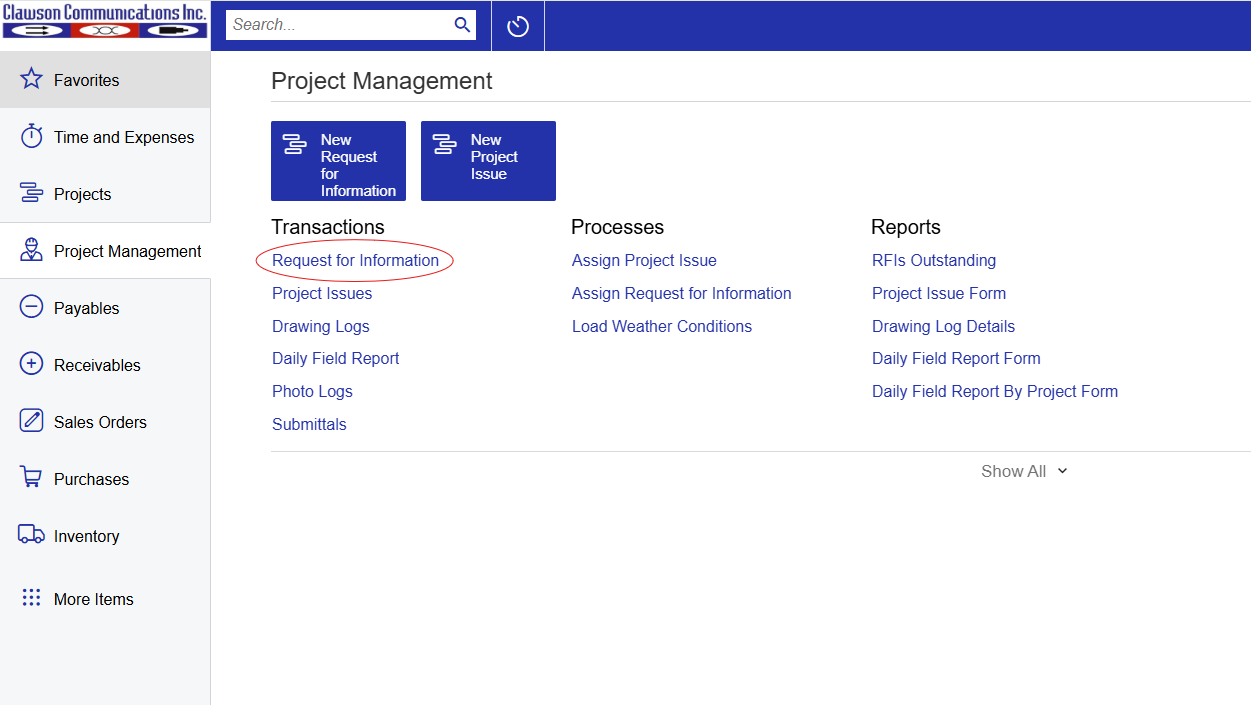
“All Records” which is a history of all RFI’s.
but we encourage users to sort the data in each module to their liking. The
process is the same for each module and is as follows:
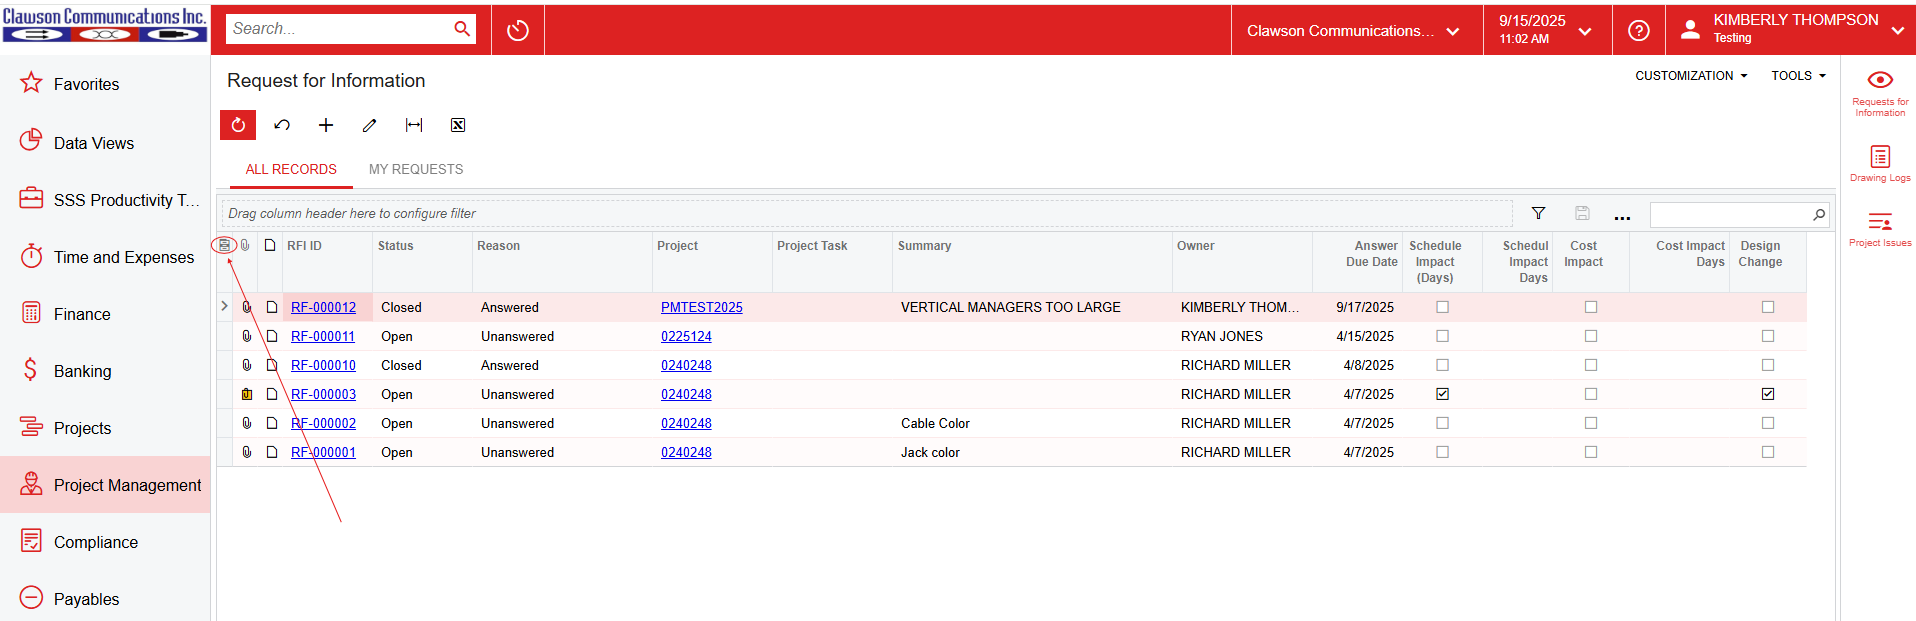
left and “Selected Columns” on the right. 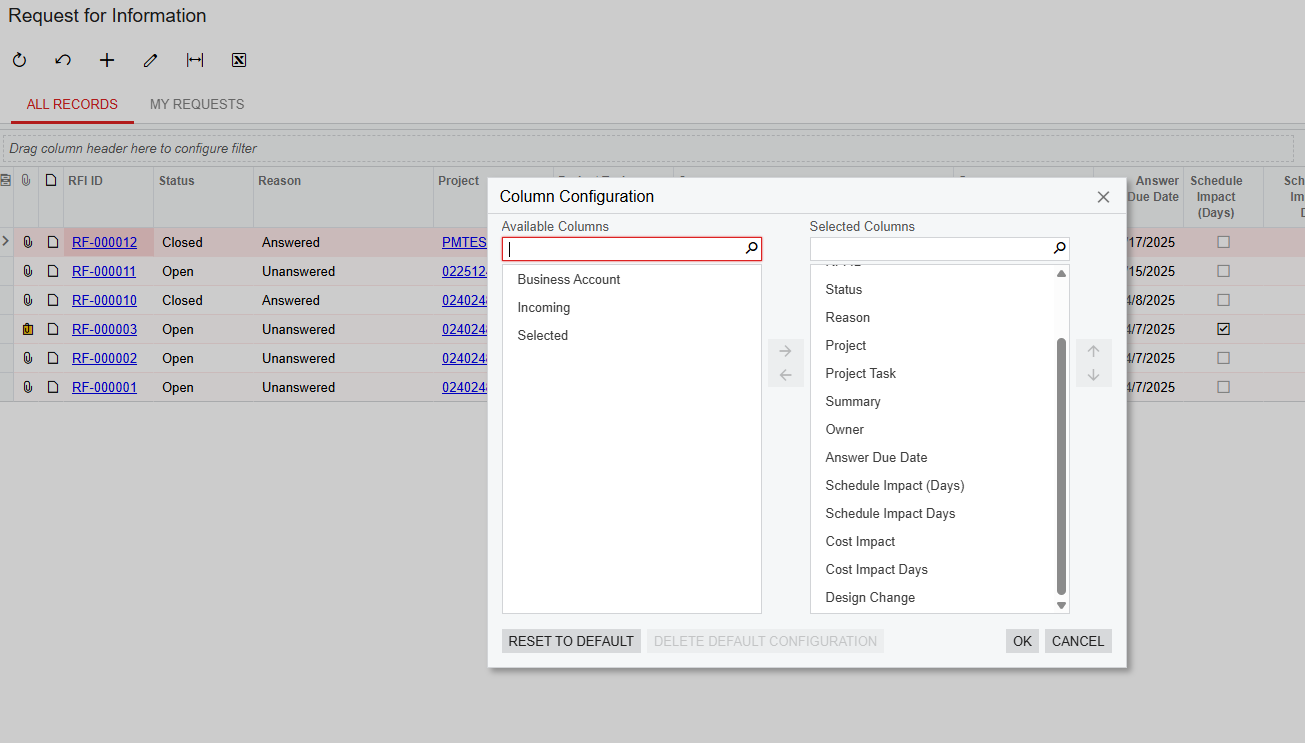
then the arrow to the left or right. Only the “Selected Columns” will be
visible in your view. The “Available Columns” descriptions will be hidden
from your view. 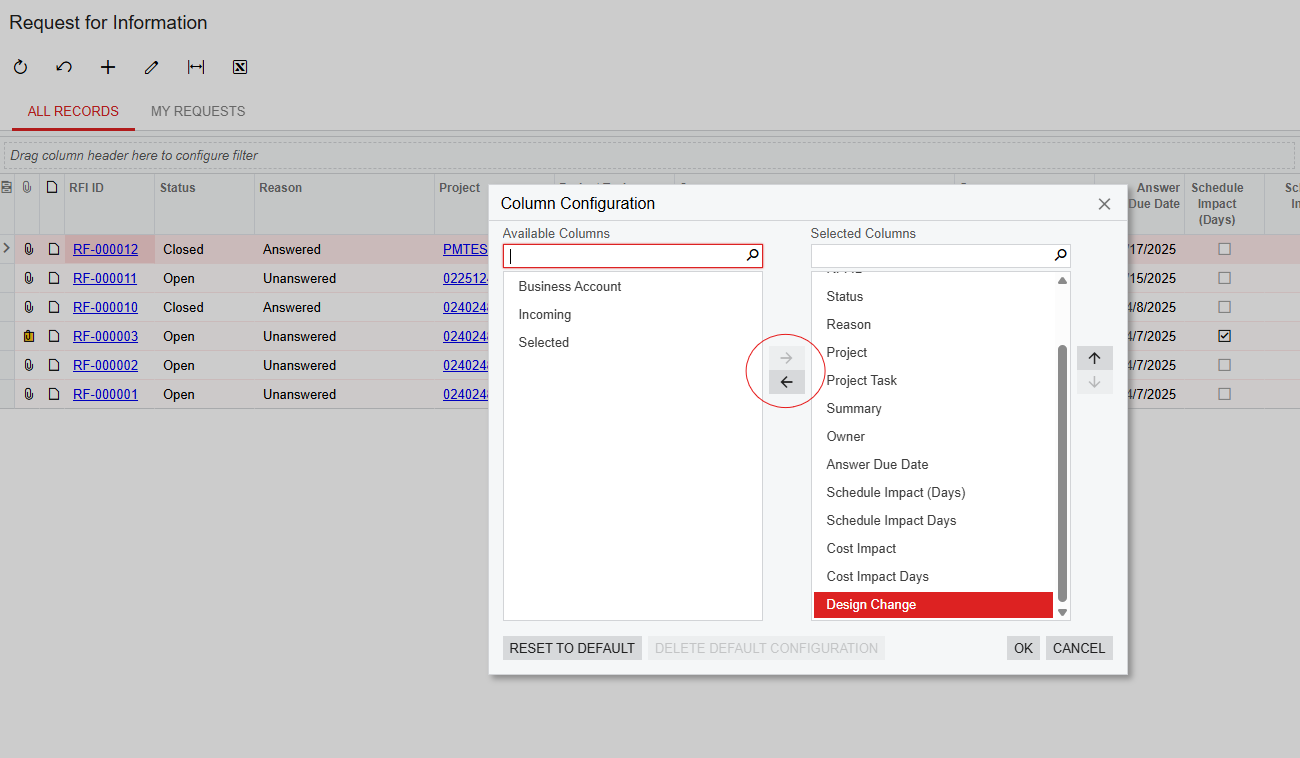
your liking, you can move them up or down in your view using the up/down arrows
on the right side. 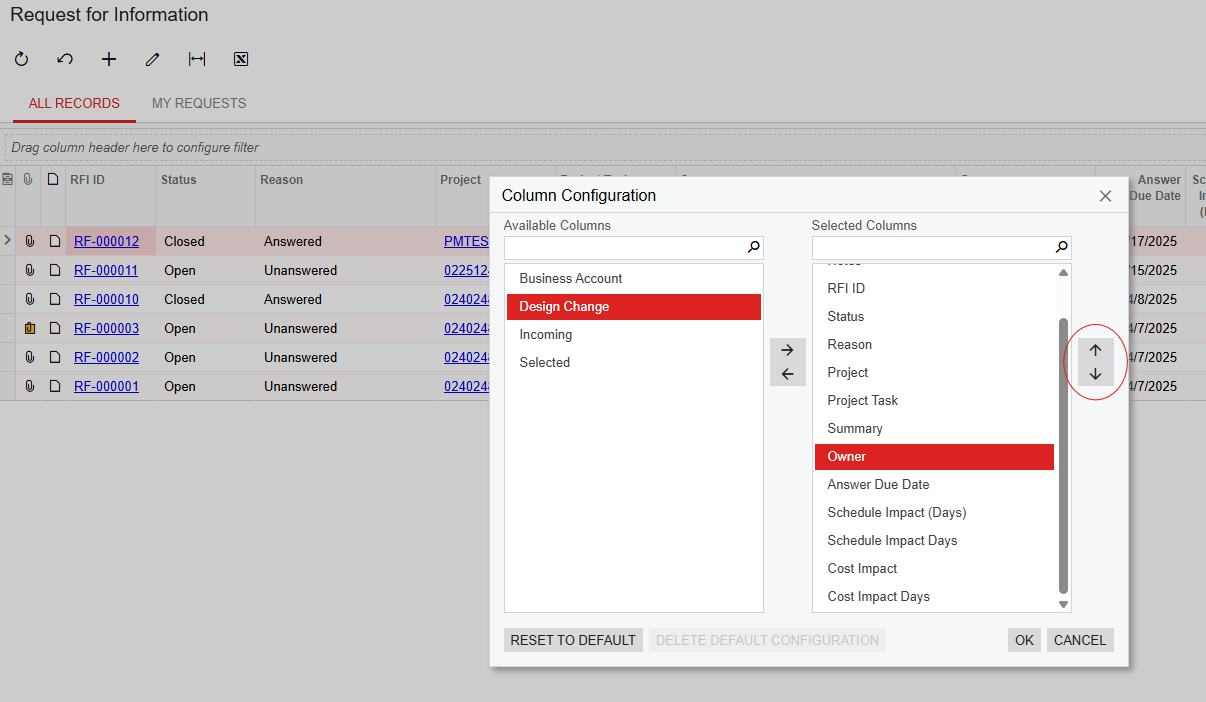
learn what information is important to you and in what order you wish to look
at it. Reminder, you can do this across all modules using the same process.
for all projects. There are a number of ways to sort and search these. If you
are looking for RFI’s for a specific project or owner you can type in the
search bar at the top right. Again, this search is available in all modules
across Acumatica. 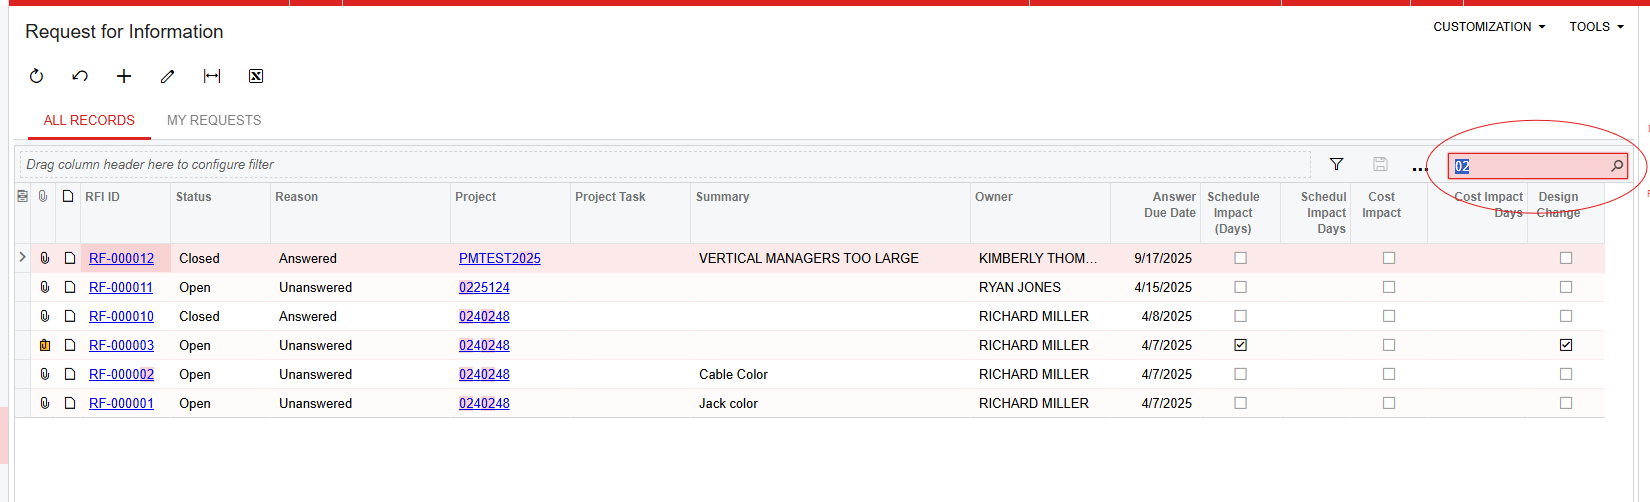
Once we enter that (note that it does not have to be an exact match to find
successful results) we can see all RFI’s for the project appear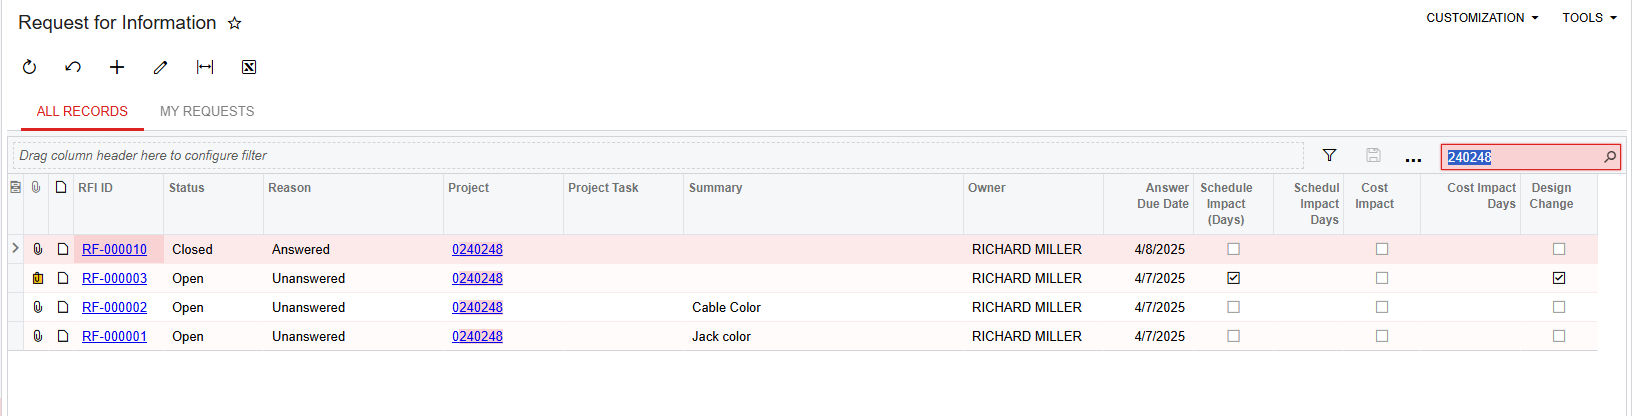
(RICHARD MILLER) in this case. Another way to search RFI’s that you
created is to click from “All Records” to “My Requests”. 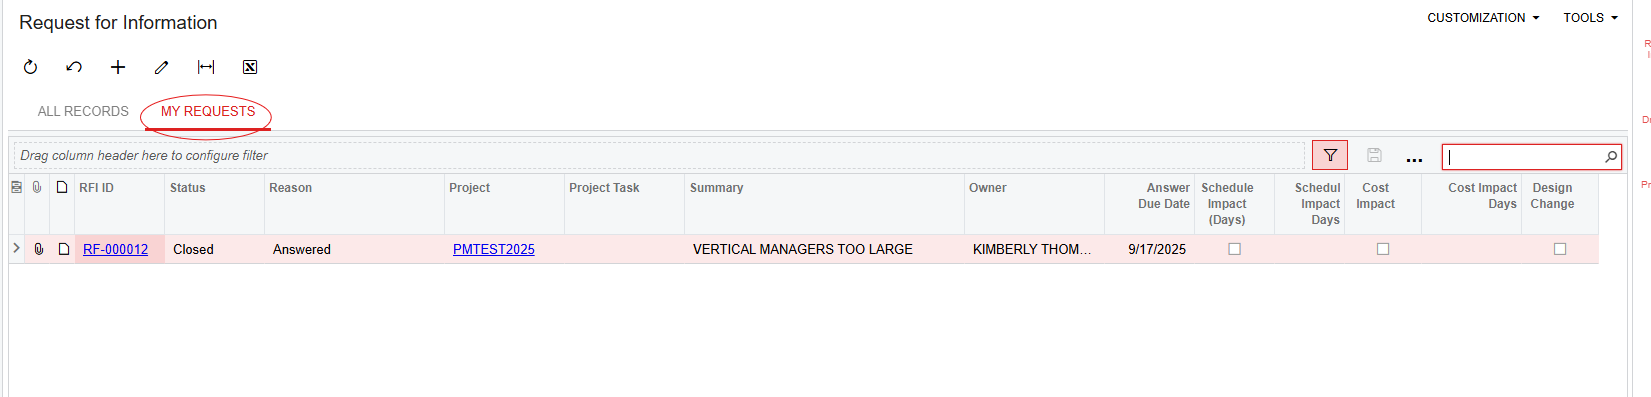
want to view “open” RFI’s, click the “Status” column and the below box will
appear: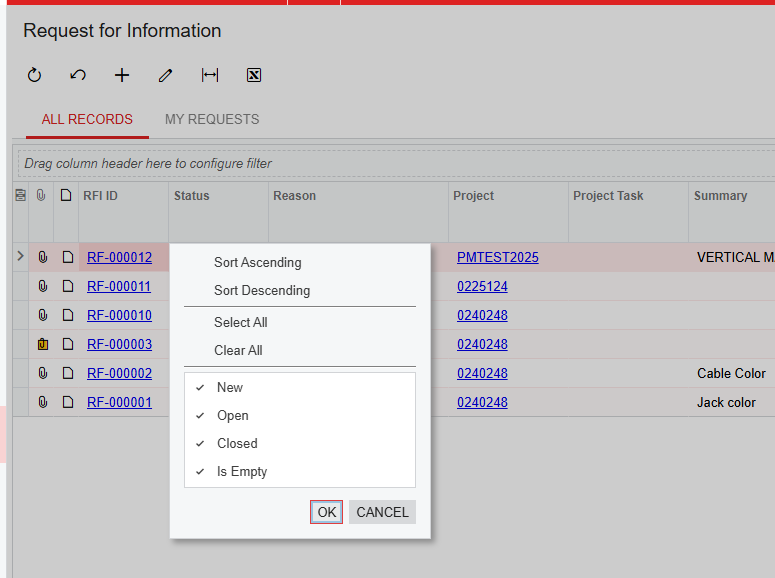
“Open”, or you can individually uncheck “New”, “Closed” and “Is Empty” to get
the same result. You can also sort ascending/descending. Remember these sorting
fields are available across all modules and all columns in Acumatica.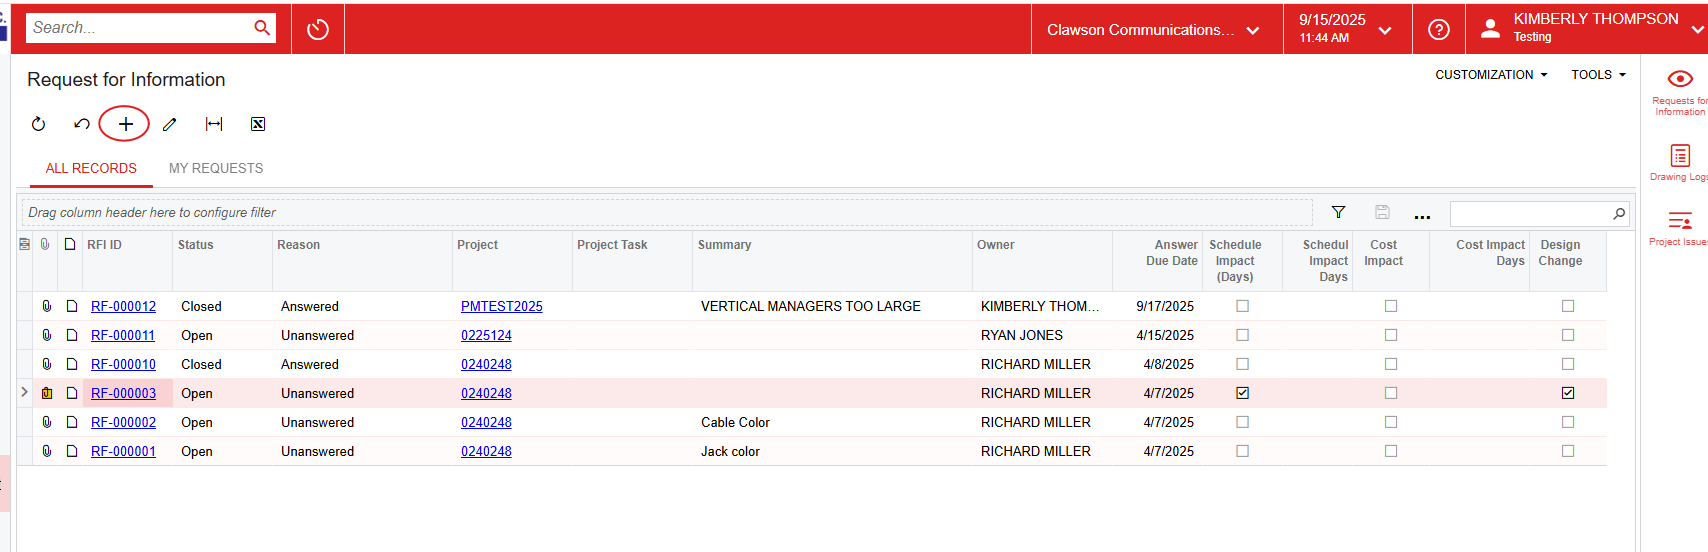
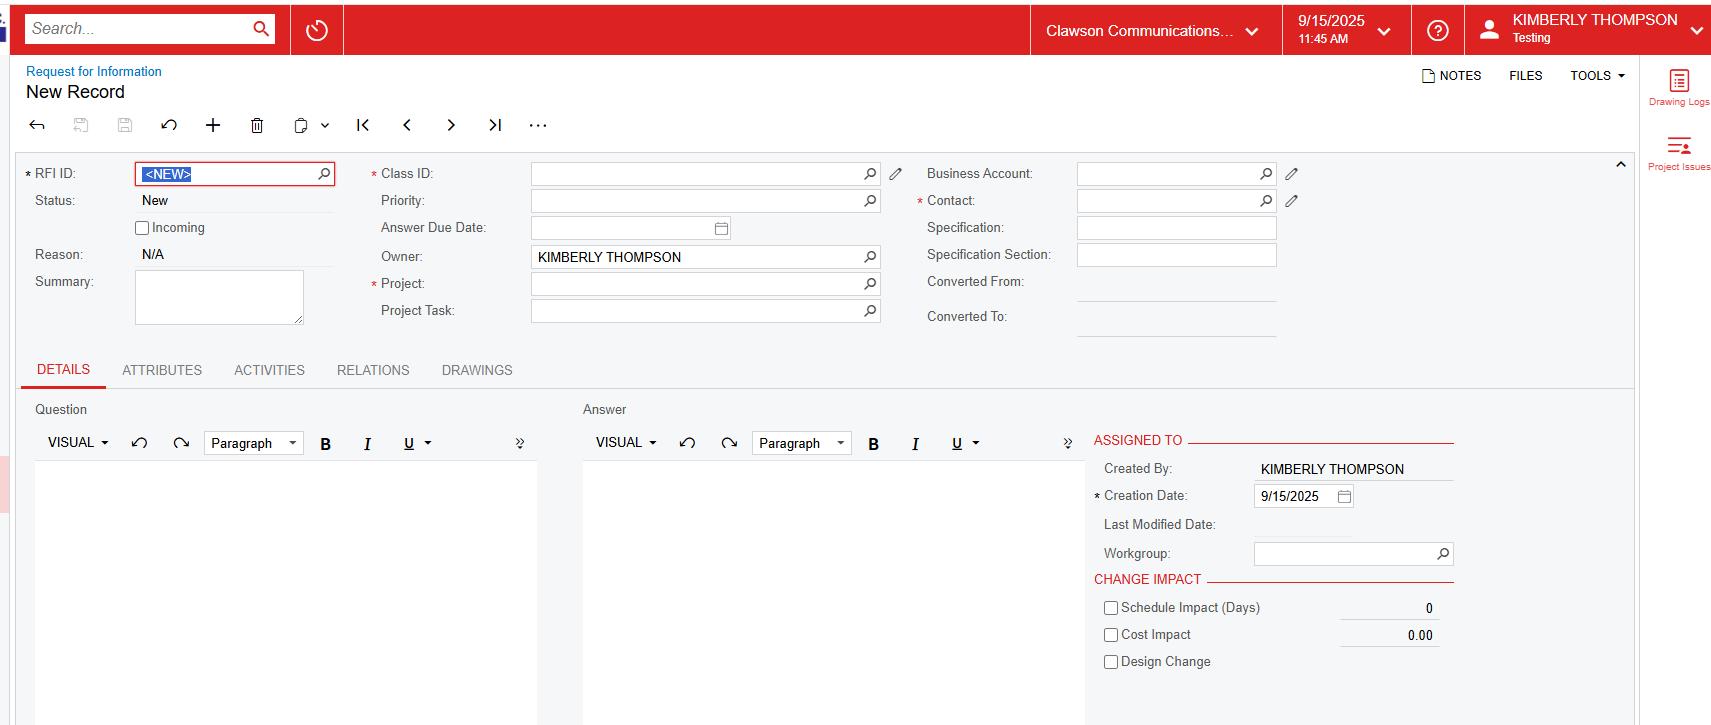
mandatory fields. The first is “Class ID”. The options here are “Labor”,
“Material” or “Other”. It is okay to choose any of these three as there
is no right or wrong answer, and does not impact the project revenue or cost
depending on your selection. It is also a good idea to enter a brief
description in “Summary” as this field is visible in your landing page so it
will help in searching RFI’s after creation.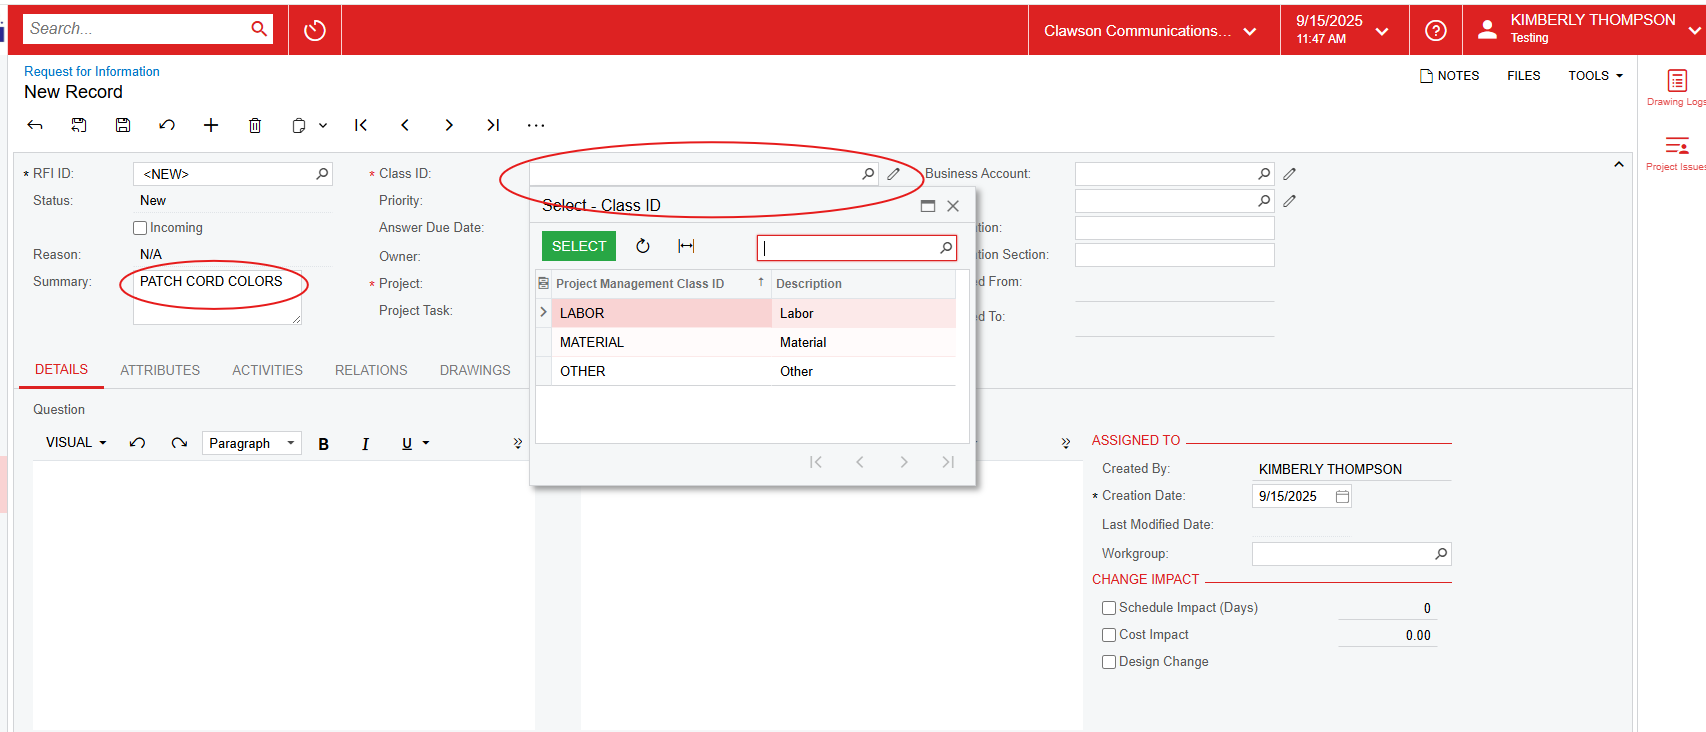
Default is set to “Medium” but you can change it to “Low” or “High”
typing either the project number or the project description, or you can click
the scope to the right and will pull up all projects, whether active or
inactive. Select the project. If you select an inactive project, you will see a
yellow warning symbol to the left. When you hover over the symbol it will tell
you that the project is completed and will not be available for data entry.
easier to leave this field blank, but will not hurt anything if you complete
it.
person you are addressing your question to. You can start typing in a
name here or select the scope for a full list of contacts. Note that ALL
created contacts are located here, not just Clawson employees. Be
diligent when selecting the contact, be sure to select only a Clawson employee
for the time being. While we may extend the use of this RFI to external
contacts at some point, we are currently using this as an internal tool.
the question you are needing clarified:
change impact to the project, either schedule, cost or design. Click any and
all appropriate boxes.
to be done here. Next to “Attributes” you will find “Activities”. We will
come back to this.
done with this at this time. Finally, next to “Relations” is “Drawings”.
If there is a drawing that you want to link to the RFI, you will click “Link
Drawing” and the drawing log for this specific project will appear. If no
drawings have been uploaded for the project, this section will be blank.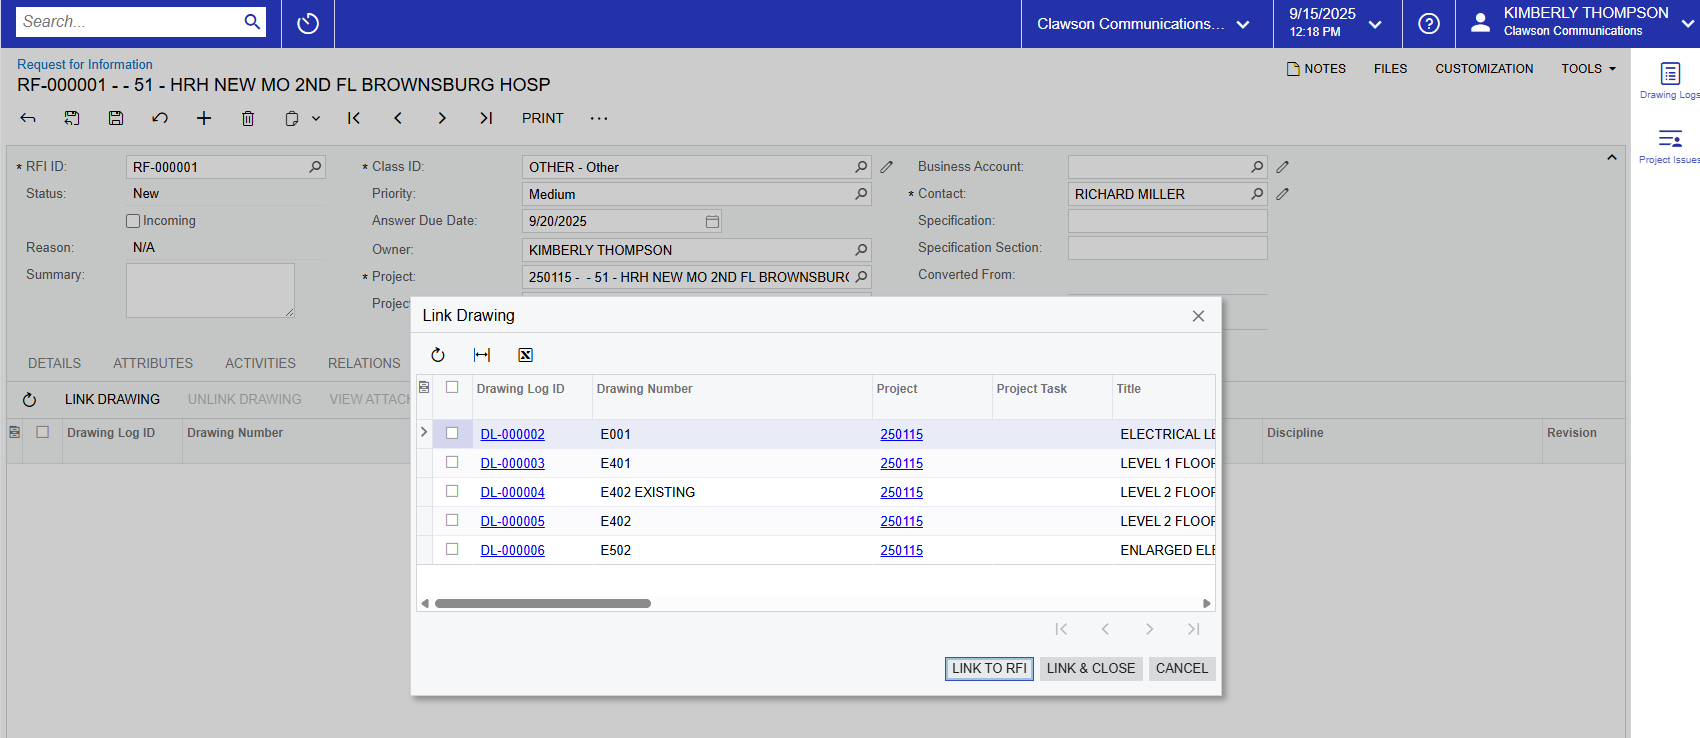
checking the boxes on the left of the drawing log ID. Once you are done, click
“Link & Close” and the drawings will now appear under “Drawings”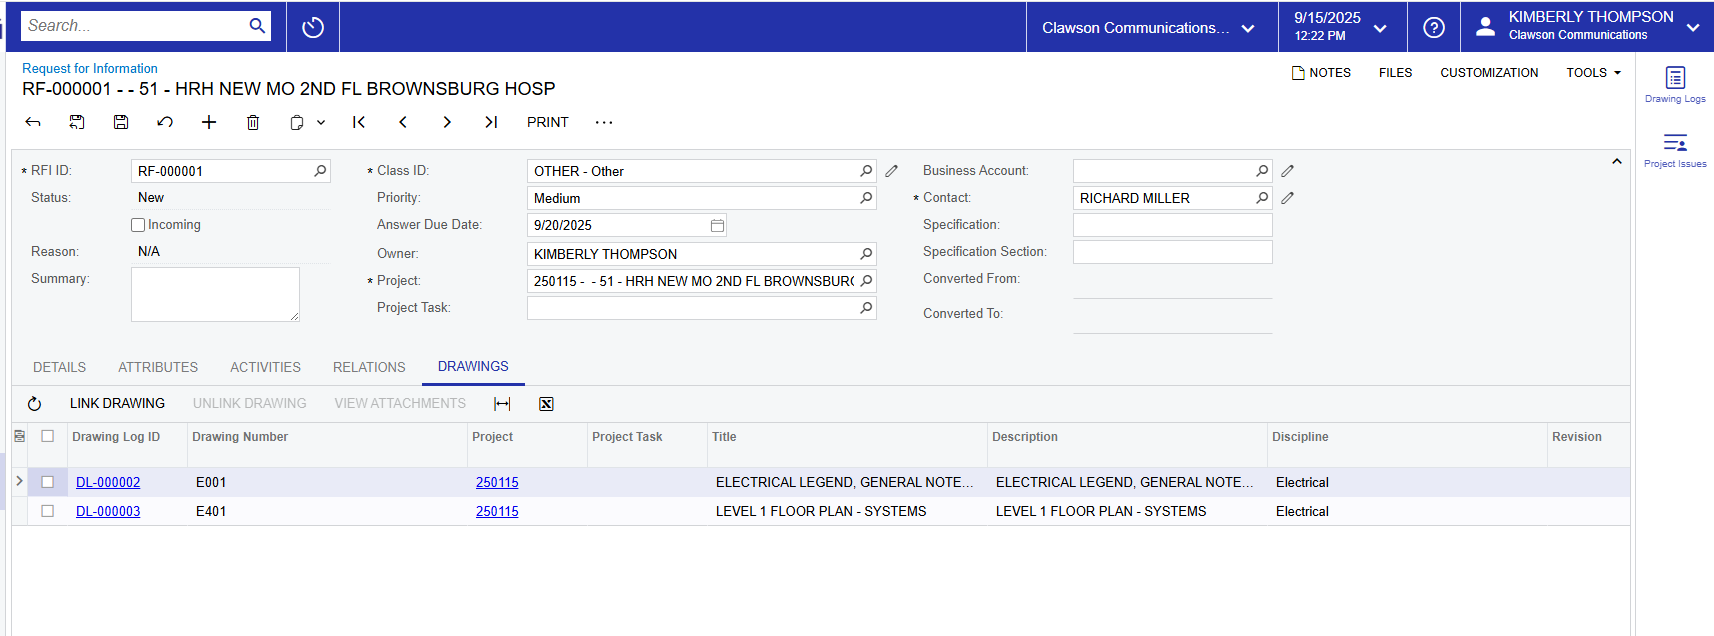
at the top right of the screen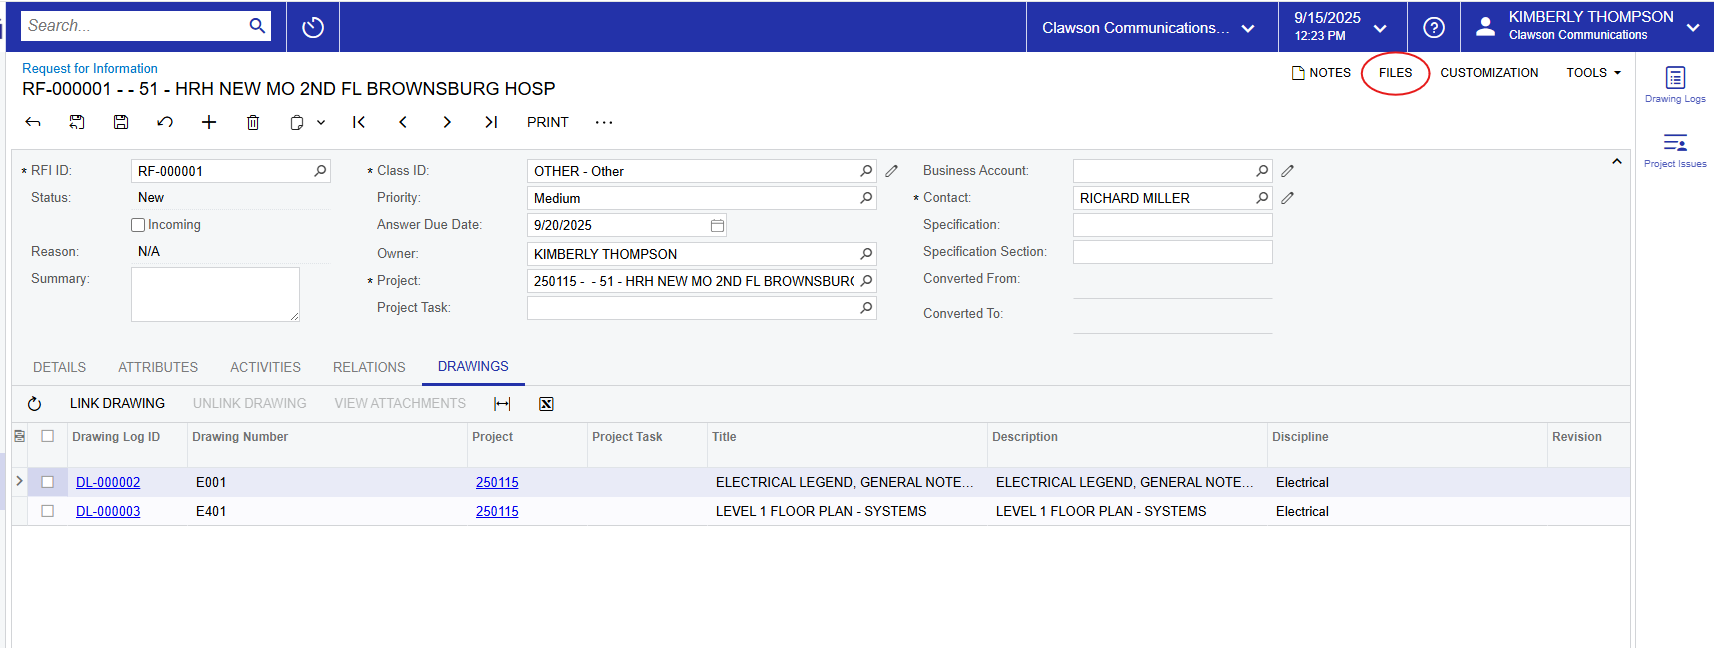
the file you want to attach then click “Upload”. It is also good practice
to enter a brief description in the “Comments” next to the file name. This is
especially helpful when you have multiple files to upload so you can easily
select the correct file to view in the future.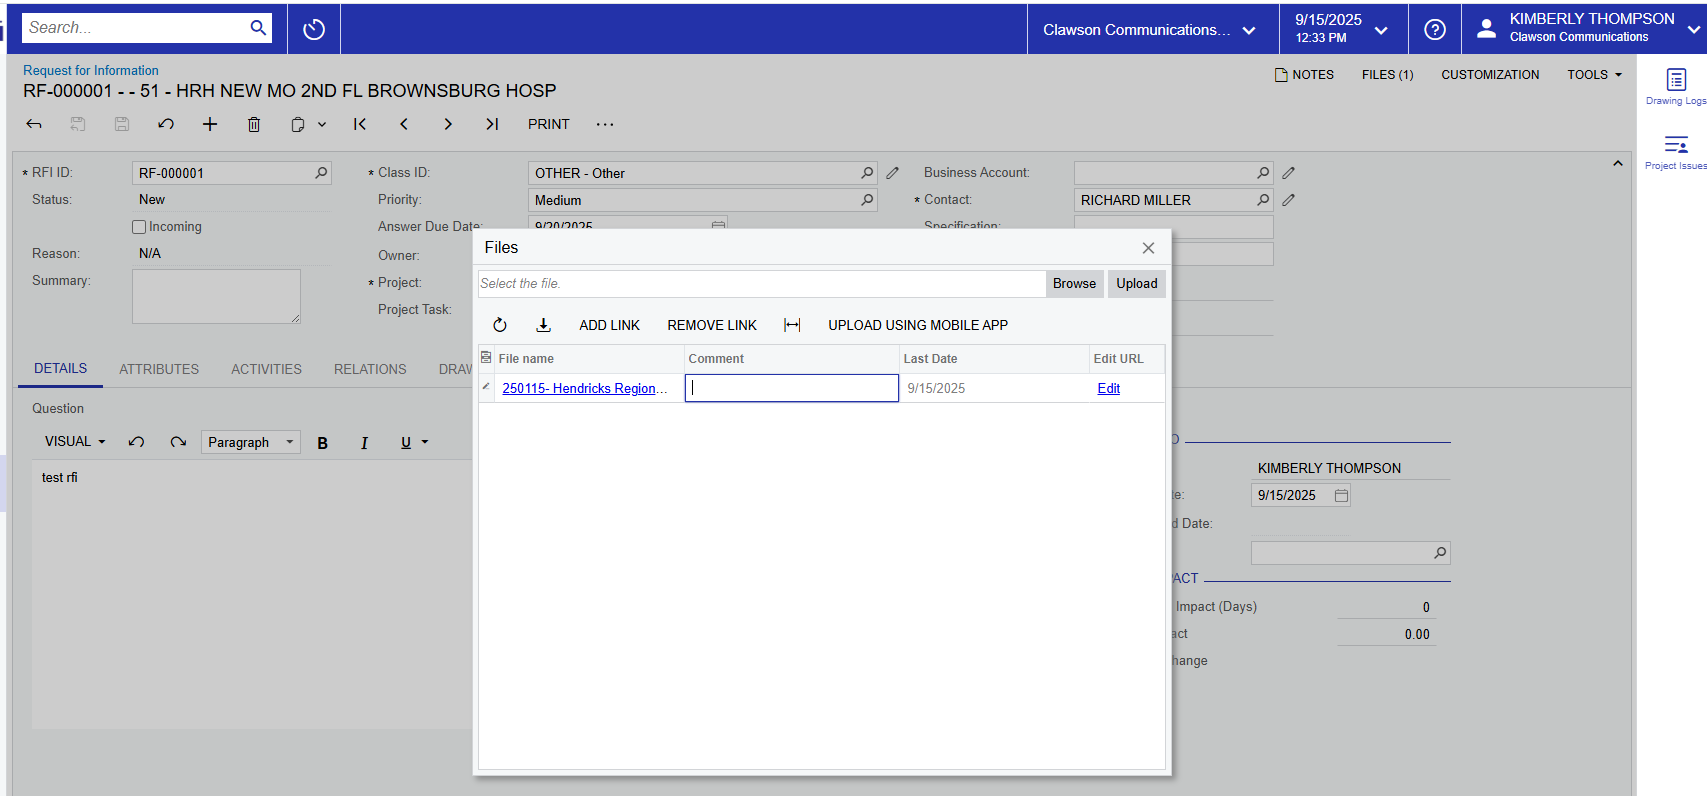
click the “Save” symbol at the top left.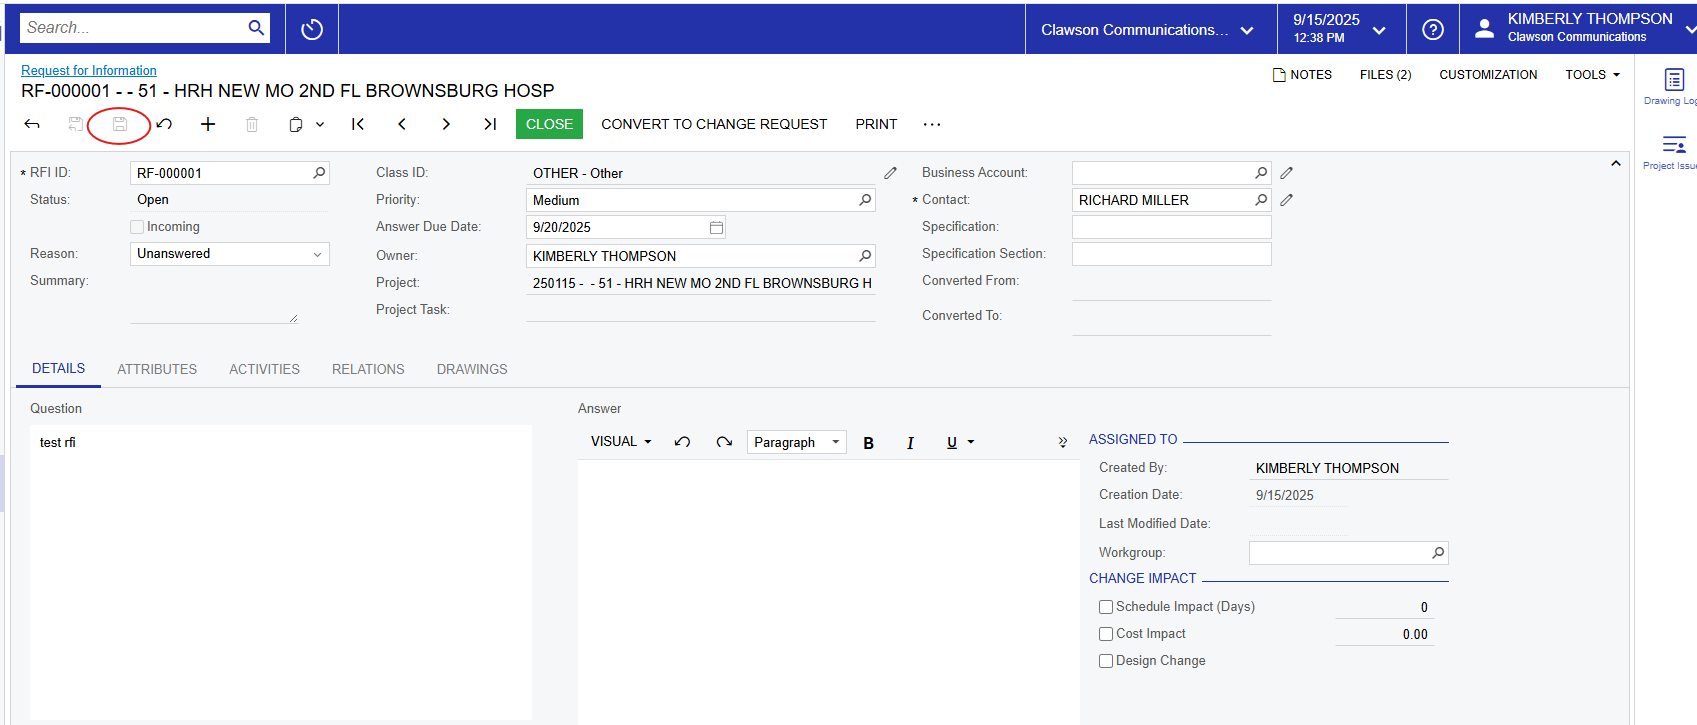
person for a response.
RFI. You will have the option to “Email” or “Print”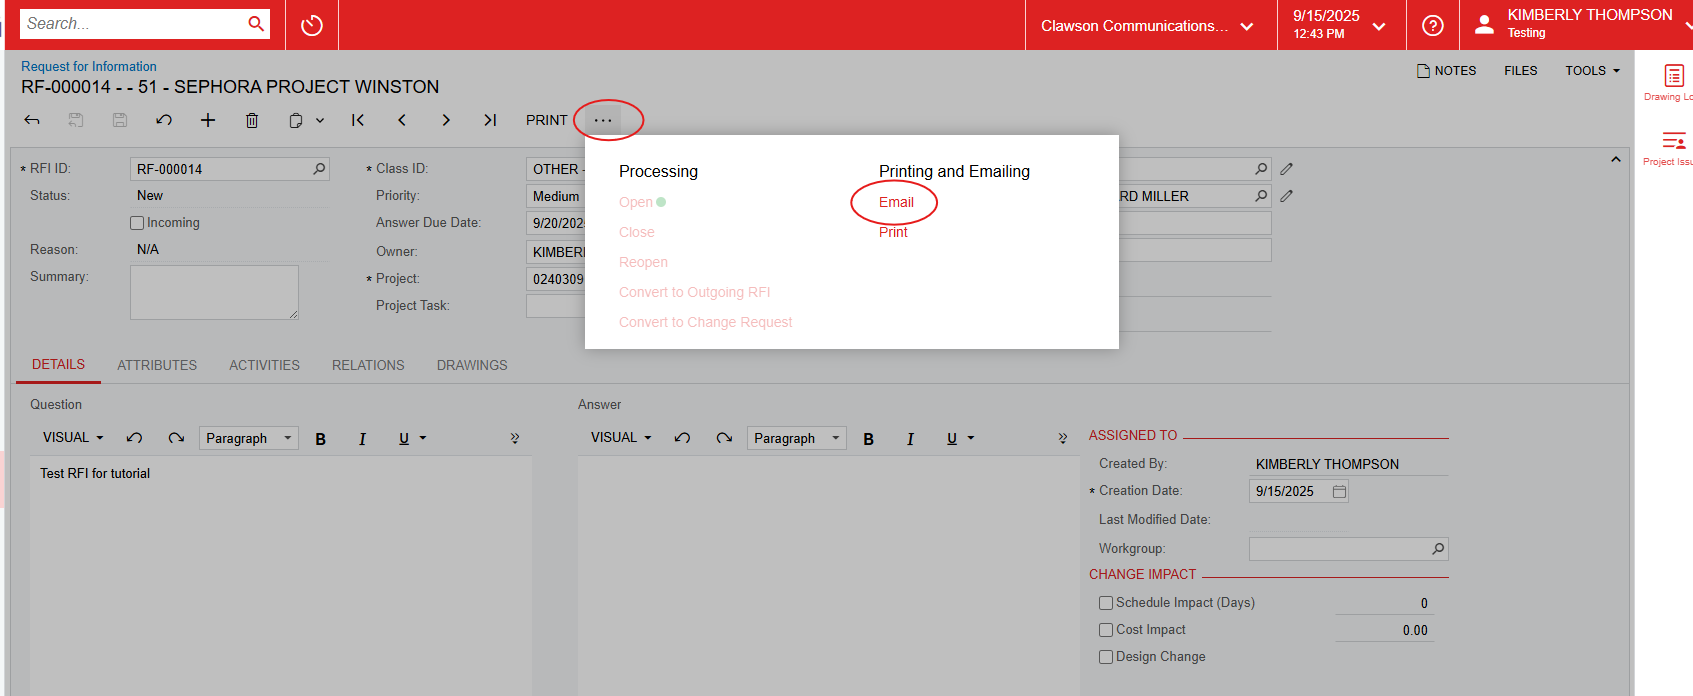
to the right and you will see a list of available account email addresses.
Select projects@clawsons.com.
“To” will default to the “Contact” you selected for your RFI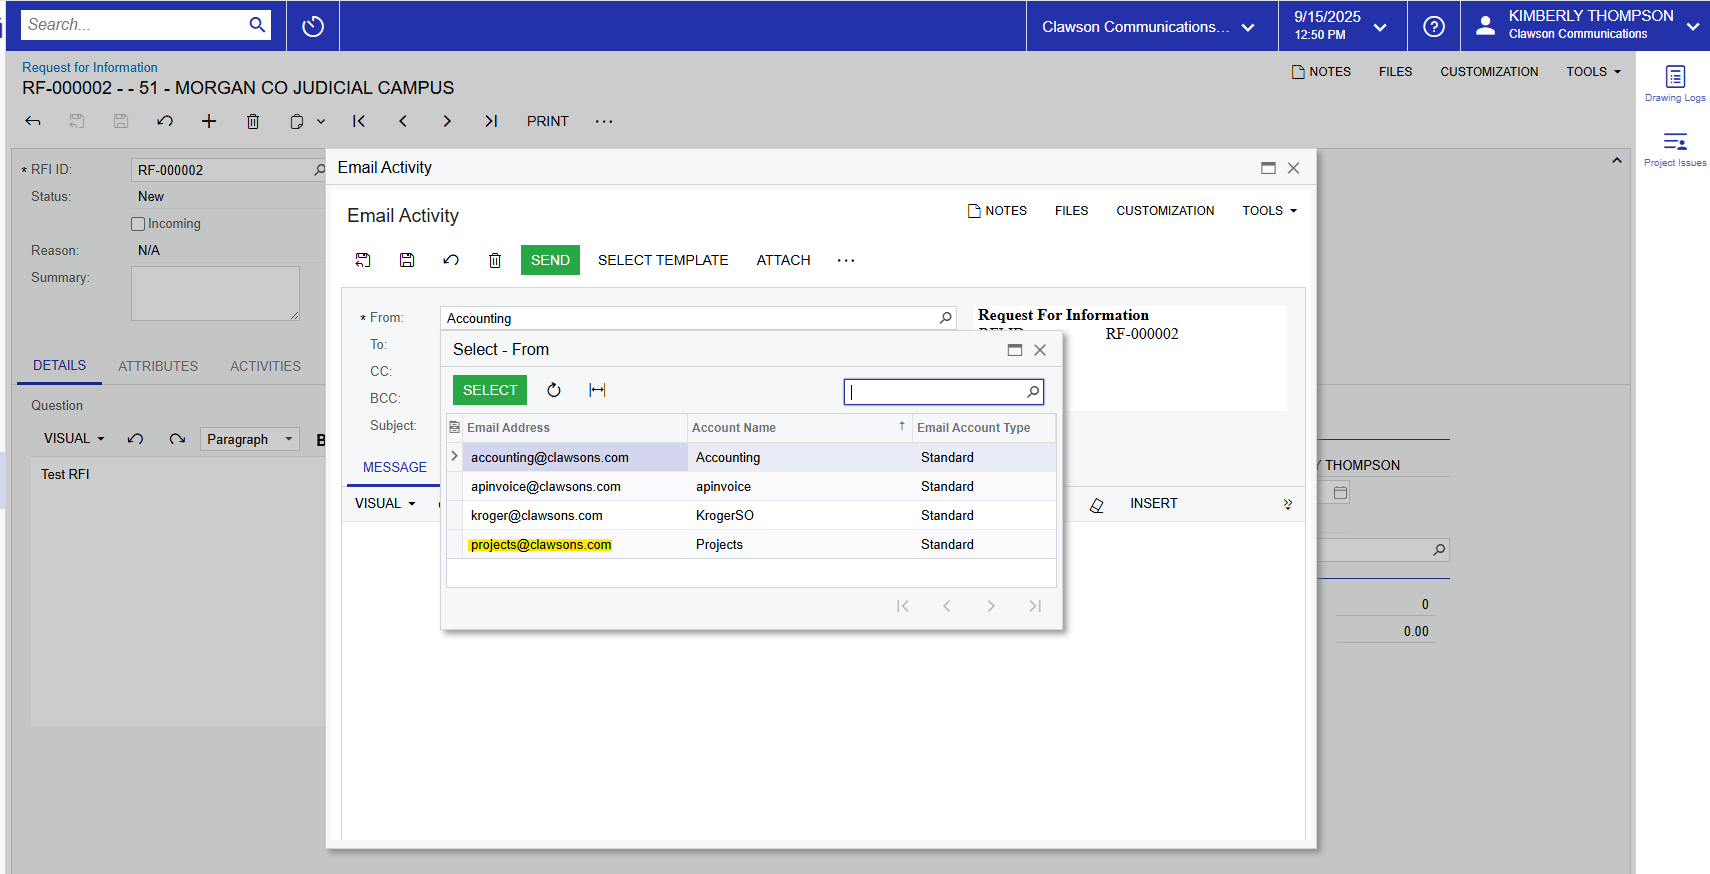
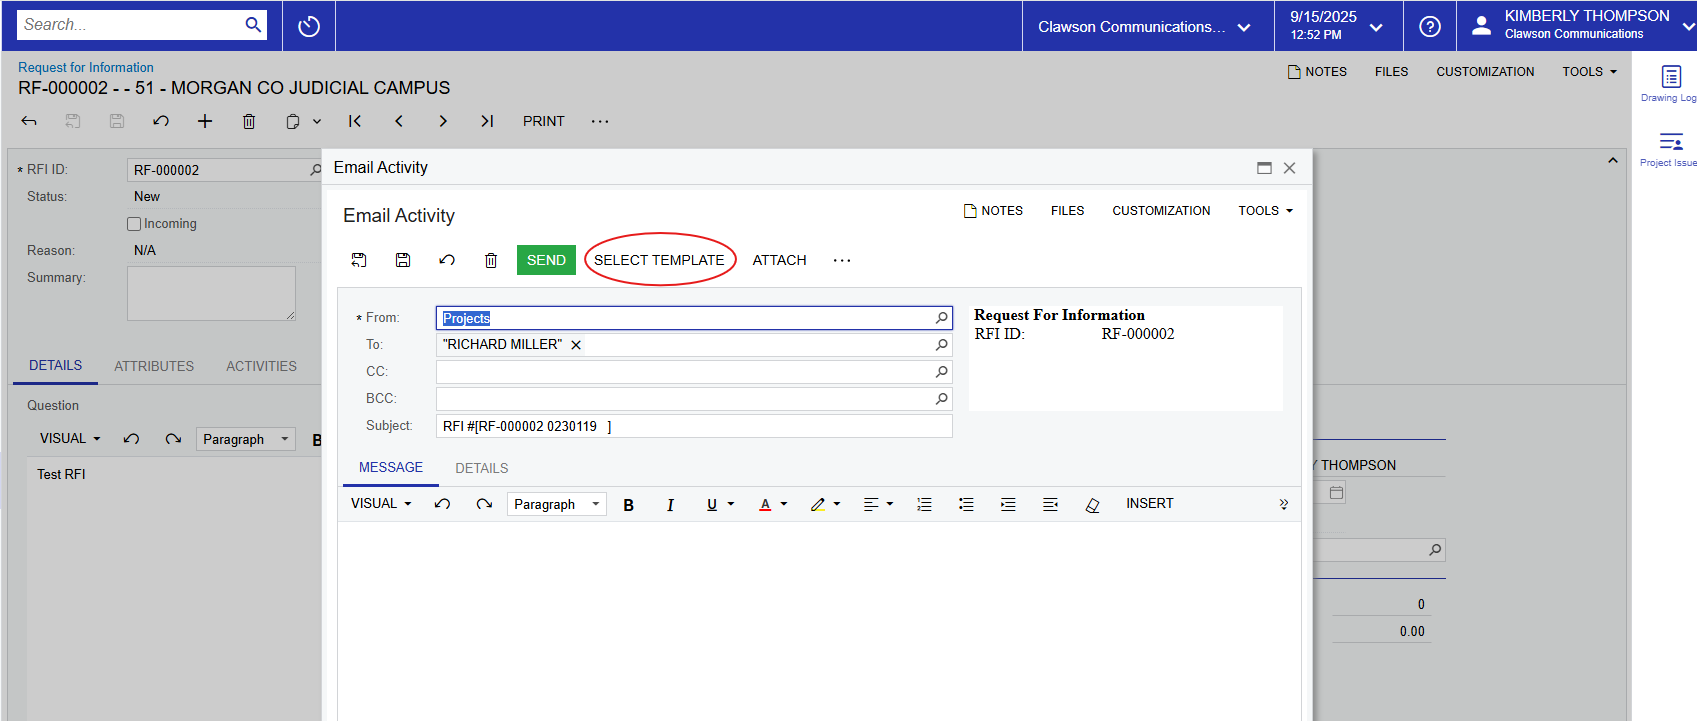
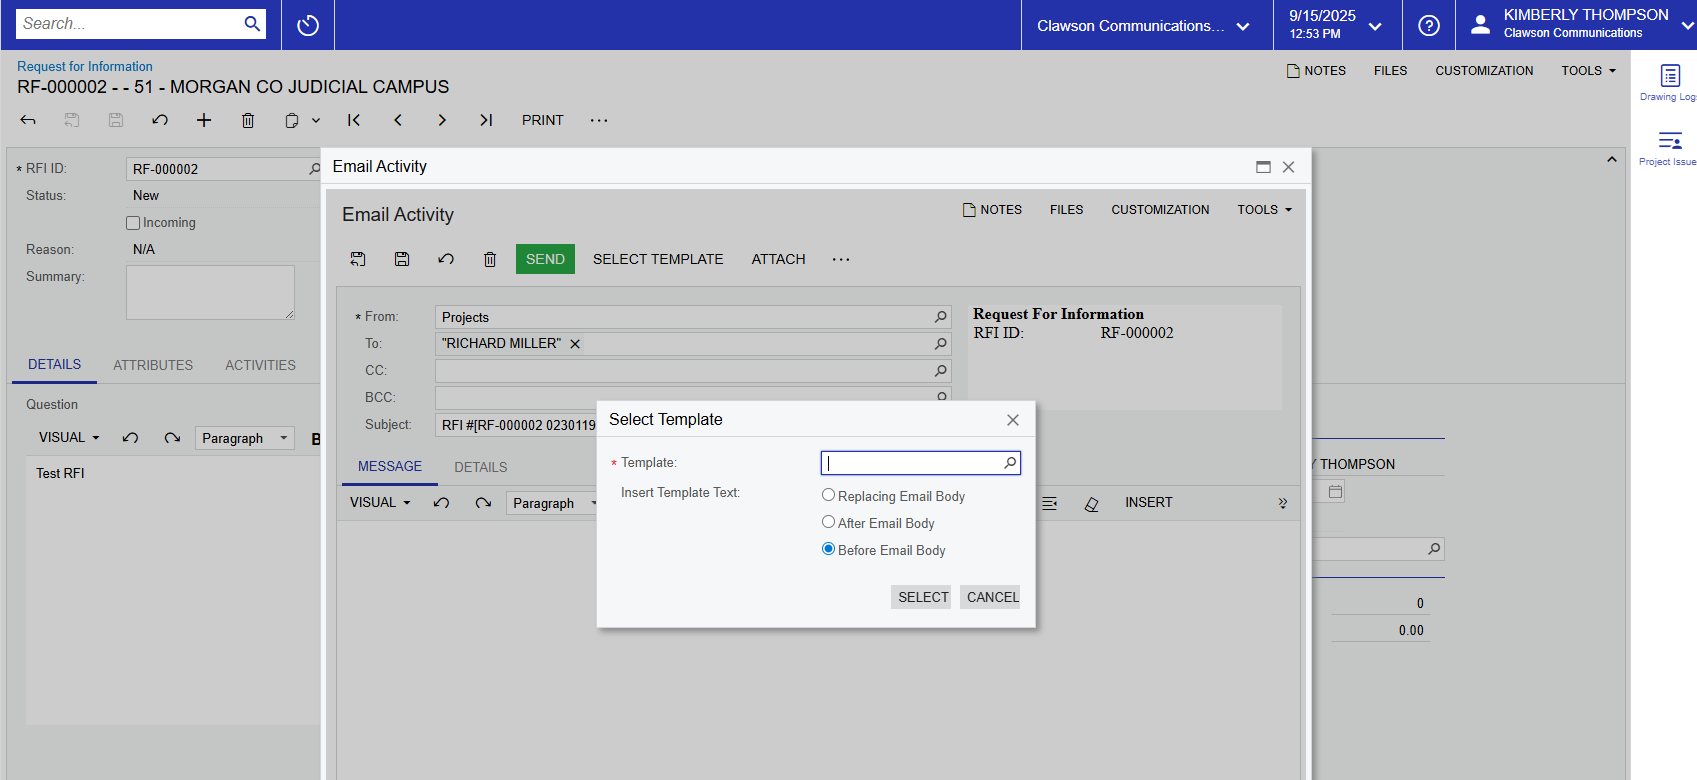
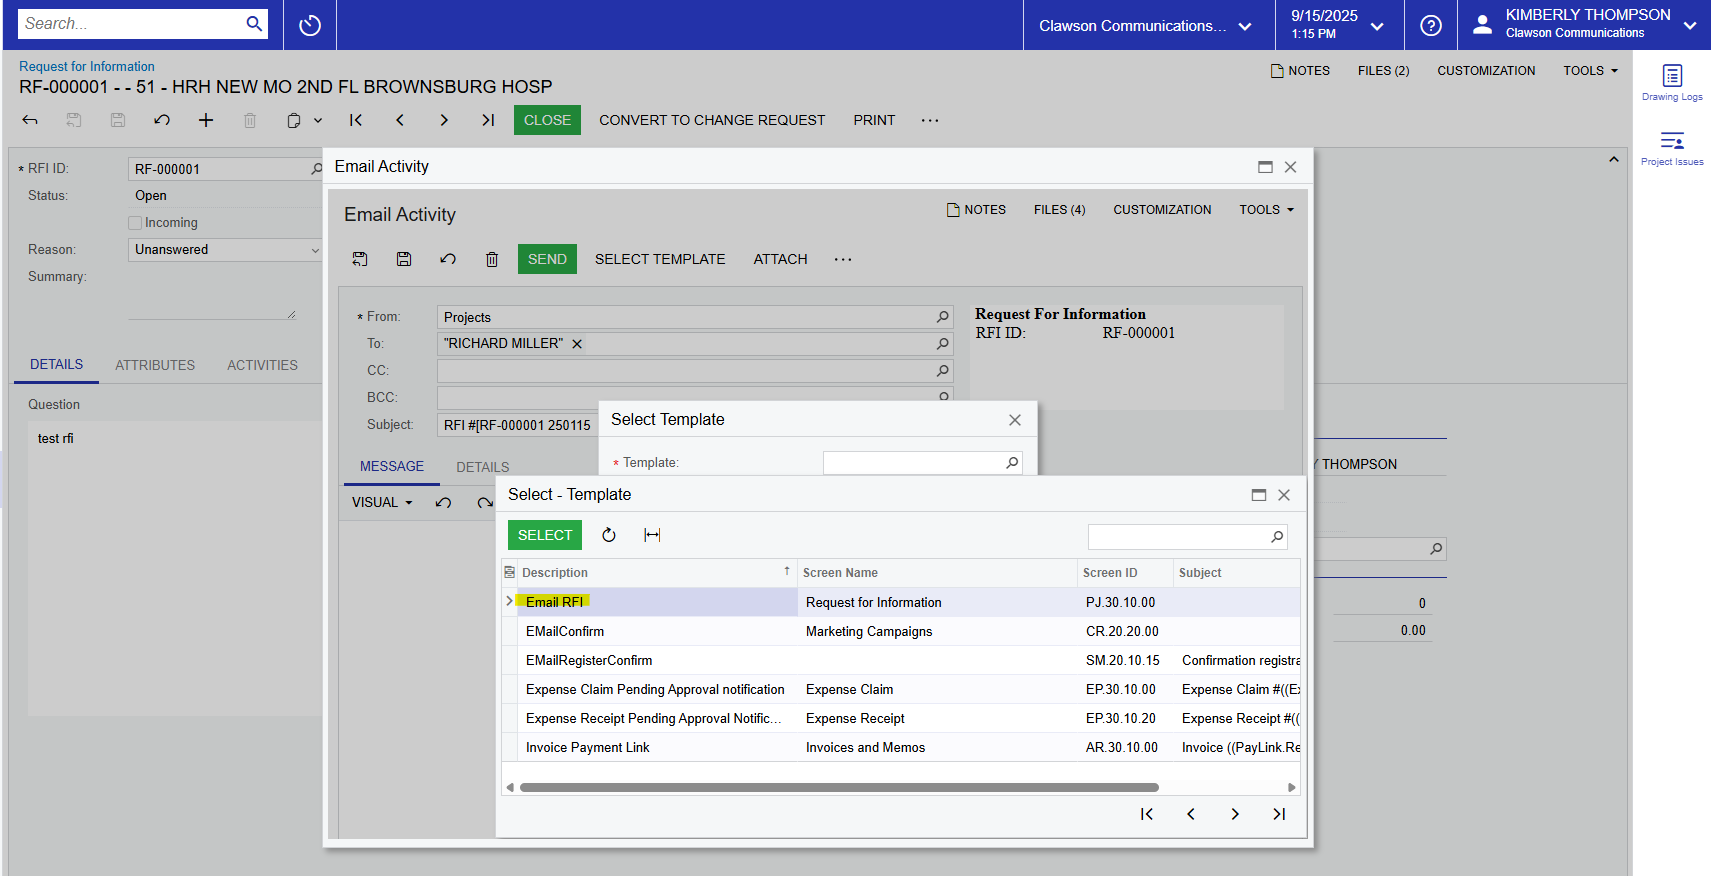
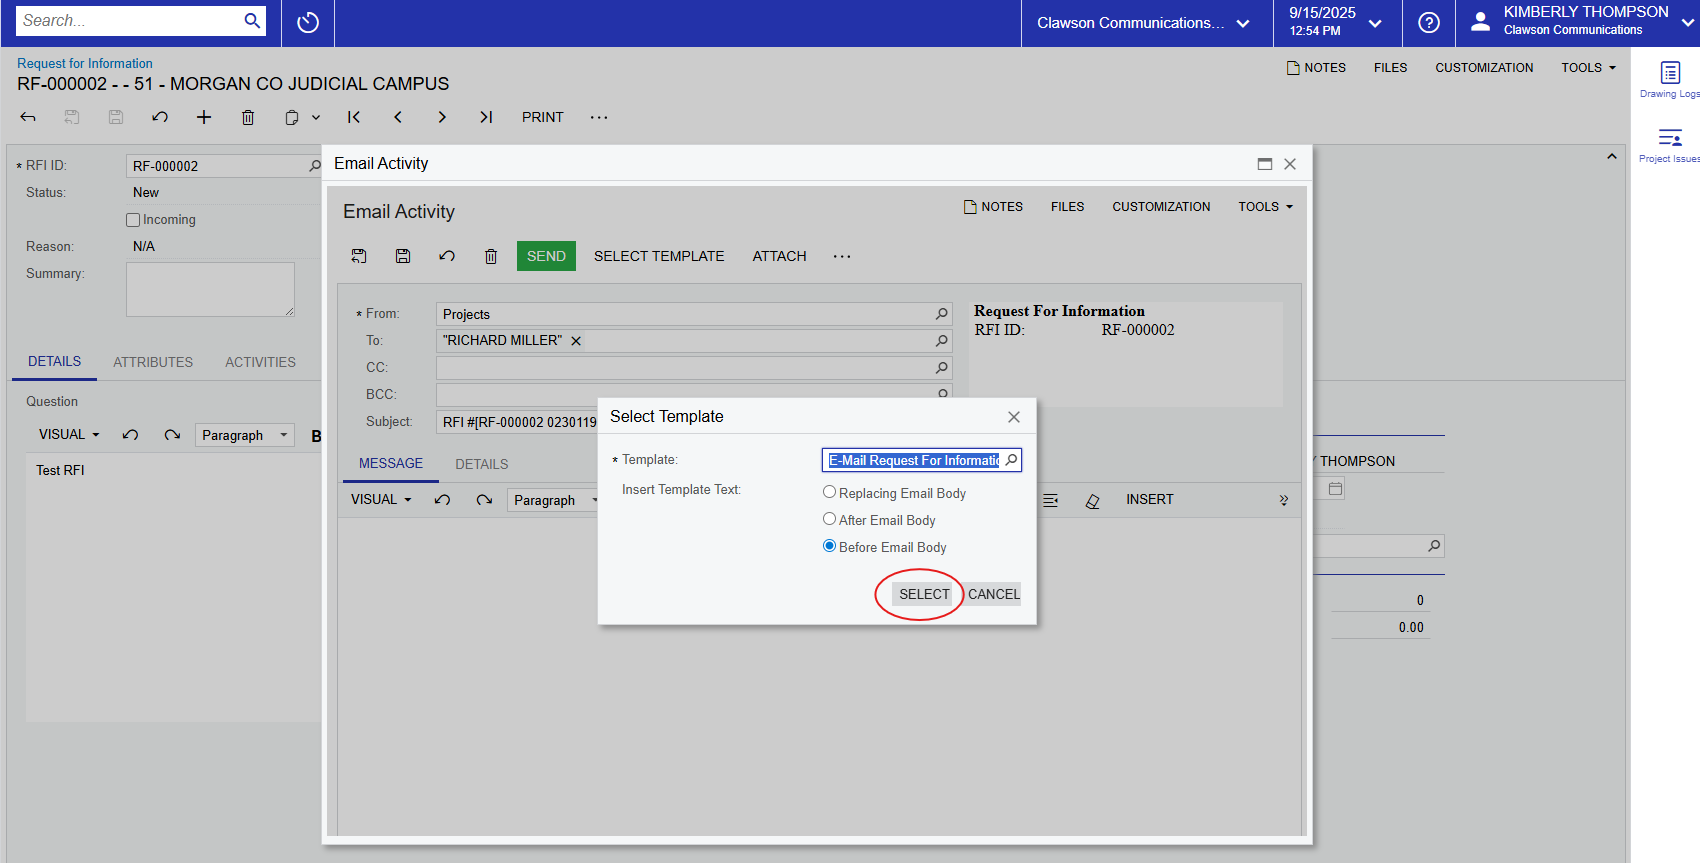
you want but it is not necessary. Once you hit Send, the email will go out with
a link to the RFI for receiver’s viewing.
see the email activity. The contact can reply directly to the email with the
answer. If they do, you will see their response in the “Activities” tab. The
newest email will be on top
answer/resolution of the RFI in the “Answer” section of the “Details” tab.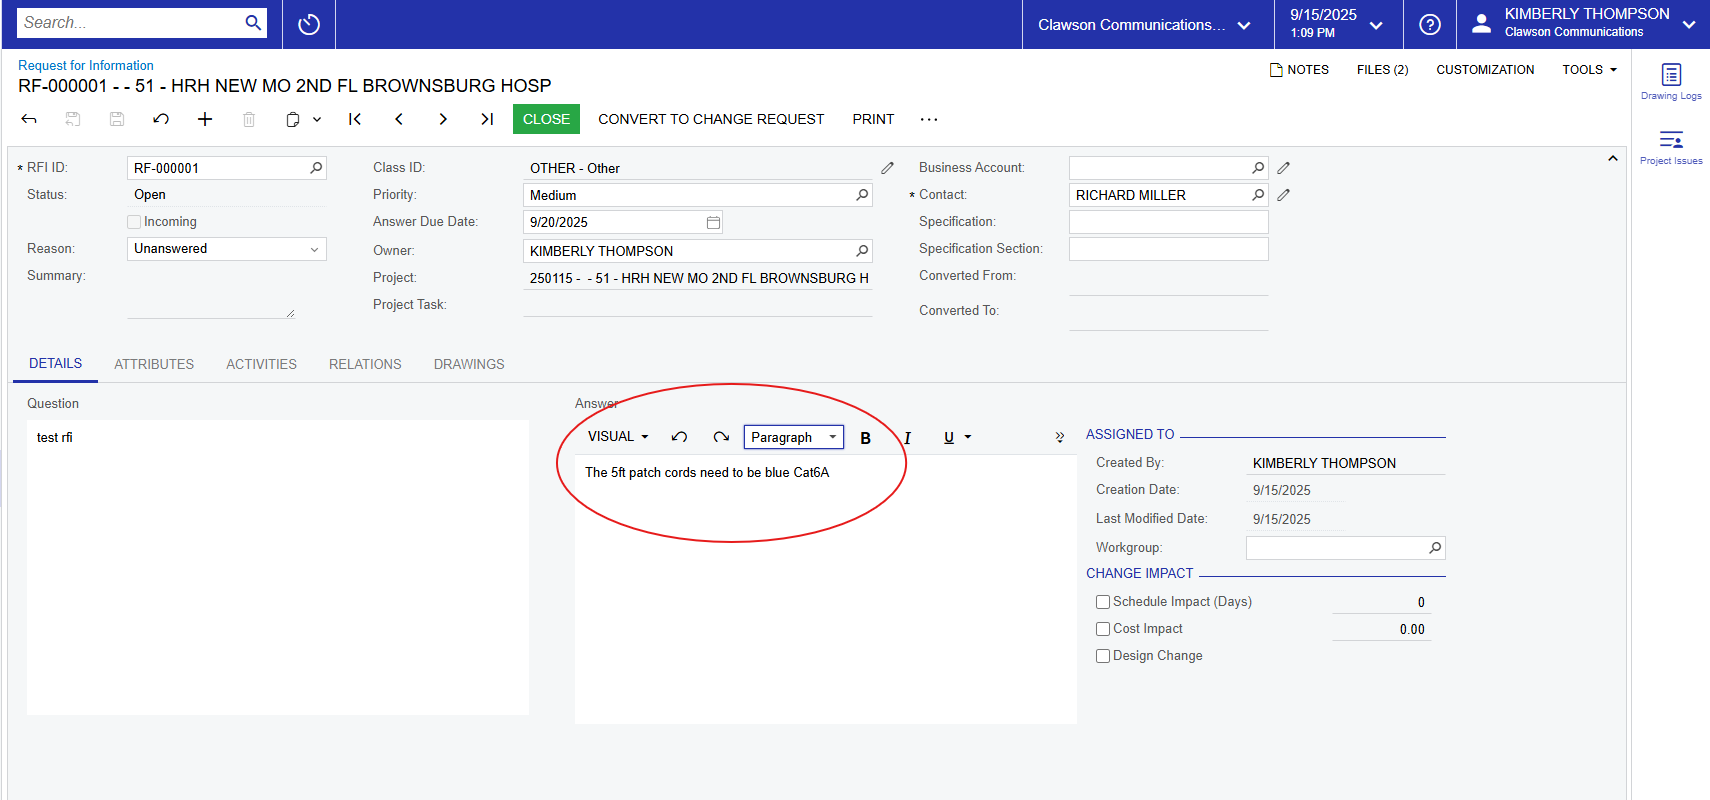
it out. We do have the option to simply close it or to convert it to a
change request. For most cases we will simply close it. Should a change request
be necessary, you can always create a new one, it just will not be linked to
the RFI.
Project
Issues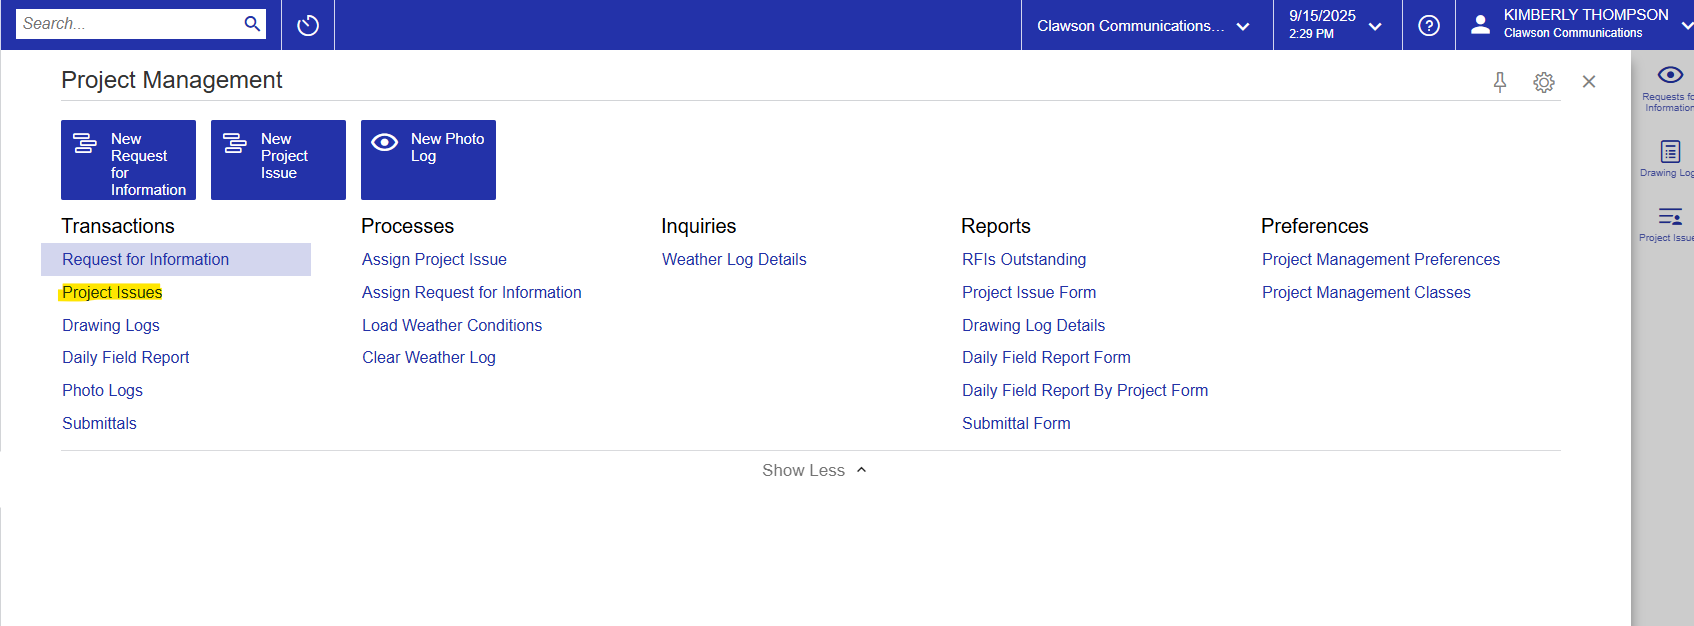
default to all project issues. You may search or filter to find a previously
submitted issue. And remember to change your column views to your liking. You
can also select “My Project Issues” and all issues listing you as the owner
will appear.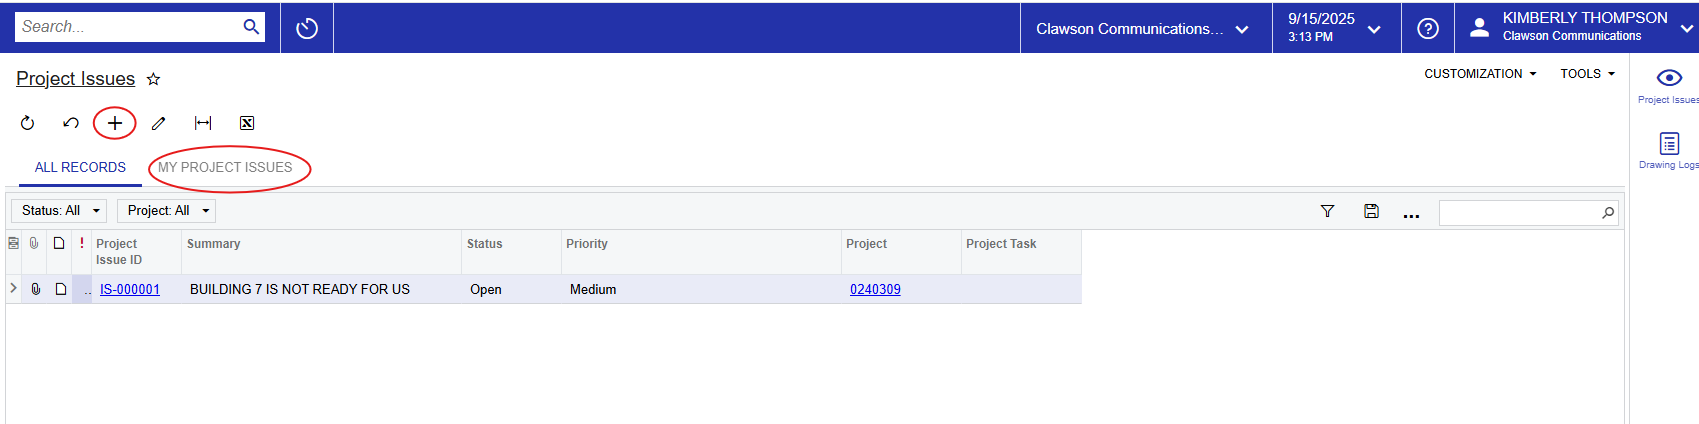
of “Labor”, “Material” or “Other”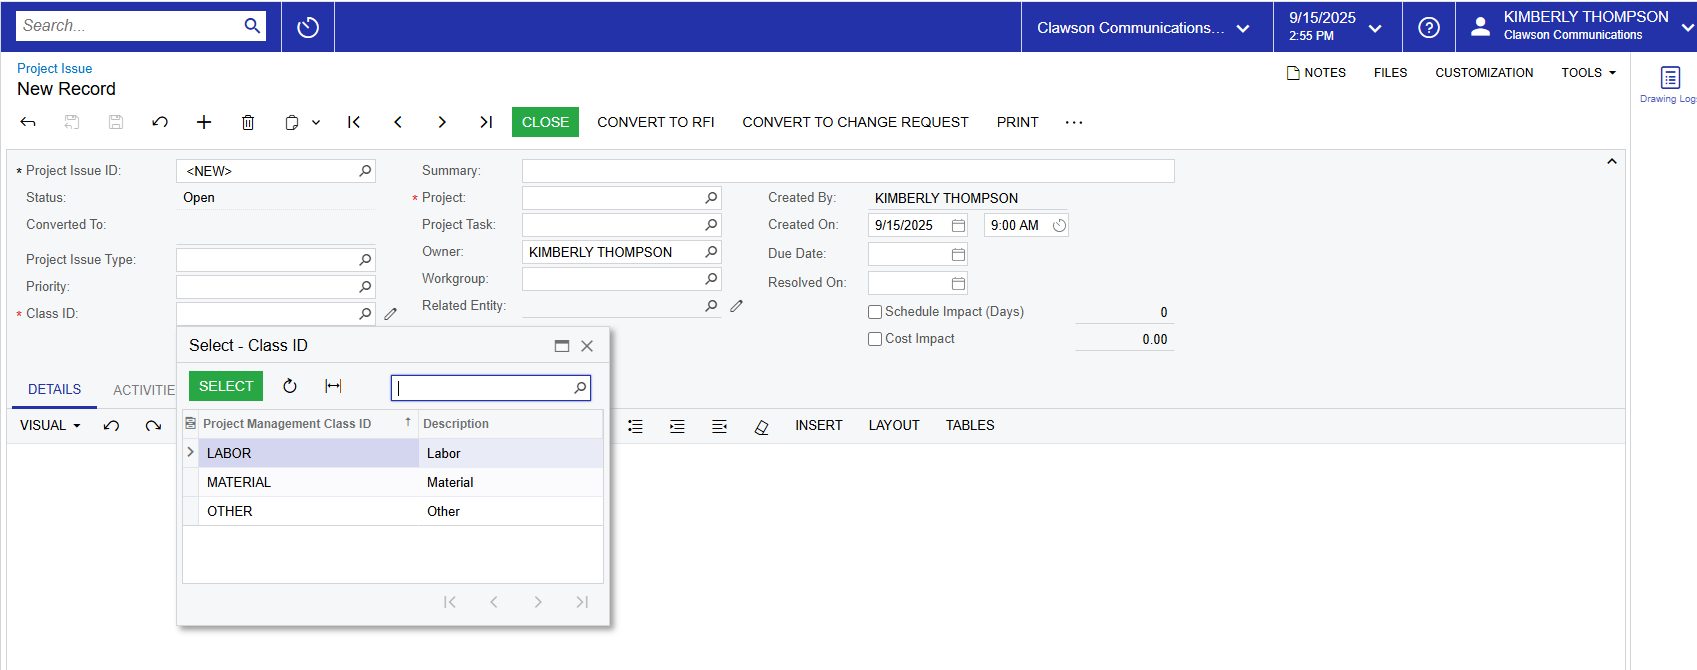
“Medium”. You can change this to “Low” or “High” if necessary.
the appropriate project.
Again, this will help with finding and sorting information.
These are things that Acumatica admin users can add/create. There’s only a
handful in there for now but feel free to provide feedback for additional issue
types that you would like to see added.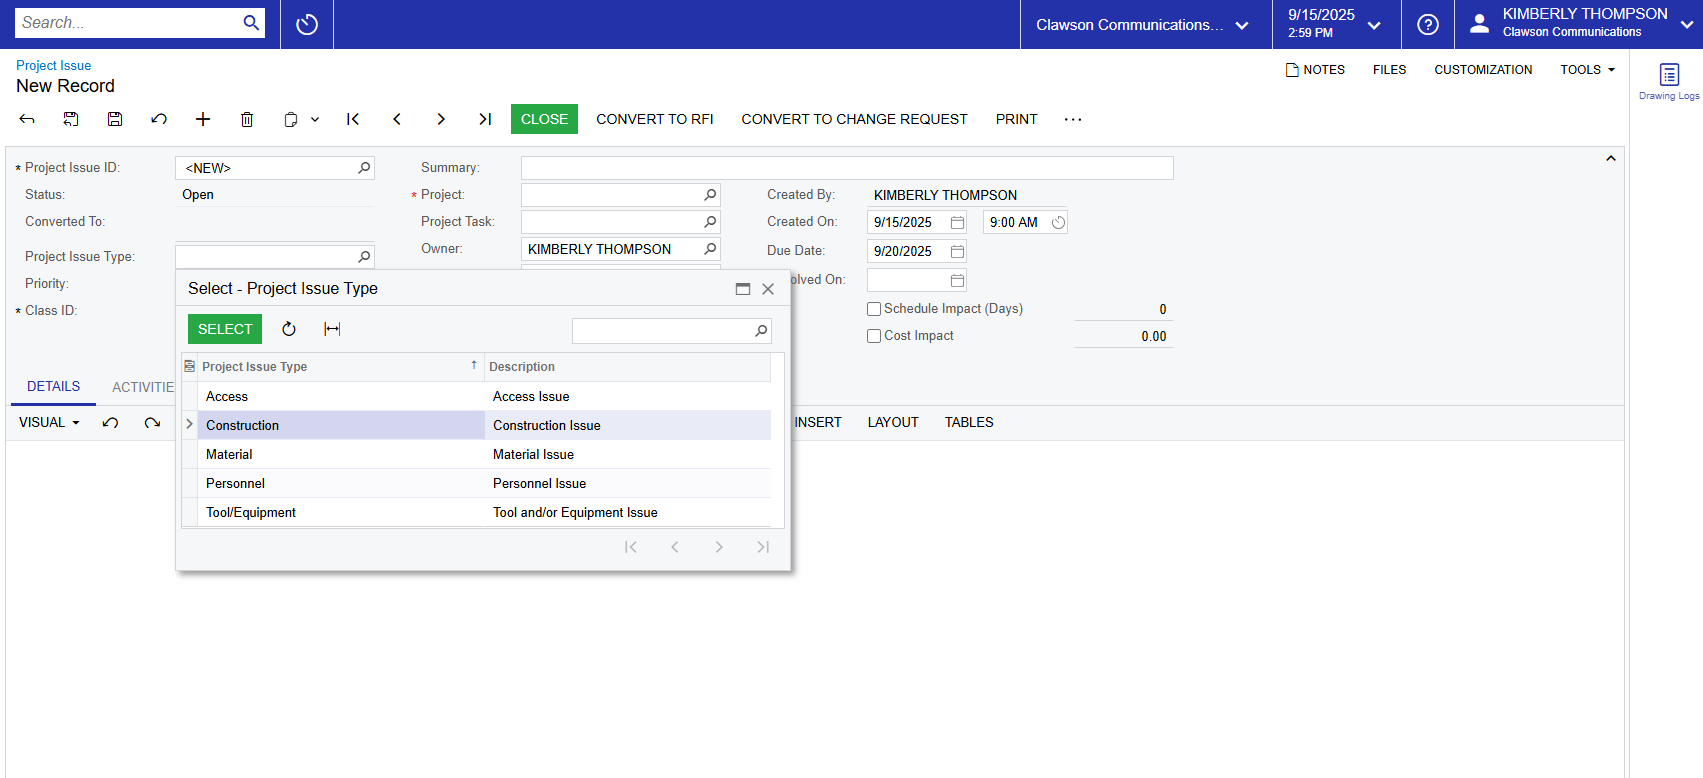
Similarly to the RFI module, you are able to check mark if there is a schedule
or cost impact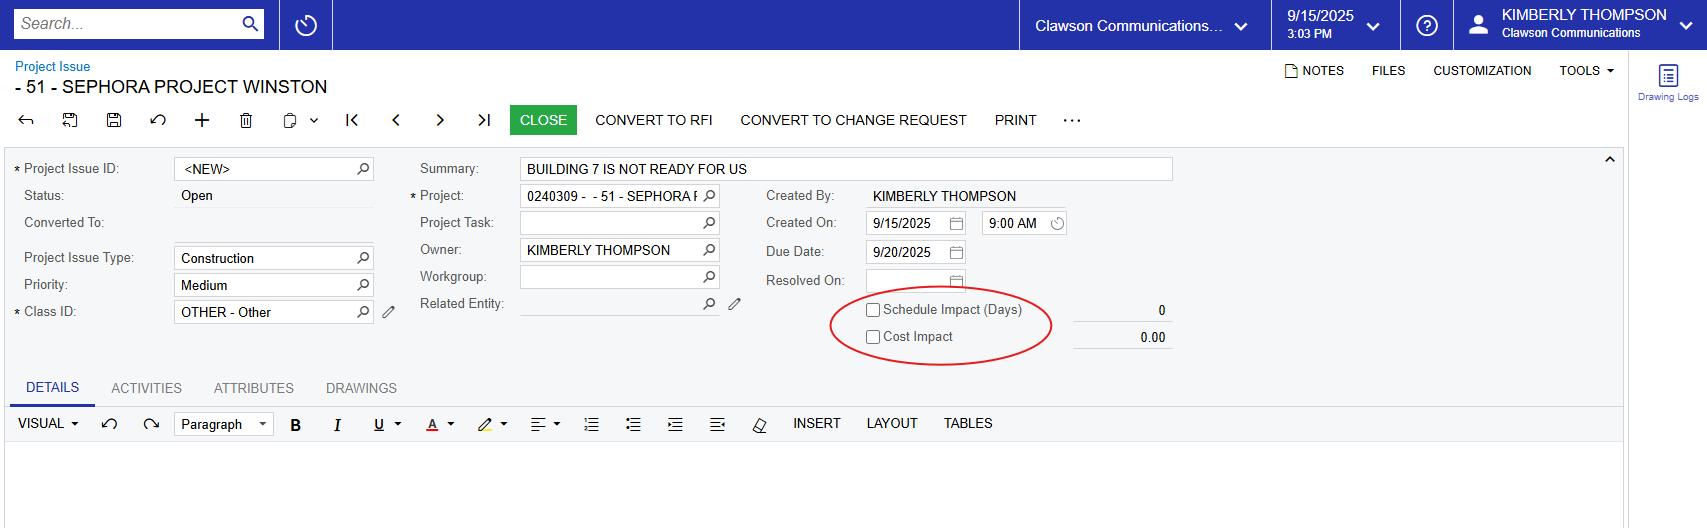
section.
and “Drawings” which are similar to the RFI module. Link drawings if desired.
You may also attach files at the top of the page if desired.
no “Contact” to send the issue to, although you are able to convert it to a RFI
by clicking the “CONVERT TO RFI” at the top. You also have the option to close
it, convert it to a change request or print it. To delete, simply click the
trash can at the top 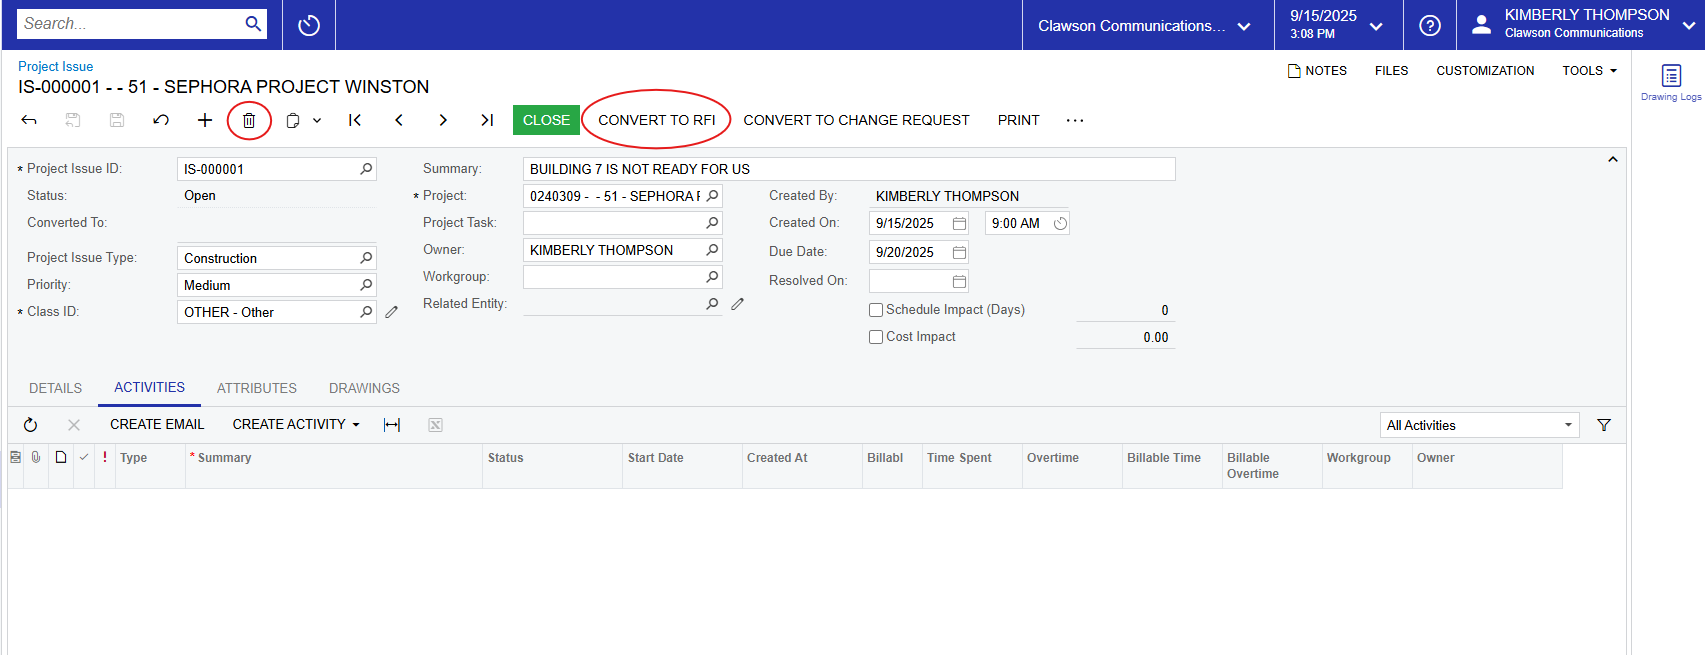
Drawing
Logs
all drawings for all projects. You can again sort by ascending/descending
project, or best practice is to enter the project number in the field at the
top. 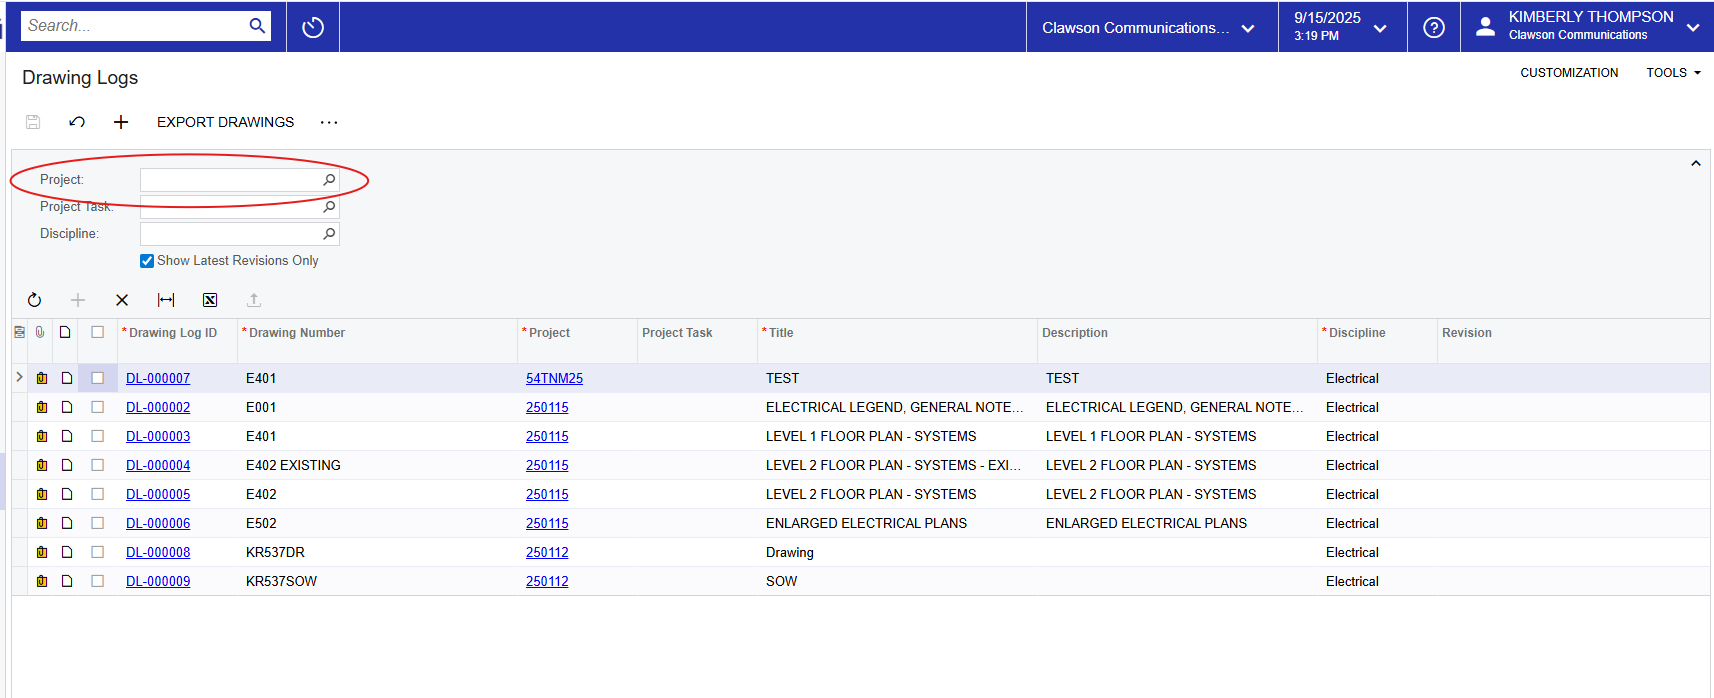
highly dependent upon a user taking the time to sort, upload and correctly
label each print. In a perfect world, this is something the office staff will
take care of on behalf of the PM. The new record entry page looks like this: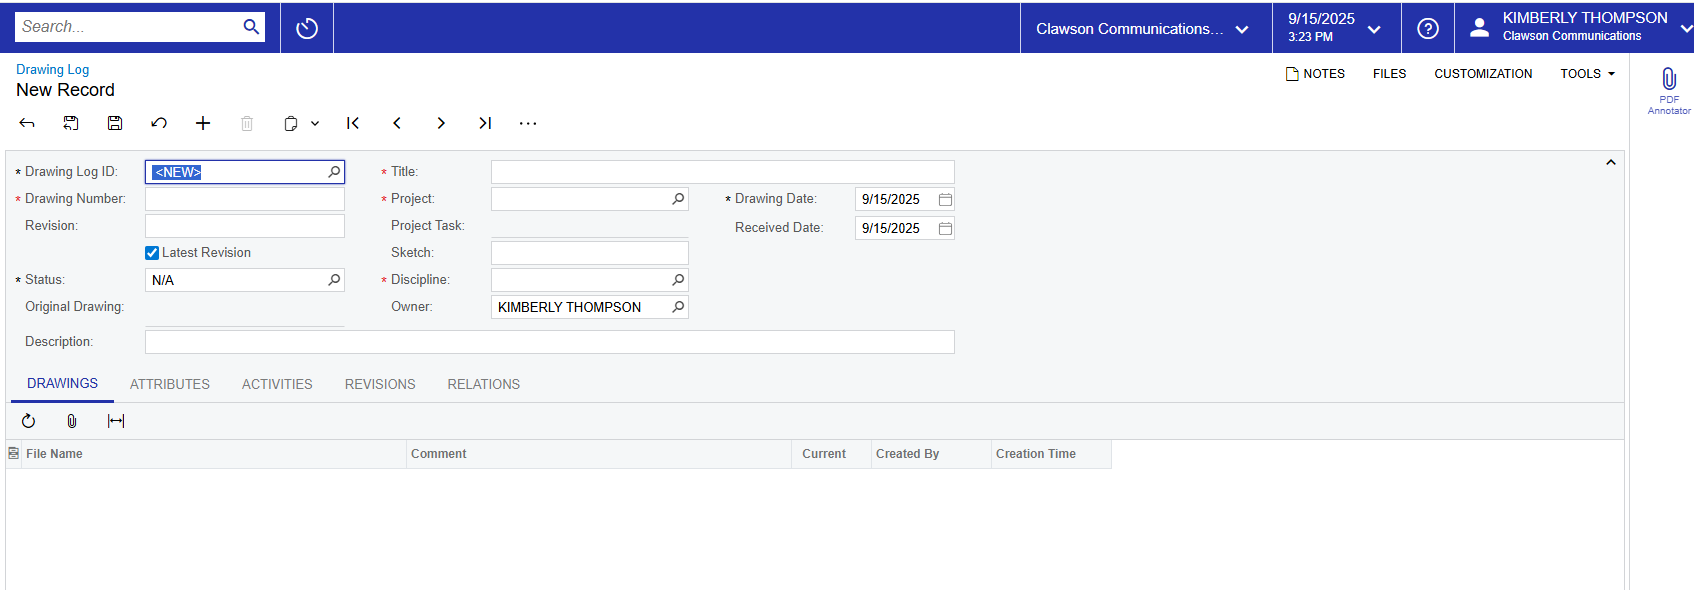
“Discipline”.
“Drawings” tab. You can also find it in the “files” at the top of the page
to a zip file) or create revisions to drawings by clicking “Create Revision”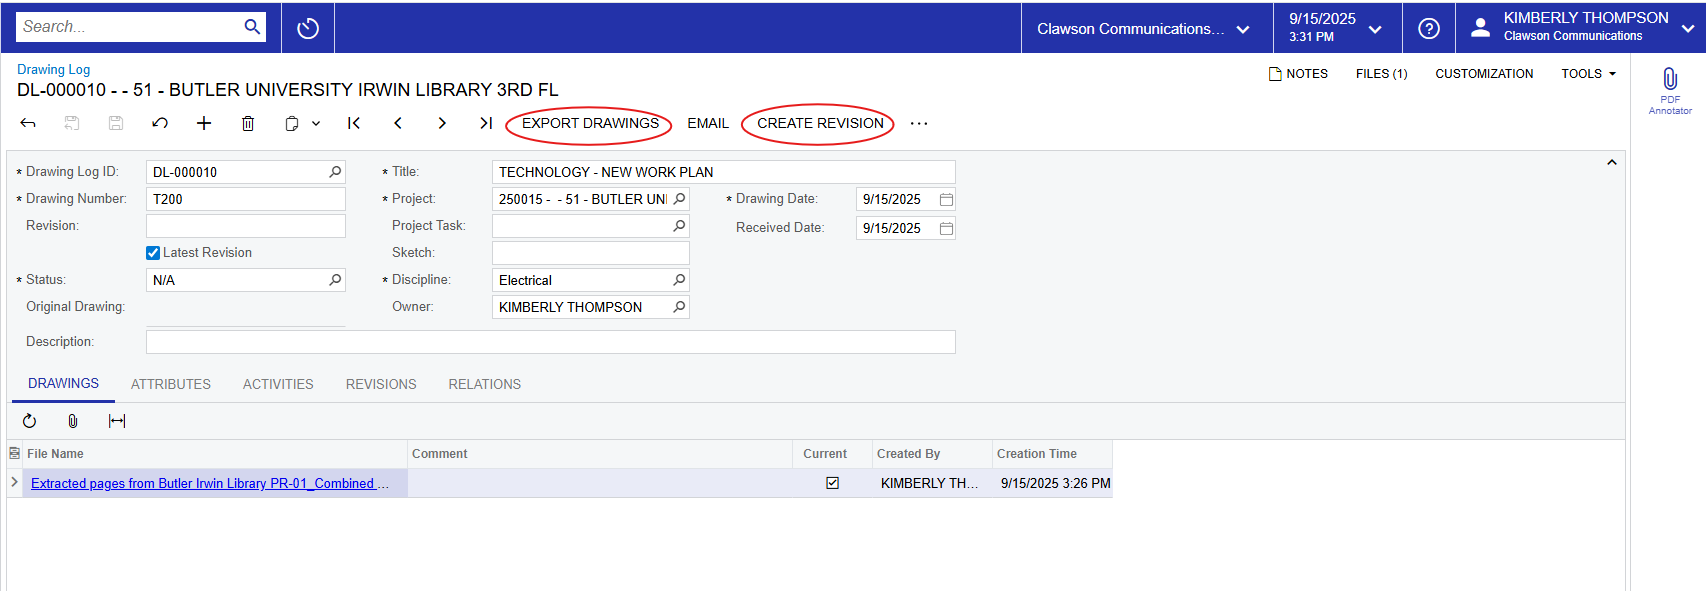
the right of the toolbar actions. Clicking those dots in the drawing logs
brings up short cuts to “Create RF”, “Export Drawings”, “Create Revision”,
“Create Project Issue” and “Email”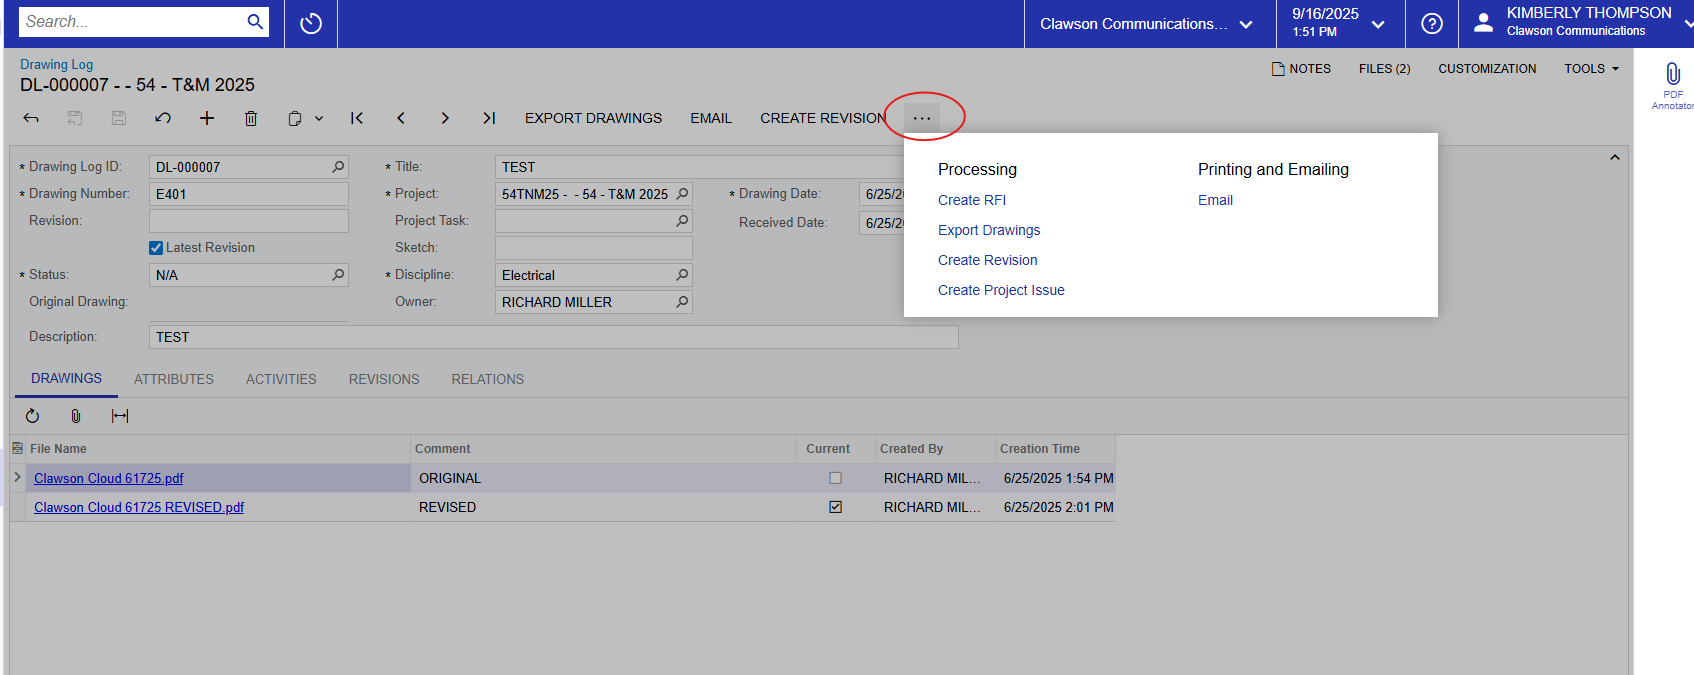
Daily
Field Report
hyperlink brings you to the landing page. Similar to the other modules, the
home view defaults to “All Records” with the option to look at “My Daily Field
Reports”
project number first, then you will be prompted to enter the Project
Manager. 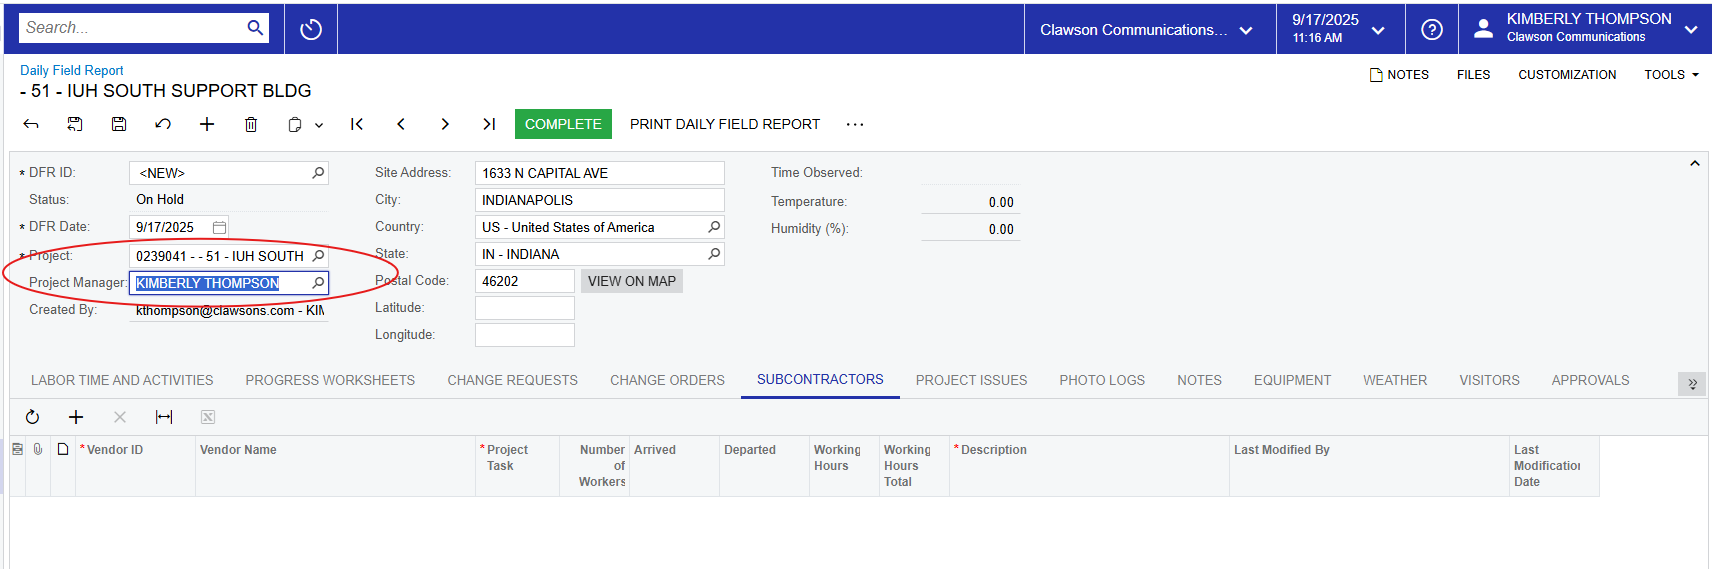
number of options available to enter data. The first one you see is “Labor Time
and Activities”. Since we do not track time in Acumatica, we track
through WorkForce Go, do not use this section. You will note that even if you
try to add time here, only your name shows up and you cannot add additional
employees.
to Inventory ID’s so again, do not use this section at this time.
refer back to change requests here, but you cannot initiate them here. To refer
back to a created change request, click the + and you must select the reference
number from the available options
Change Requests.
this list, a PO must first be created. If Devin has not created a PO, this
section cannot be used appropriately. If you choose to use this section to
track subs on your job site, first make sure the PO exists (you can tell by
clicking the + sign to create a new record). A list of all vendors linked to
the project will appear. 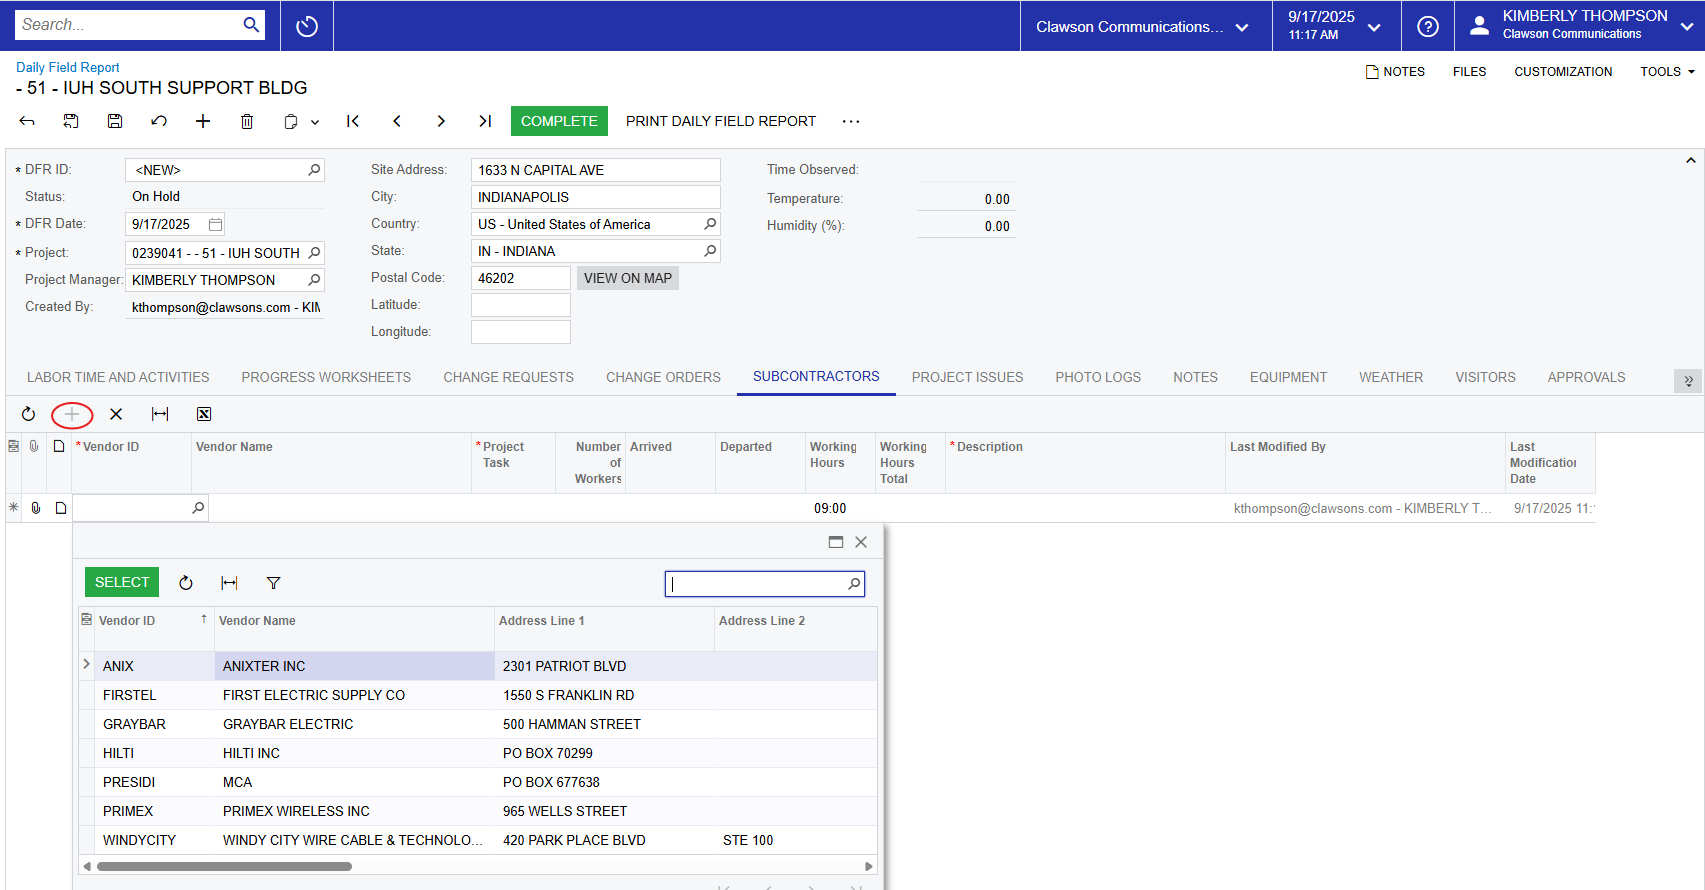
“Project Task”. If you’re tracking subs, the project task is “S” for
Subcontractor. 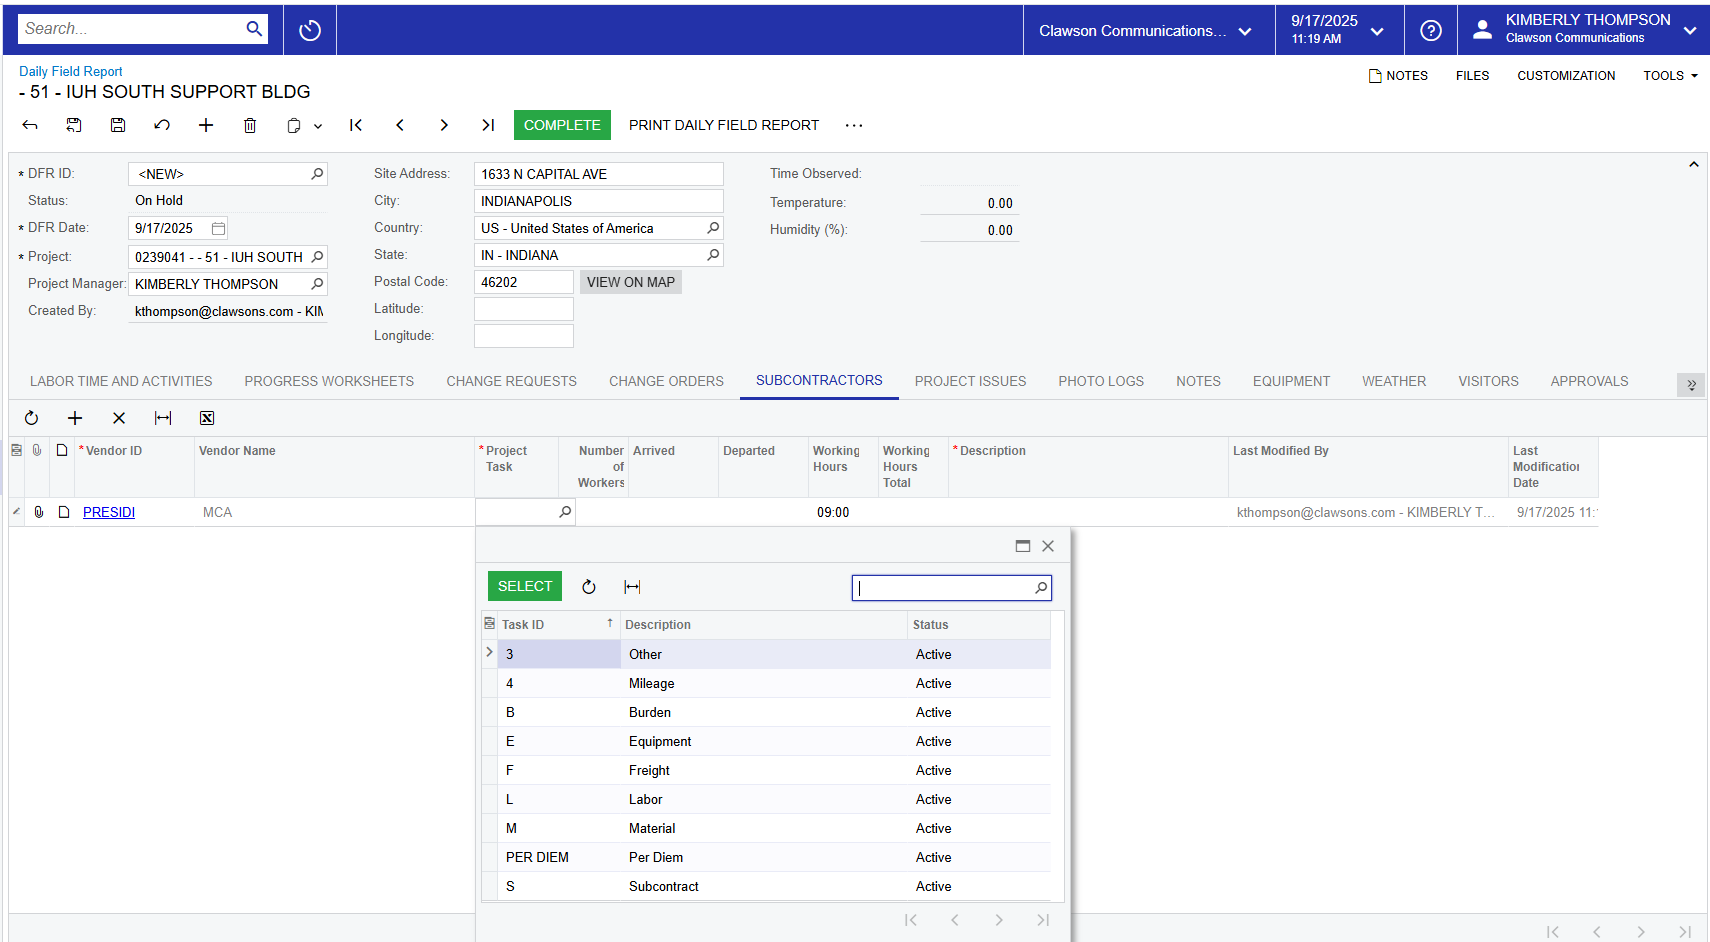
arrived and time departed. The “Working Hours” and “Working Hours Total” will
calculate based on your entries.
are again similar to Change Requests/Change Orders where a record must first be
created in order to reference it through Daily Field Report.
Daily Field Reports. To create a new record, click the + and enter a
description/summary. There is a character limit here so do not enter details of
the day here, only a summary. You will then need to save your work. After
saving, you will want to enter details for the day by clicking the piece of
paper next to the paperclip on the left side of the screen. This will bring up
a text box where you can type unlimited characters. You will note that you are
also able to attach files here by clicking the paper clip.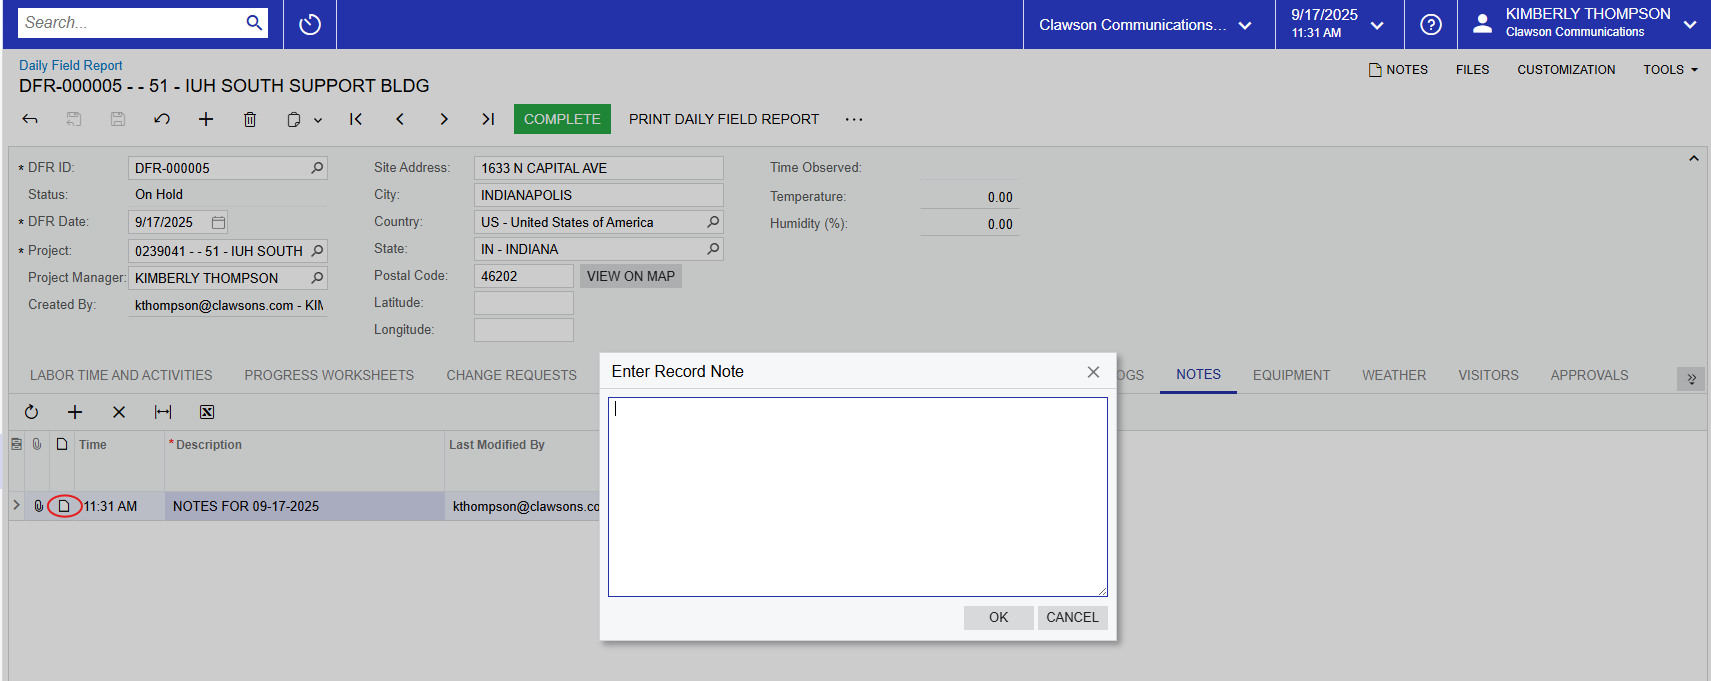
because the piece of paper will now be yellow. This also applies across all
modules in Acumatica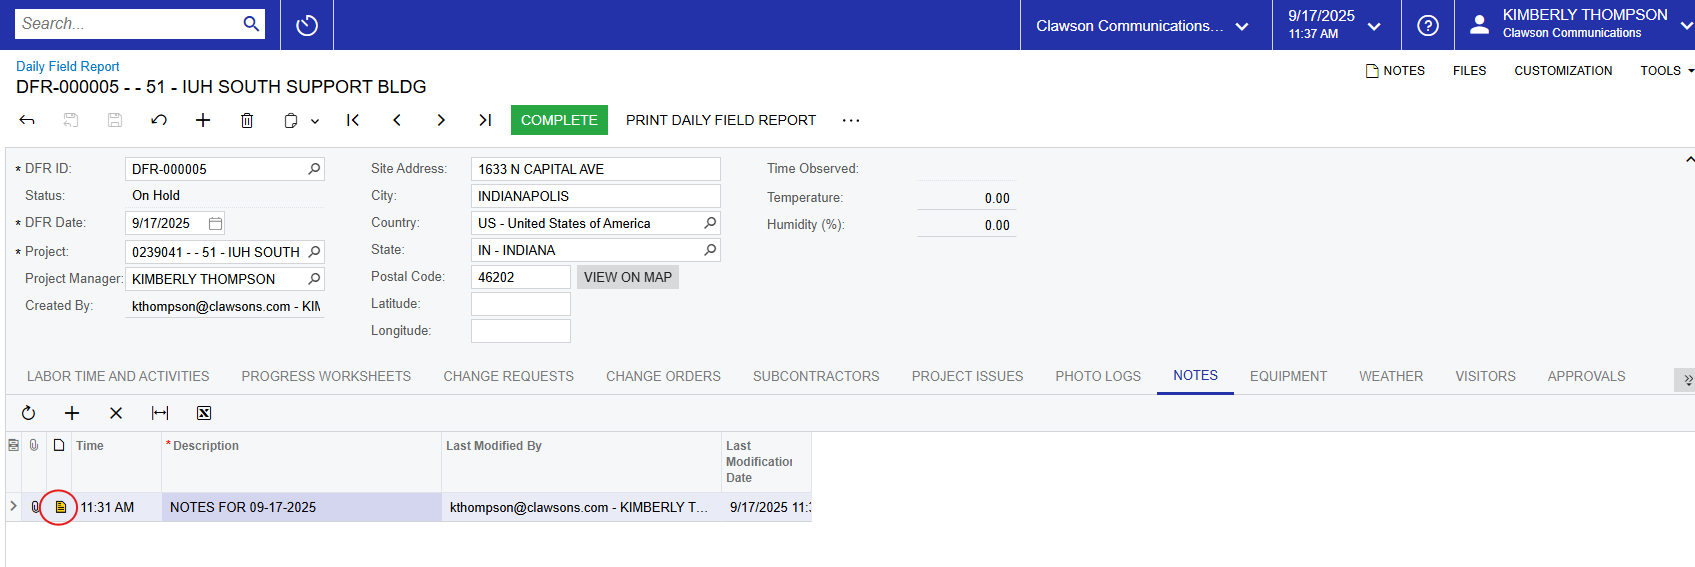
roll out in the future. You can log hours for equipment such as boring machine,
trencher etc. here. The equipment must first be set up, which is something
admin users must do. If the equipment is listed and you want to use this
feature, it is available for you to do so. You must select the equipment and
project task, from there you can enter Setup Time, Run Time and Suspended Time.
Once you save the data, the system will create an Equipment Time Card. 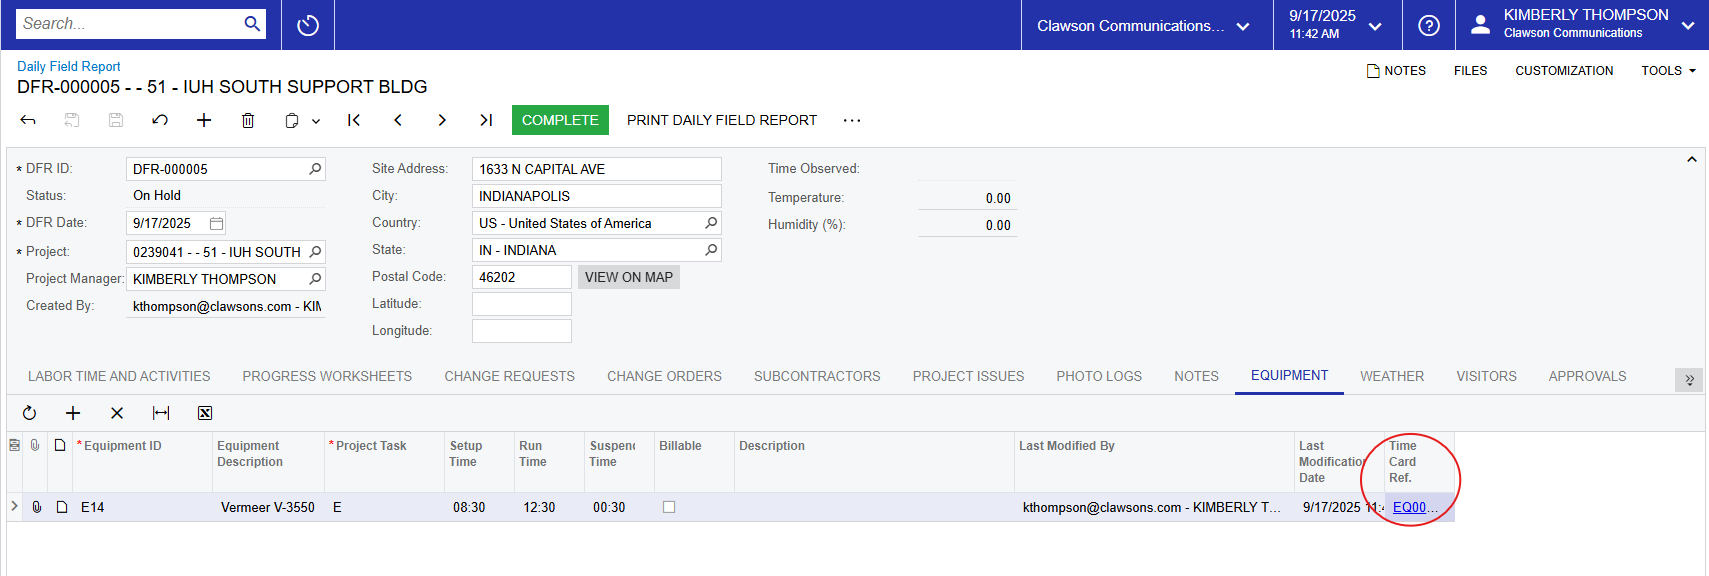
for the use of equipment on an hourly basis. This is not something we do at
this time, equipment is figured in to the estimator’s pricing.
available for use if you find it helpful.
clicking the + sign and choose from the available Visitor Types. You must enter
the visitor’s name, arrival & departed times and the reason for visit. You
can also enter the areas visited and add a brief description. You also have the
notes option here if you want to enter more detailed information, as well as
the paperclip to attach a file.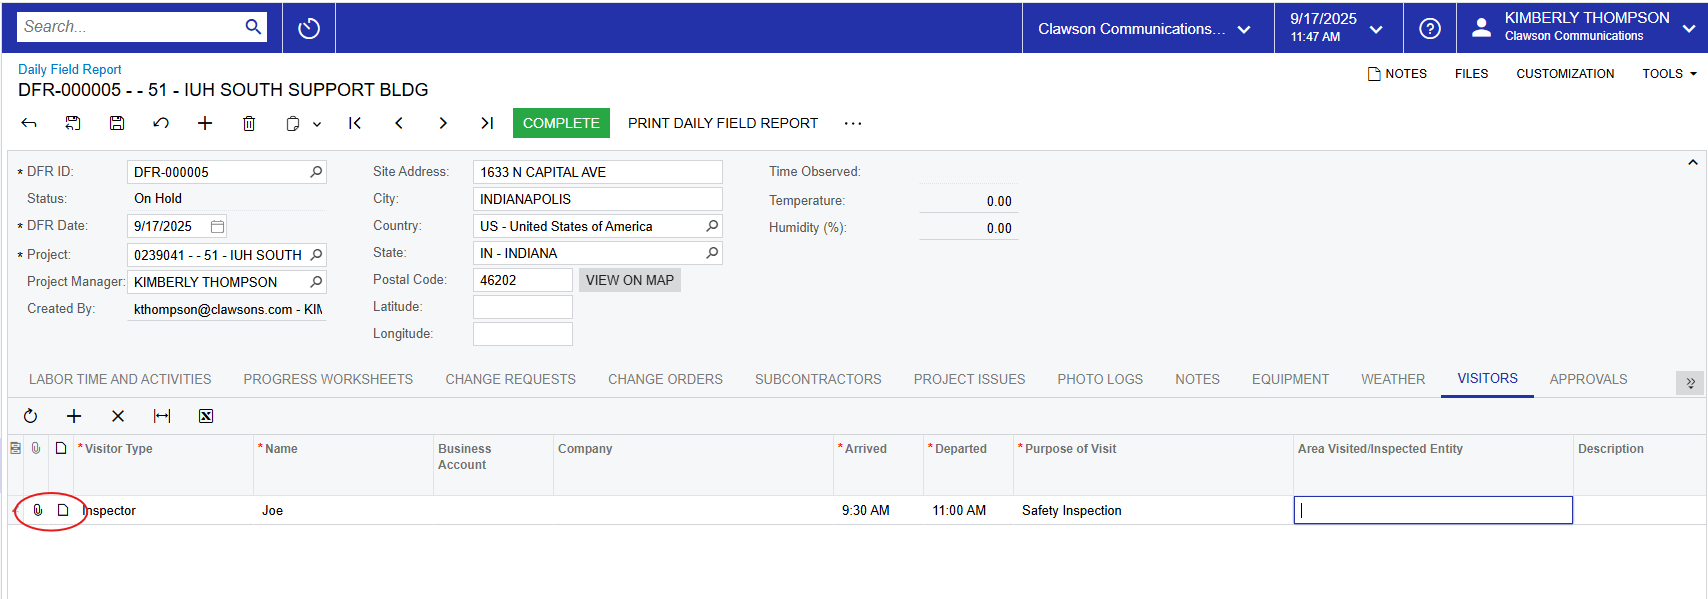
option, but you will see two arrows pointing to the right set in dark gray.
Across all modules in Acumatica, this signifies additional tabs. 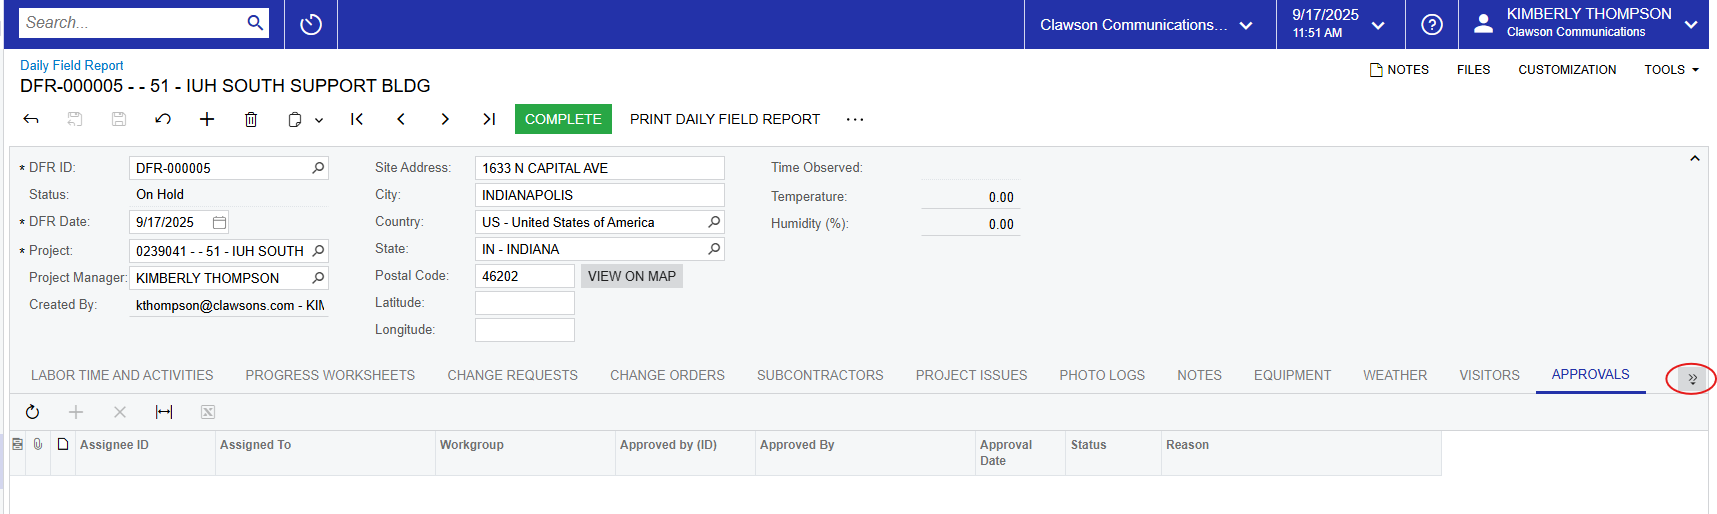
only one left in this module is “History” and there is nothing to do here.
Photo
Logs
to the project! Photo logs view differently on an ipad/mobile device vs a
laptop/desktop. On a laptop/desktop computer, you’re able to view a photo
preview if it was set up to be the main photo (selecting a main photo is
not required). Choosing a main photo would be useful for organizing photos
within a certain telecom room, for instance. The main photo could be a picture
of the telecom room # with the detailed pictures added inside the photo log.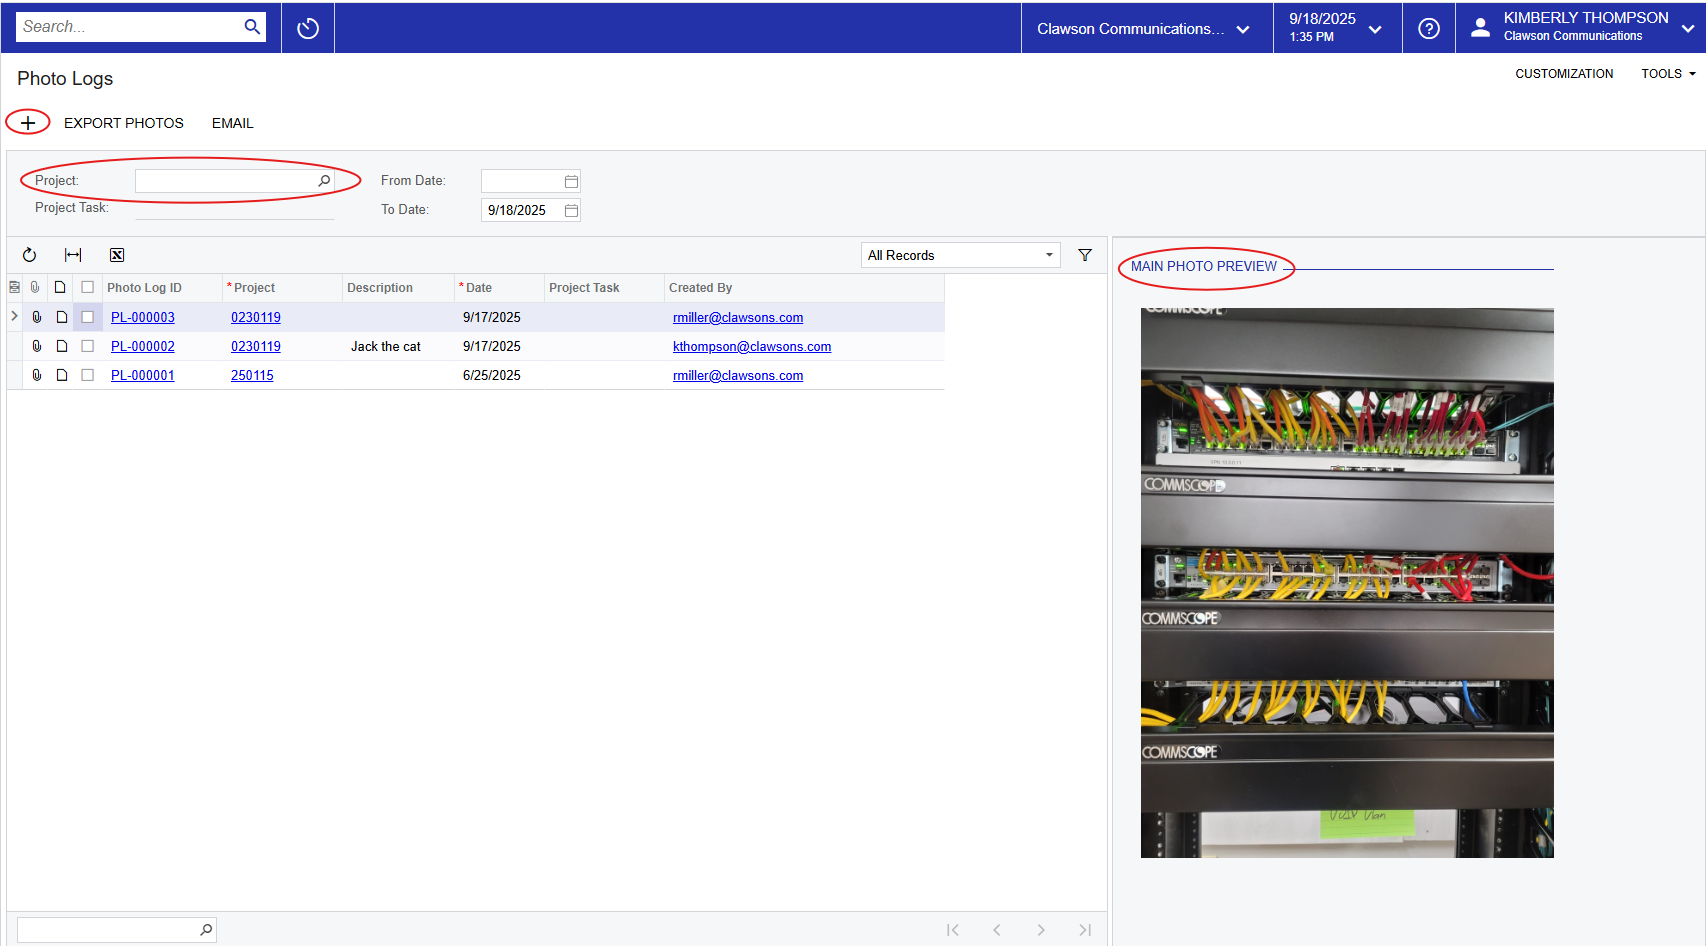
screen. Or to view/edit an existing photo log, click the blue hyperlink under
“Photo Log ID”. Note that you can search photos by project, and you can
also filter photos by any of the available columns.
then save your work.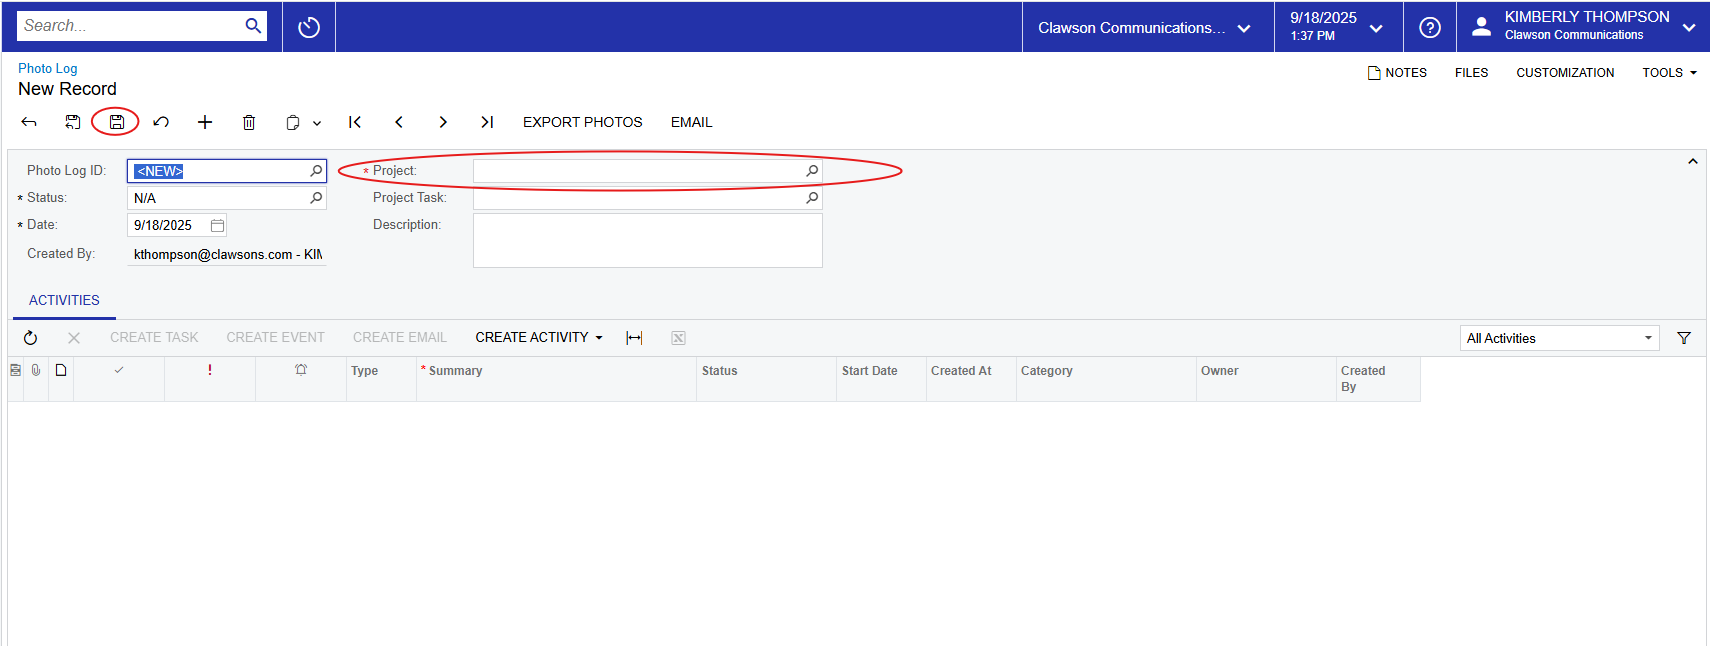
“Photos”. Adding photos from a laptop/desktop computer is easy. You can drag
and drop them or click to upload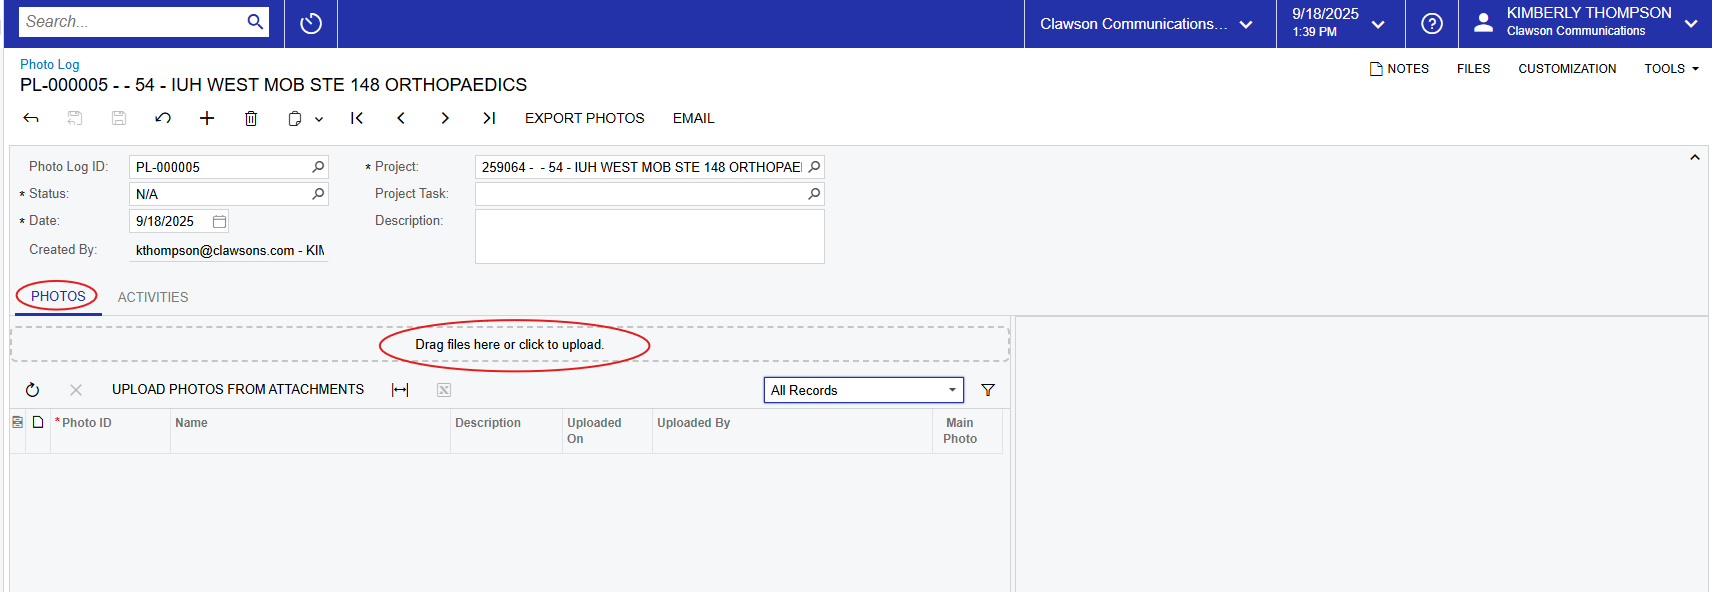
the top of the page for an overall description of this photo log, and it is
best practice to enter a description for each photo, which will help with
organization and searching in the future. Lastly, if you want to make a “main
photo” for the photo log, check the box to the right of that photo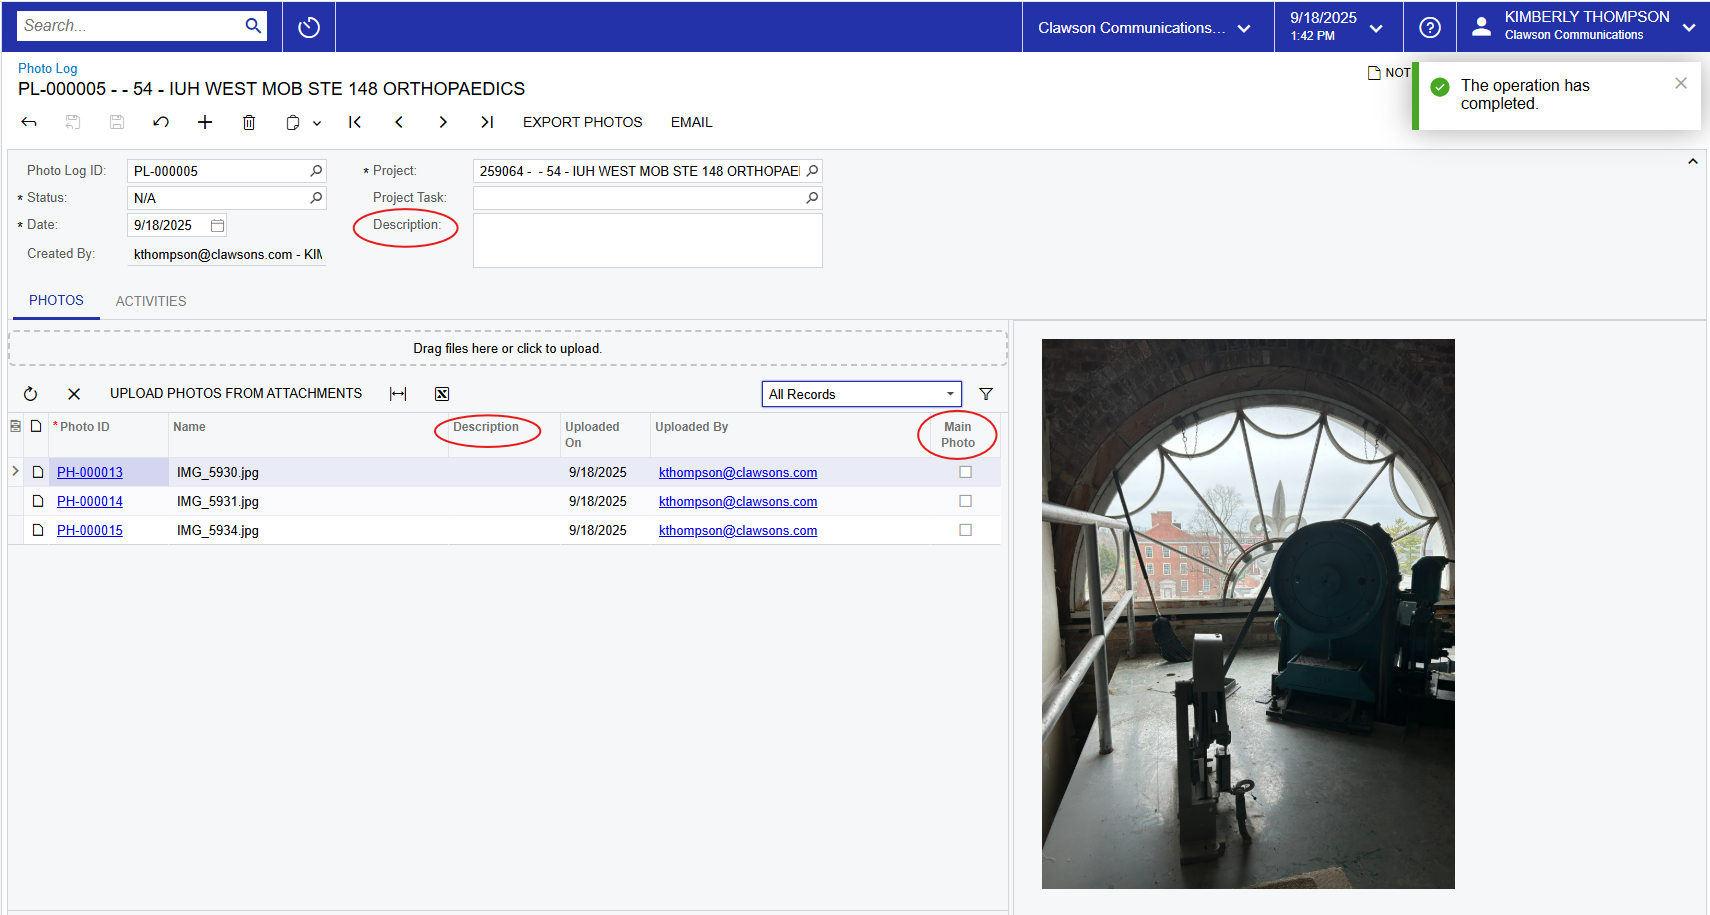
ipad, add photos by clicking “Drag files here or click to upload” and you will
be prompted to choose from your “photo library”, “take photo” or “choose
files” where you can upload photos straight from your device. From your
mobile device, a thumbnail view of the photo may or may not be viewable. Try
turning your device sideways/landscape and the image may appear to the right.
The images do seem to be easily viewable from a laptop/desktop so we assume
this feature will depend on the user’s screen size.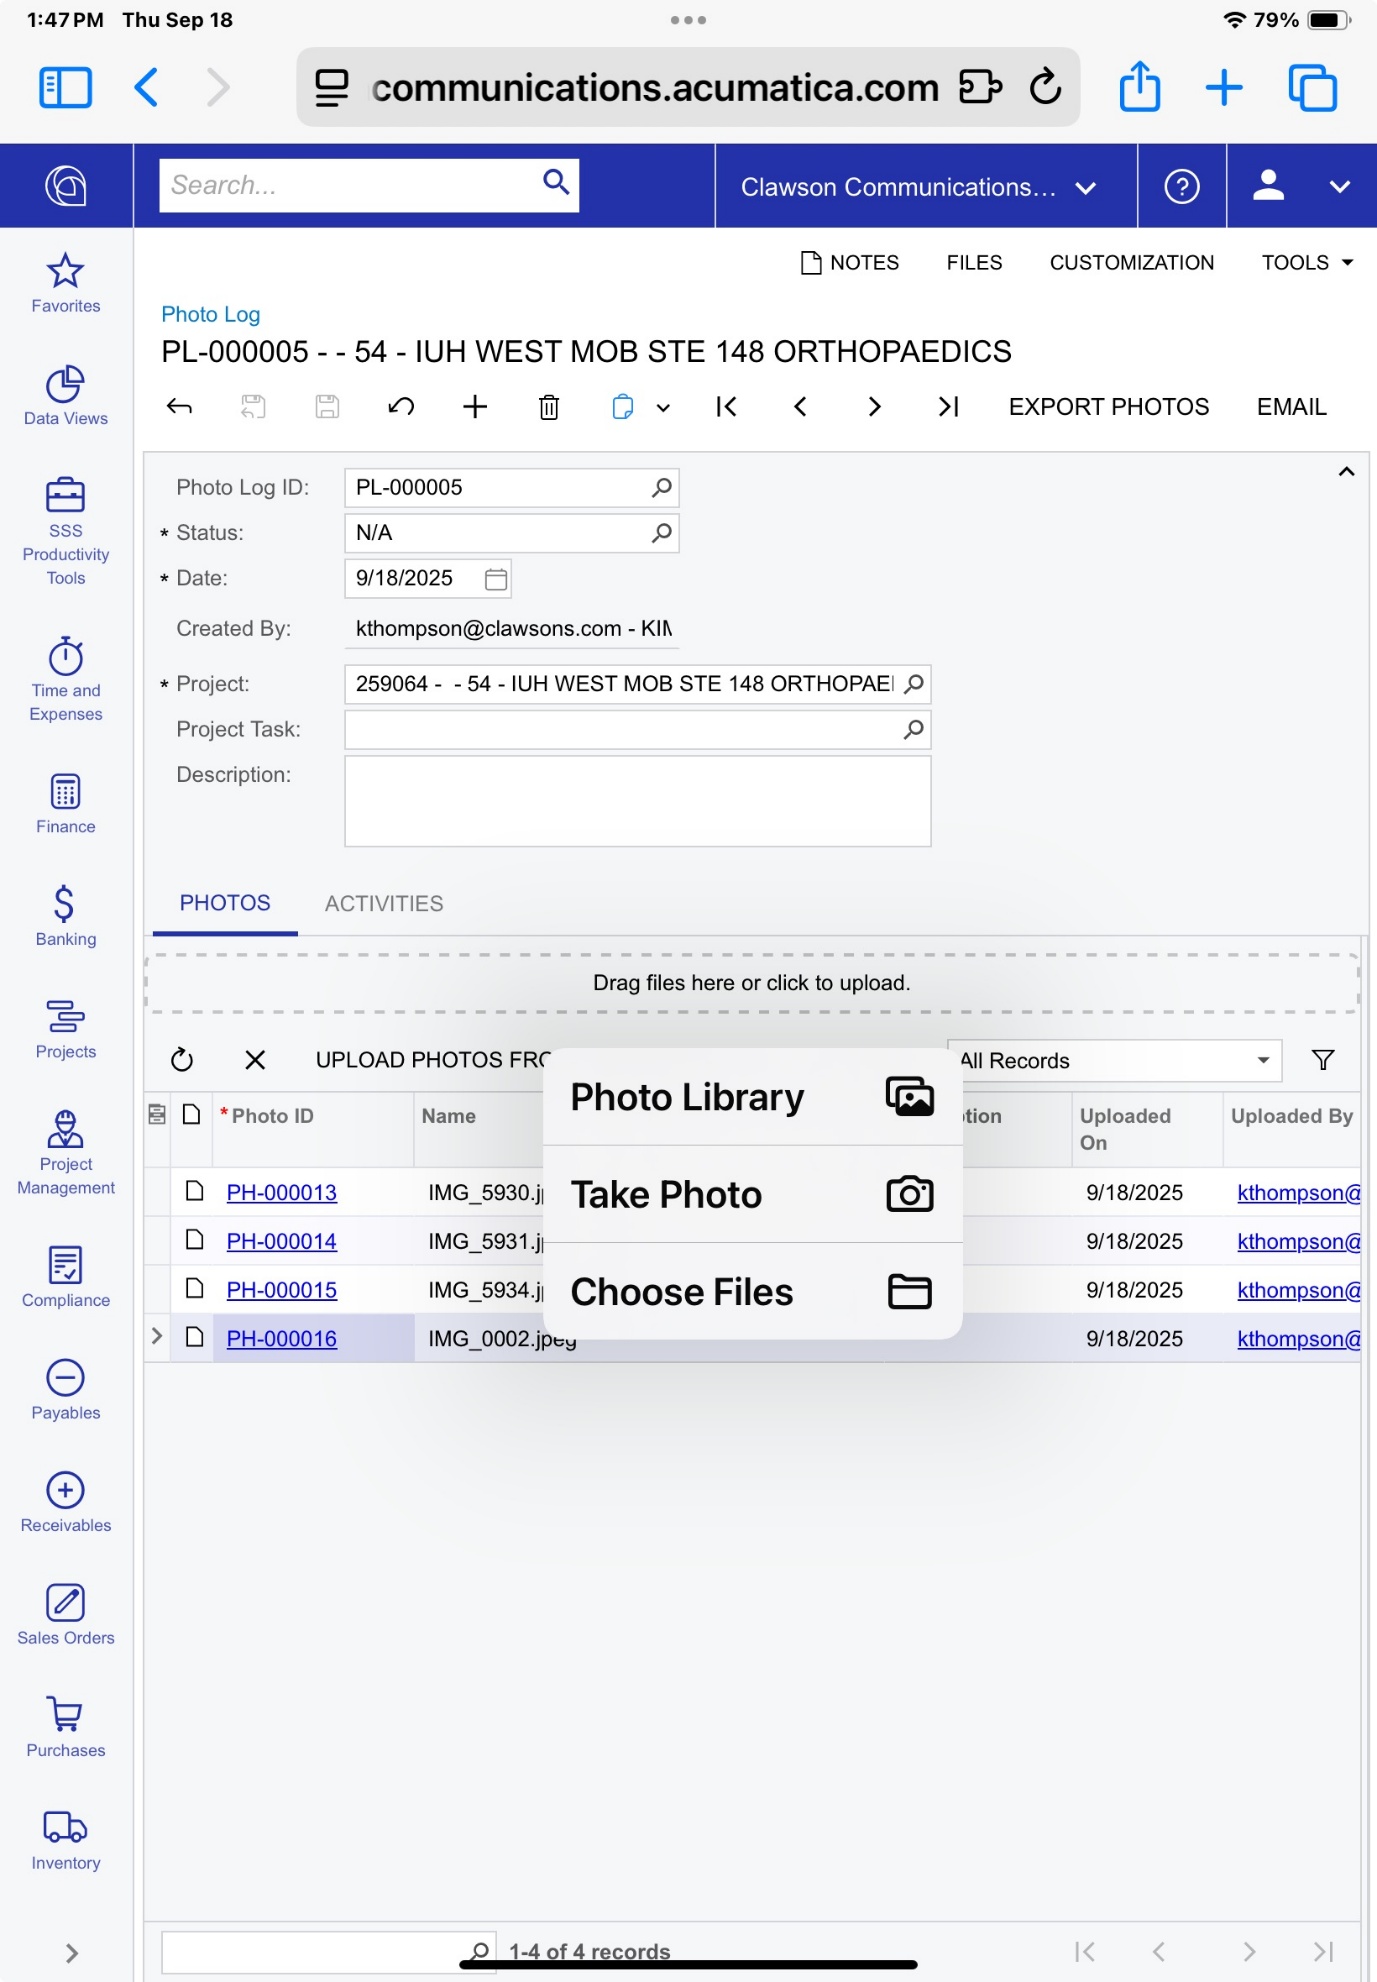
new tab with the photo and description. If you are on a mobile device, click on
the Photo ID. If nothing happens, you need to allow pop-ups on the device. To
enable pop-ups, follow the instructions below:
section.
pop-ups.
click the Photo ID where you may get a prompt reading “This site is attempting
to open a pop-up window”. Click “Allow” and the device will open a new tab with
the photo.
Submittals
here for the time being.
Additional
Useful InformationProjects
about your projects. 
will help with finding them in the future and will also be placed in the
“Favorites” tab for you
will only primarily only be using a few. The main us under “Profiles” and is
labeled “Projects”. This is where all projects live, both past and present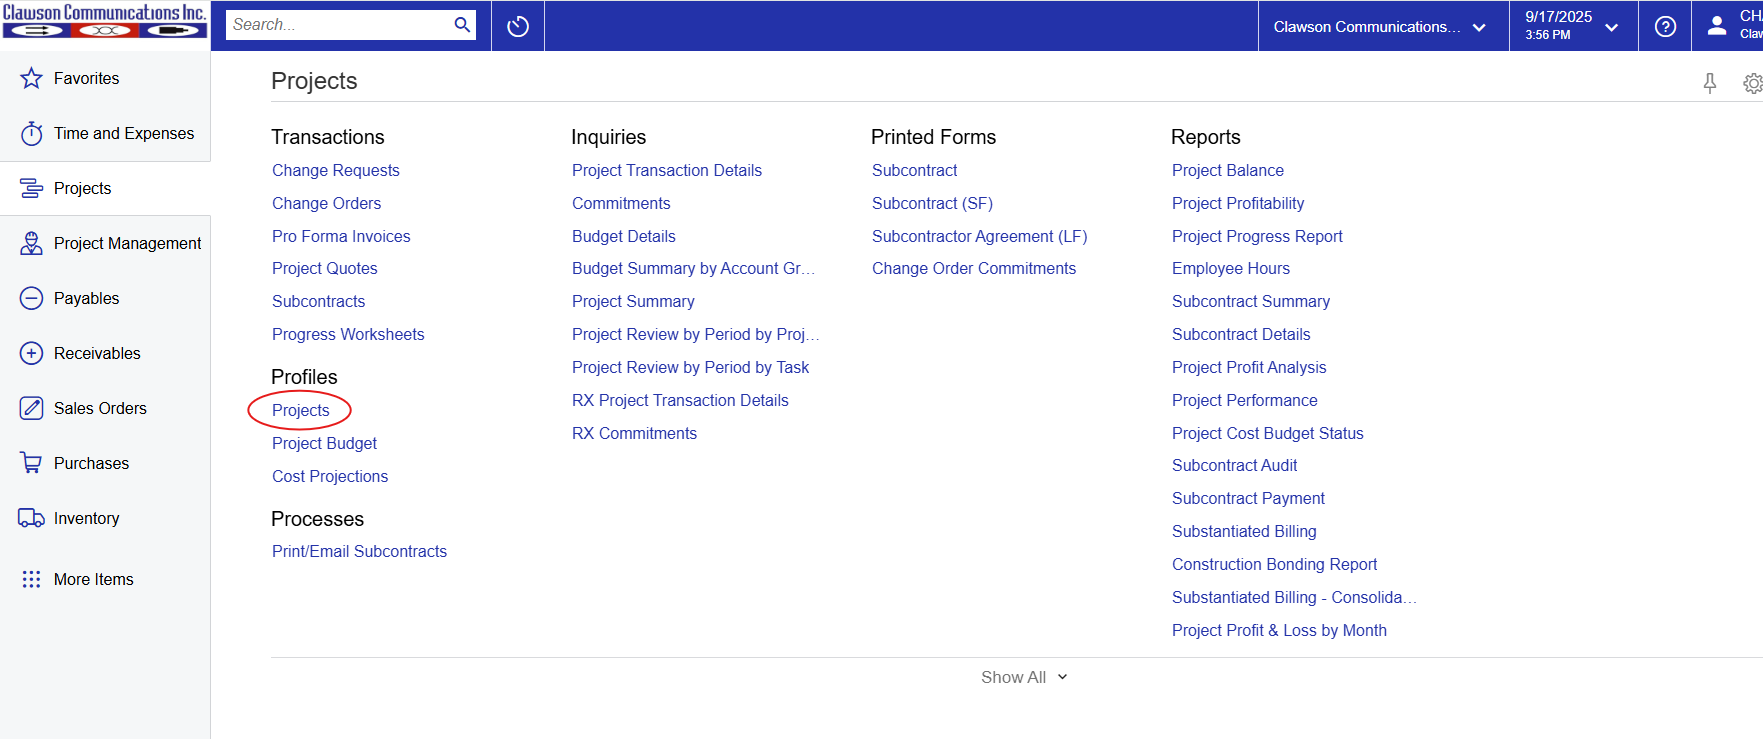
Records”. Note that by default you can also view “Completed Projects”.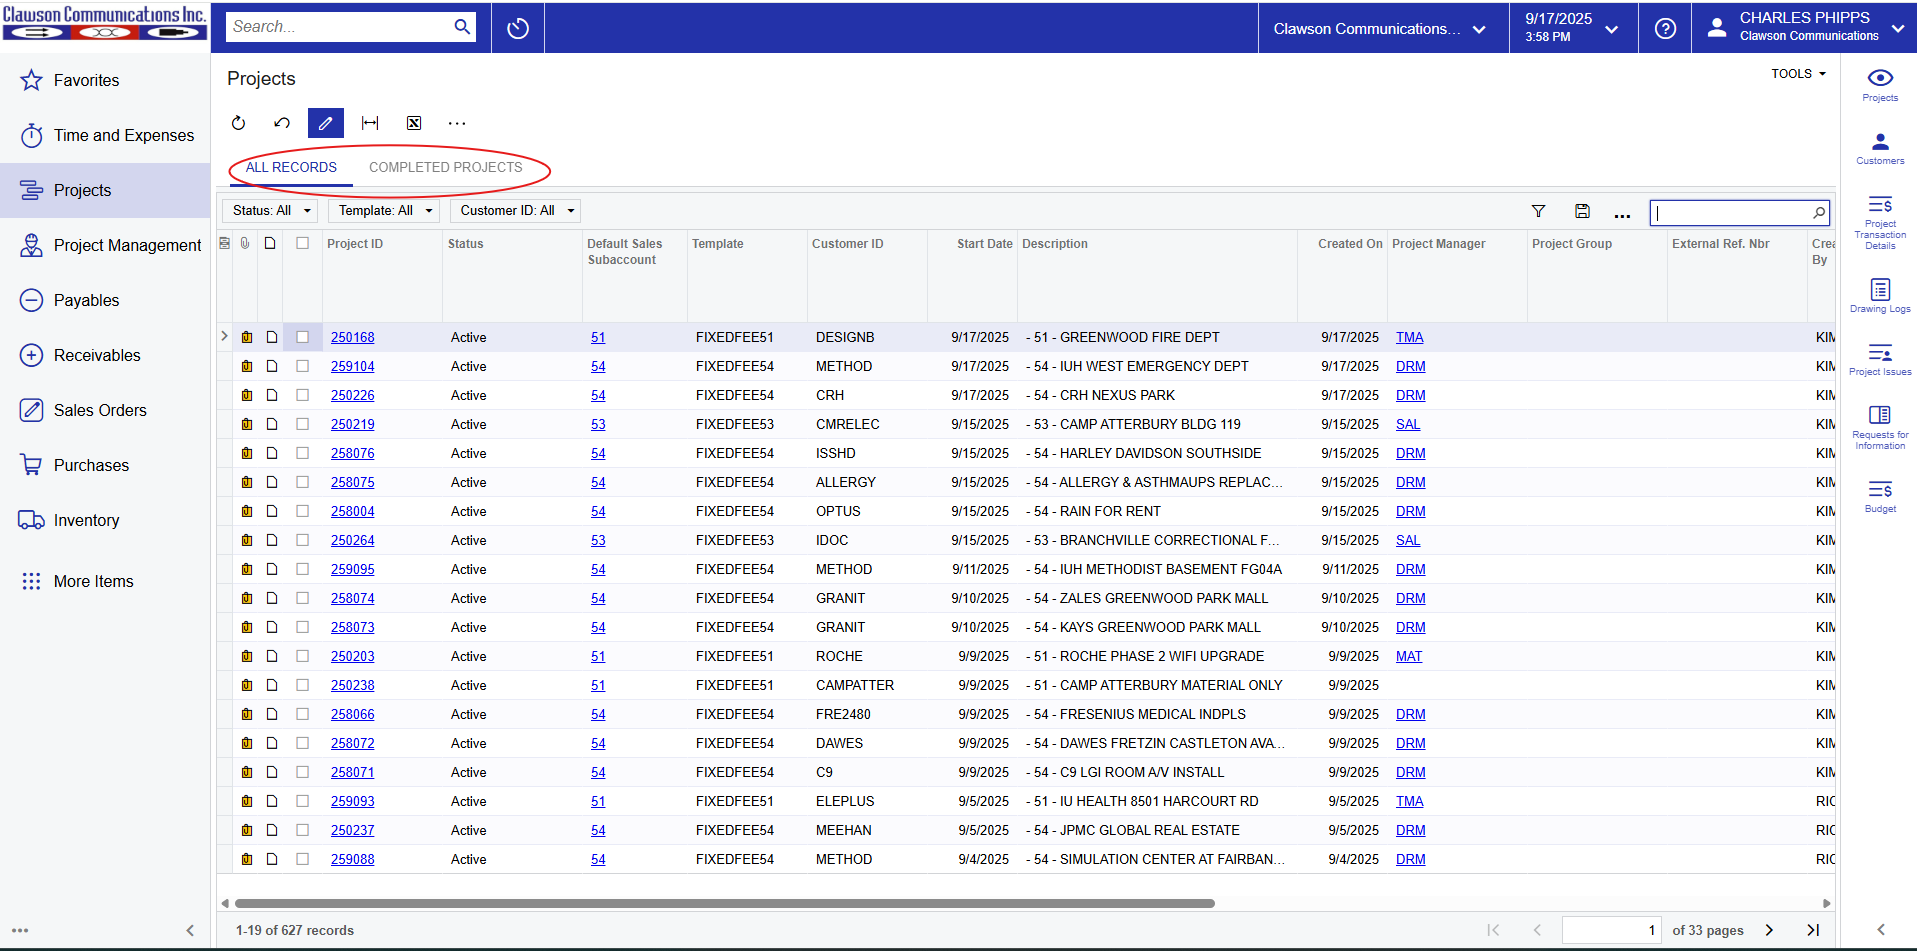
The General Inquiry that Rick created here will show a lot of information. At a
glance you can see the original bid amount, change order amount, revised bid
amount and total project cost to date, project manager, sales manager as well
as various other information.
hyperlink, you will be taken to the main project screen. The information in
this module is viewable only, you will note that you cannot add or modify any
information.
be able to look at the file attachments where you should be able to find a copy
of the bid, CO’s, possible materials lists etc. You can find these documents by
clicking the “Files” on the top right of the screen.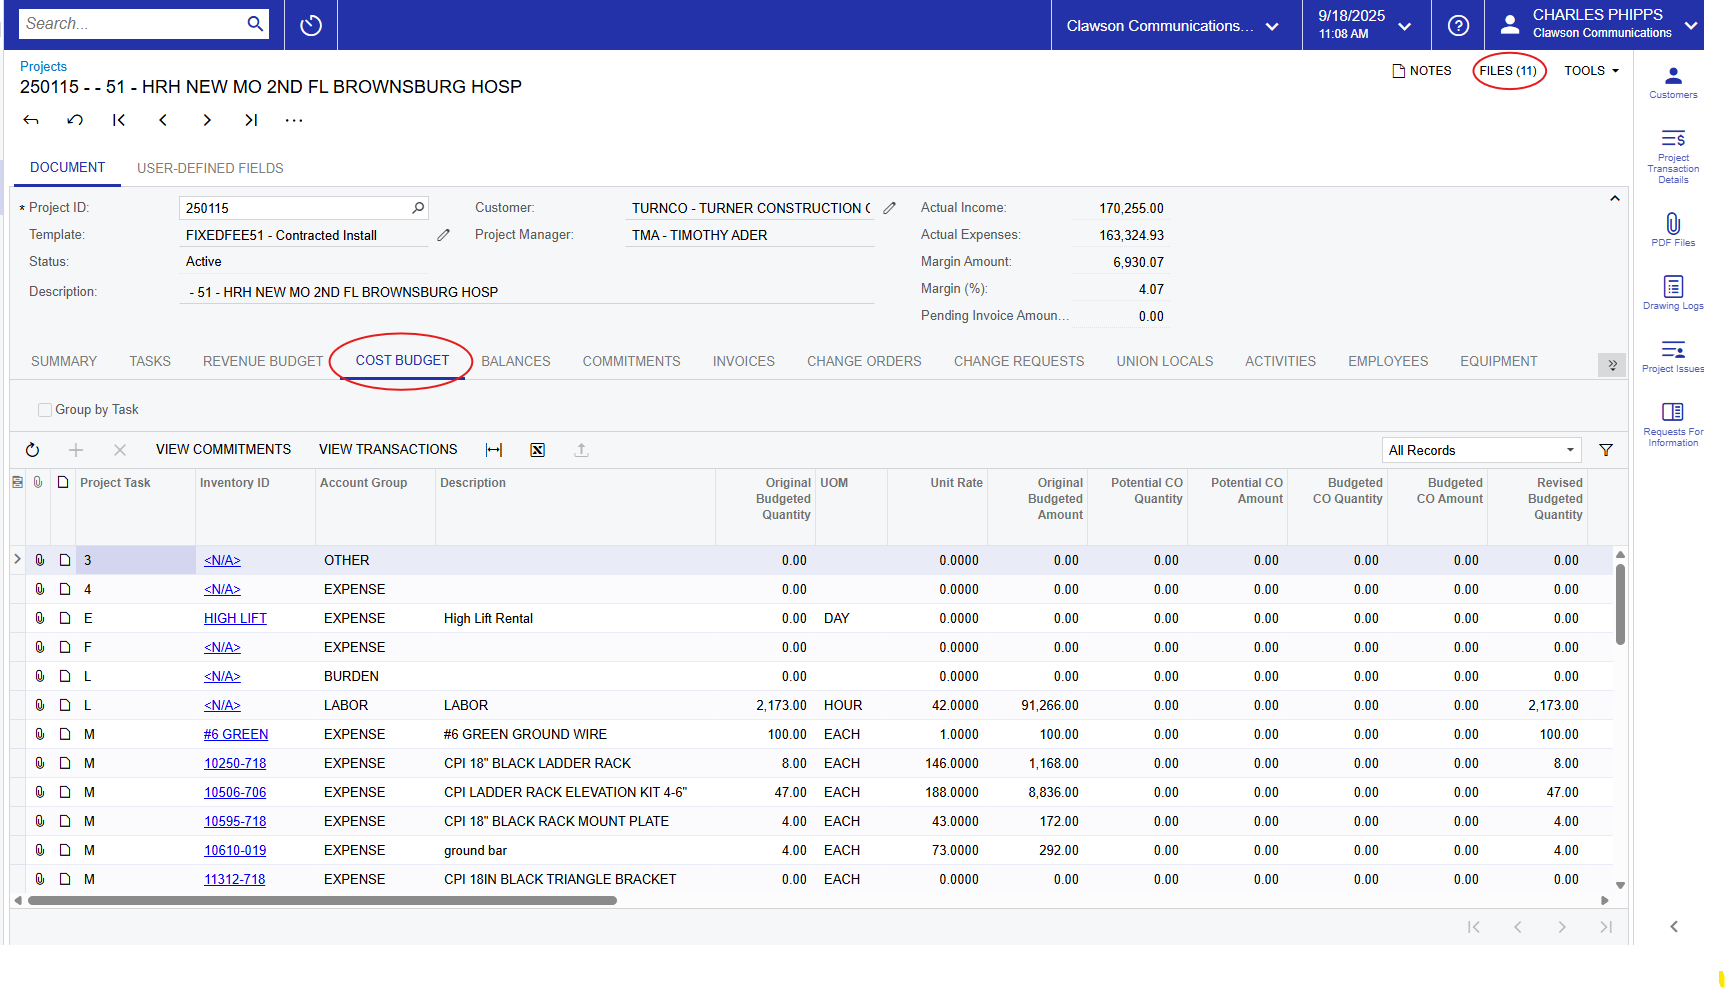
Budget” tab. This should give a list of items that Devin has ordered, with
quantities and pricing. You will want to edit your column views in this module
as there are a LOT of options that get quite overwhelming.
probably most needed and a brief description of each. If not listed, it may be
best to hide from your view:
has come up with in their initial materials list. This must be entered manually
at project start-up and will not always be available/entered
BOM
dollar amount (budgeted quantity * unit rate) that the bidder came up with
date
ordered
been invoiced and most likely received, or at least has been shipped
yet been invoiced, probably not yet shipped
date
not yet been invoiced
Inventory ID’s is not helpful as it just takes you to the inventory id profile
take you to PO’s that have been created for the project. 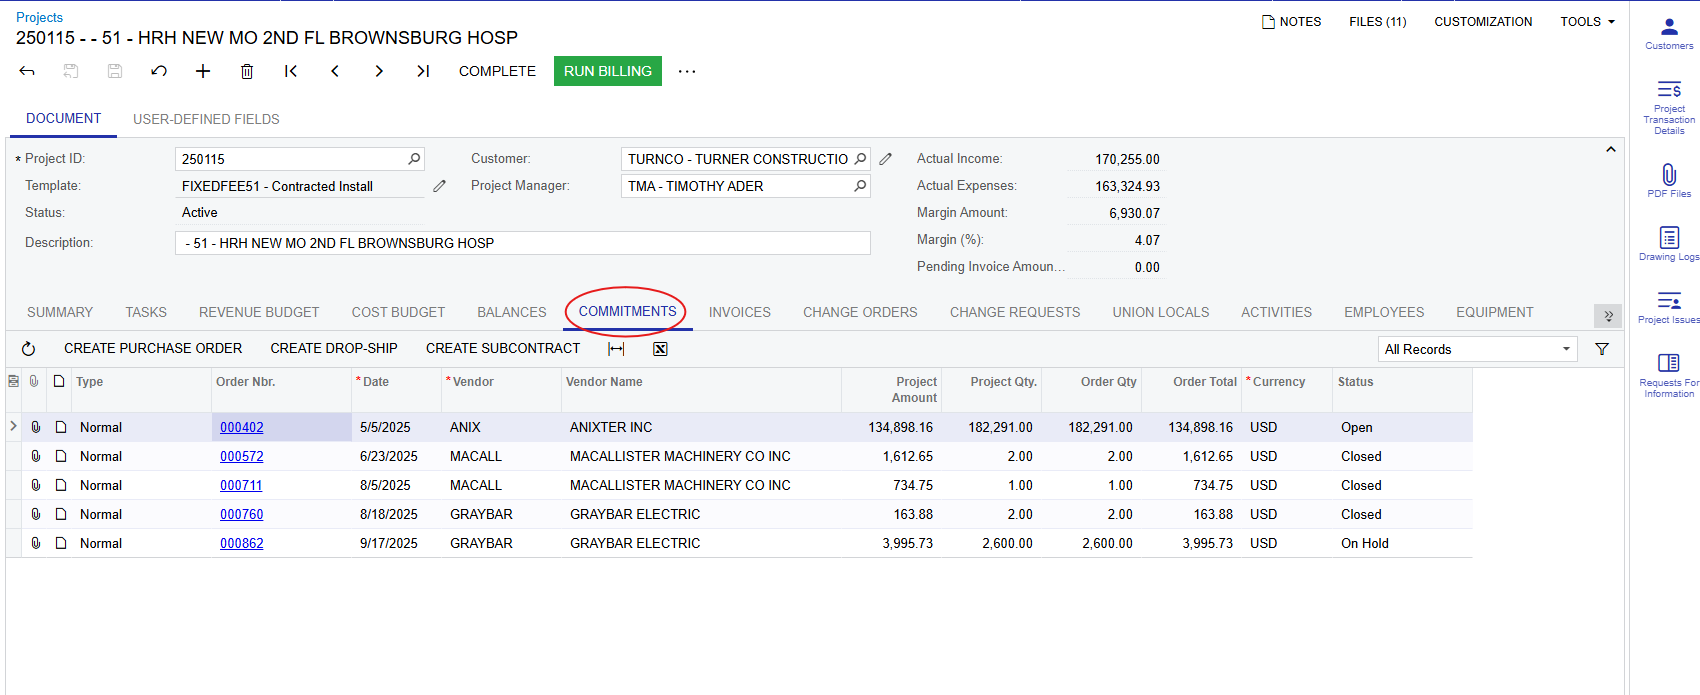
it will open a new tab and take you right to the PO. You can view the all items
that were ordered on that PO, the part number, description, quantity ordered,
quantity billed etc. There are again several available columns for view in this
section, I’d suggest changing the view to something similar to:
free to add additional items if you find them helpful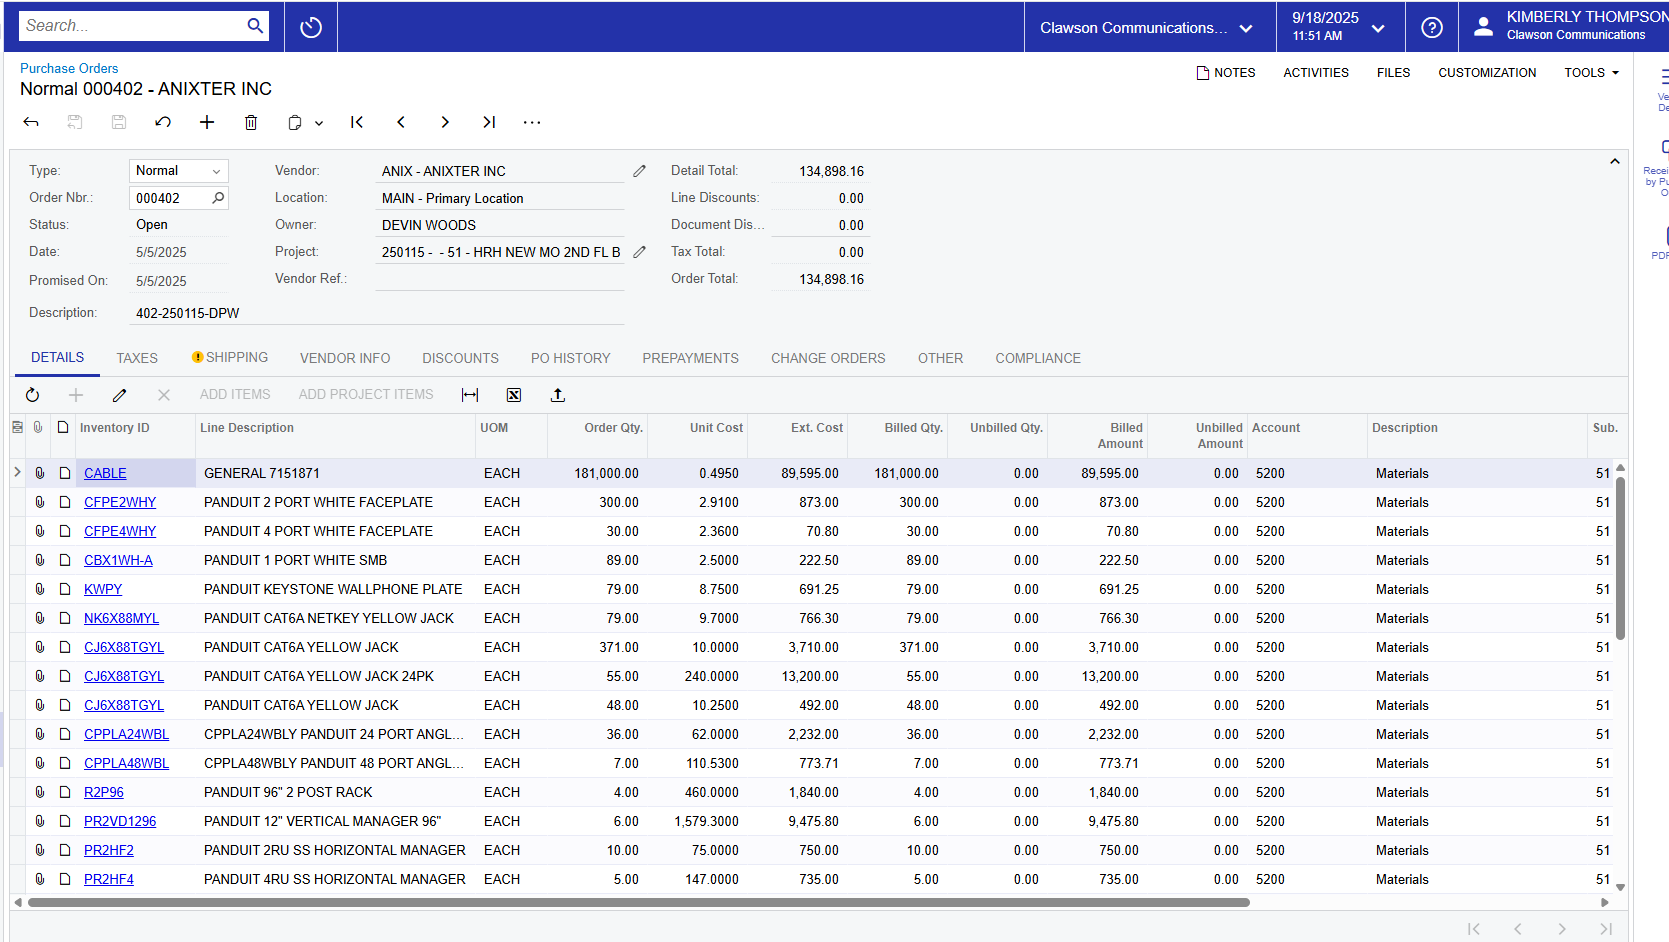
This is probably not useful to you, but the info is there.
only change orders that have been approved are entered here, pending CO’s will not
be entered at this time. Clicking on the hyperlink for the CO Reference Nbr
will open a new tab where you can view the revenue lines of the CO and a copy
will be attached to the files.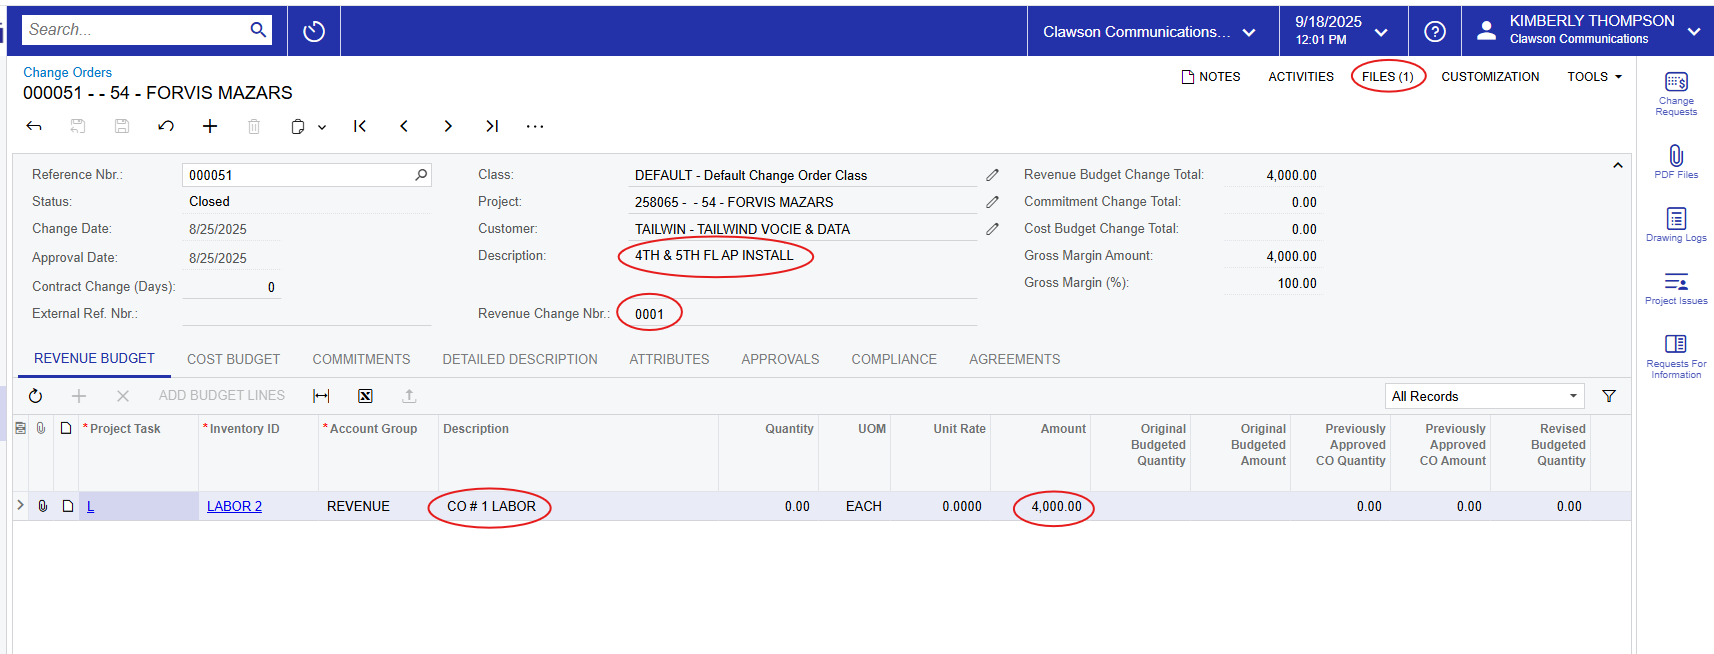
which can usually be found by clicking the two arrows to the right which
reveals additional tabs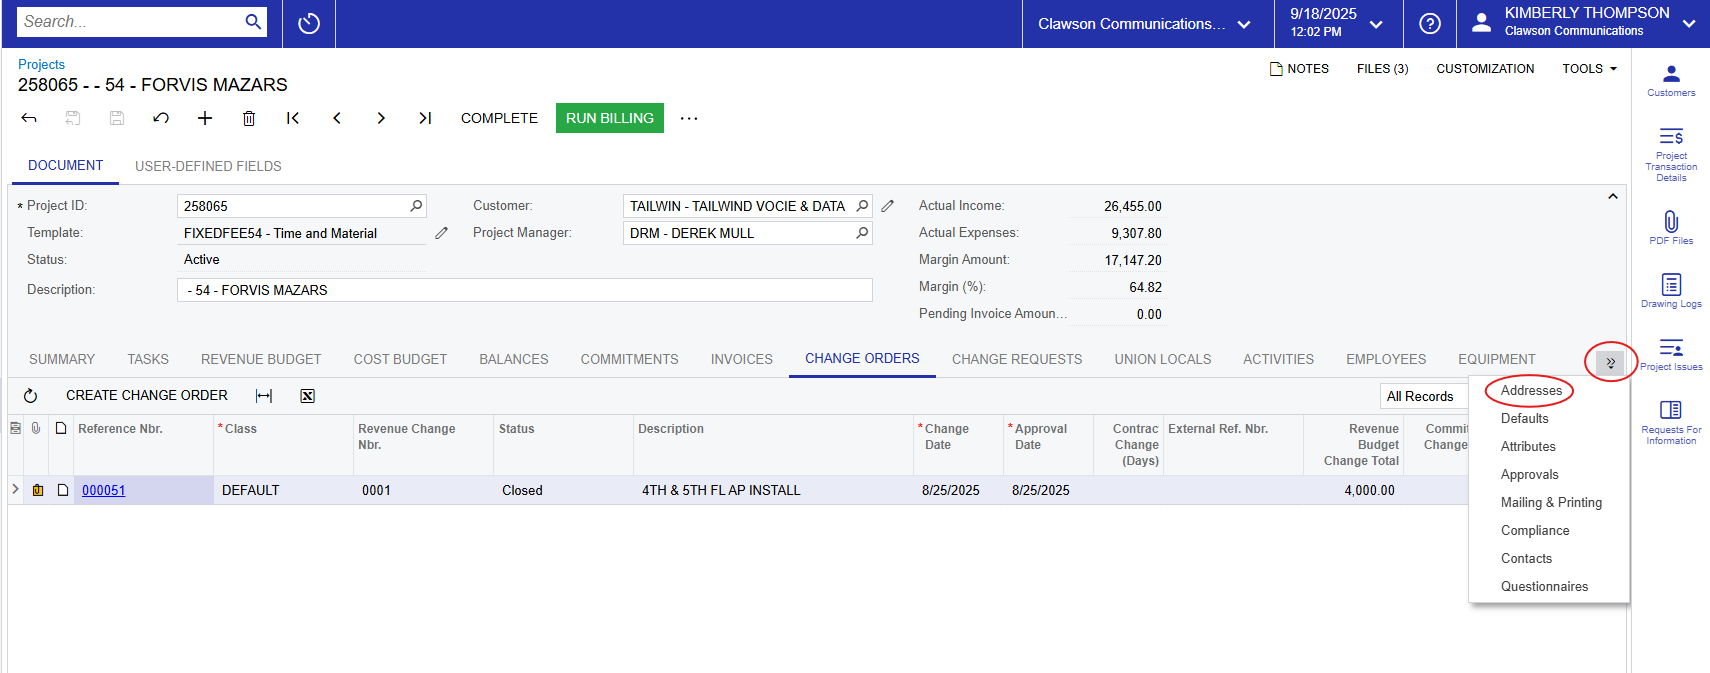
also be located on the bid
Budget
Details
located under “Inquiries” and is called “Budget Details”.
Records. For this module, navigate over to “Active Labor Budget Summary”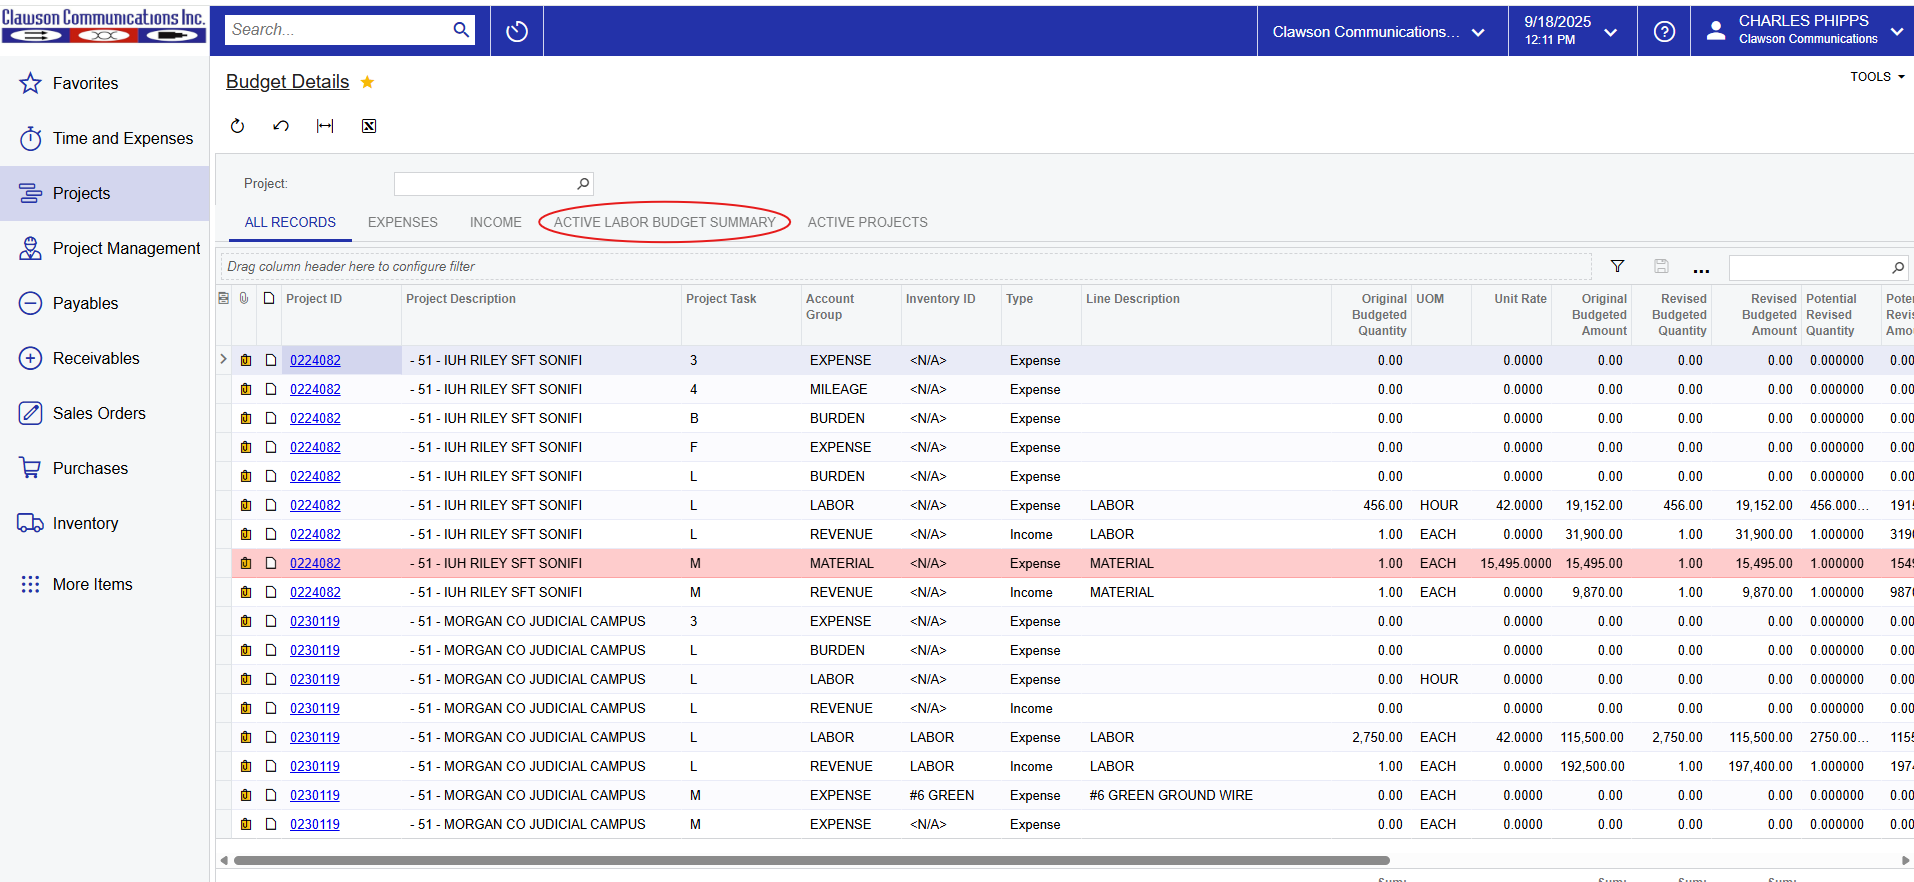
labor hours. To find a specific project, search the project in either the top
search box or the one at the top right (it is generally easier to use the one
on the right)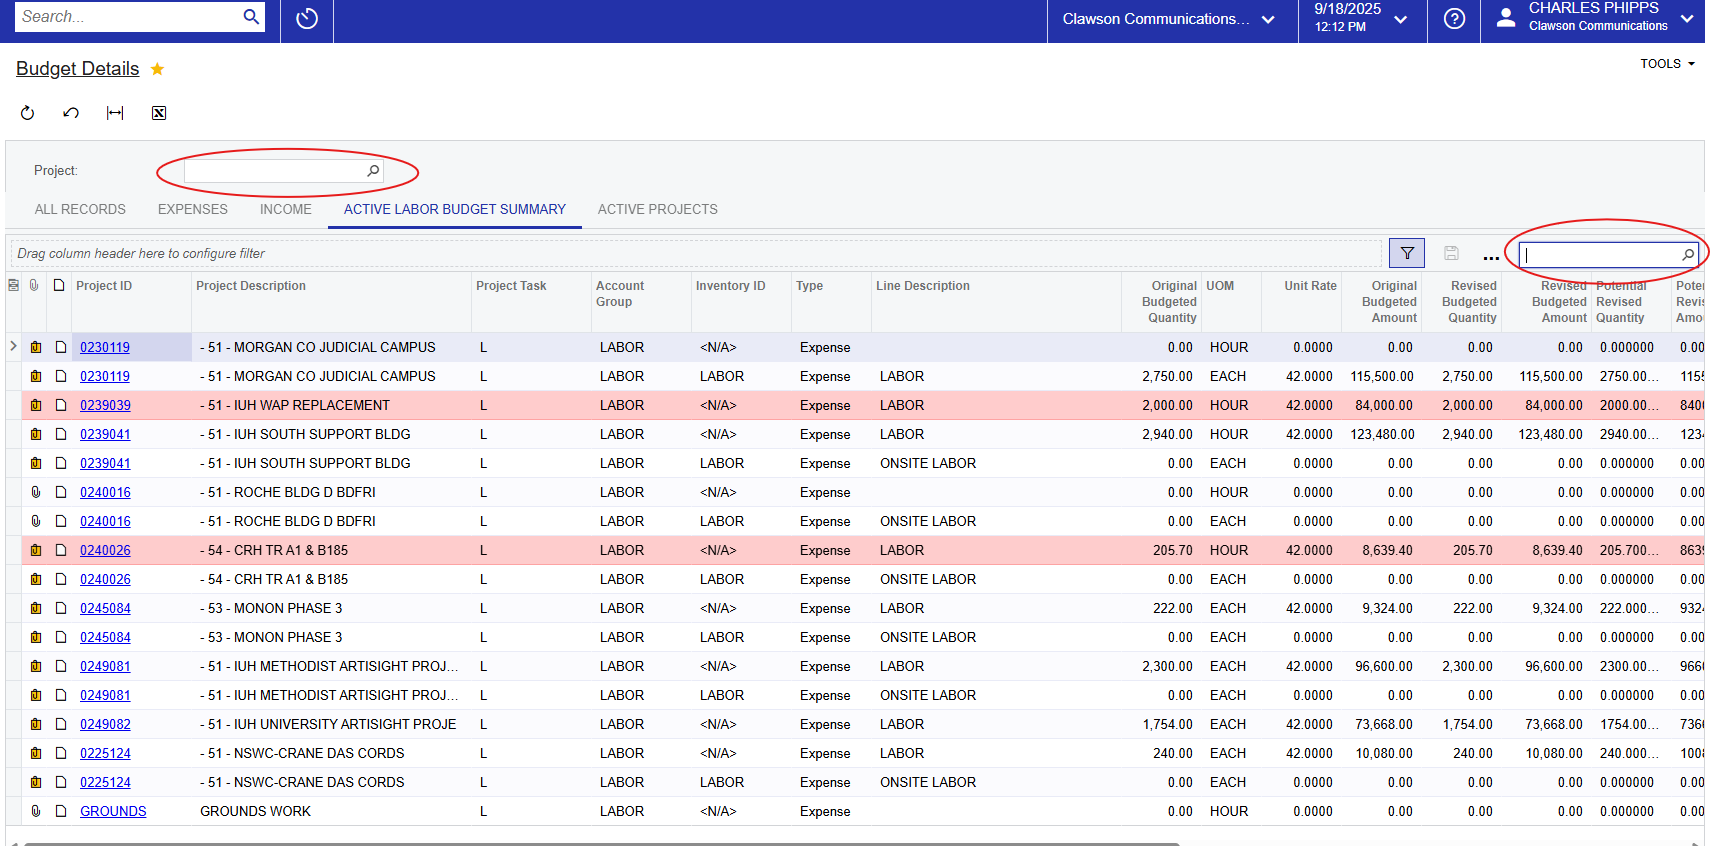
that you adjust your view to the following:
hours that were bid for the project and is a manual entry
to date after payroll has been posted
system is set so once a percentage reaches 80%, it is flagged and turns red.
amount budgeted for labor
budgeted for labor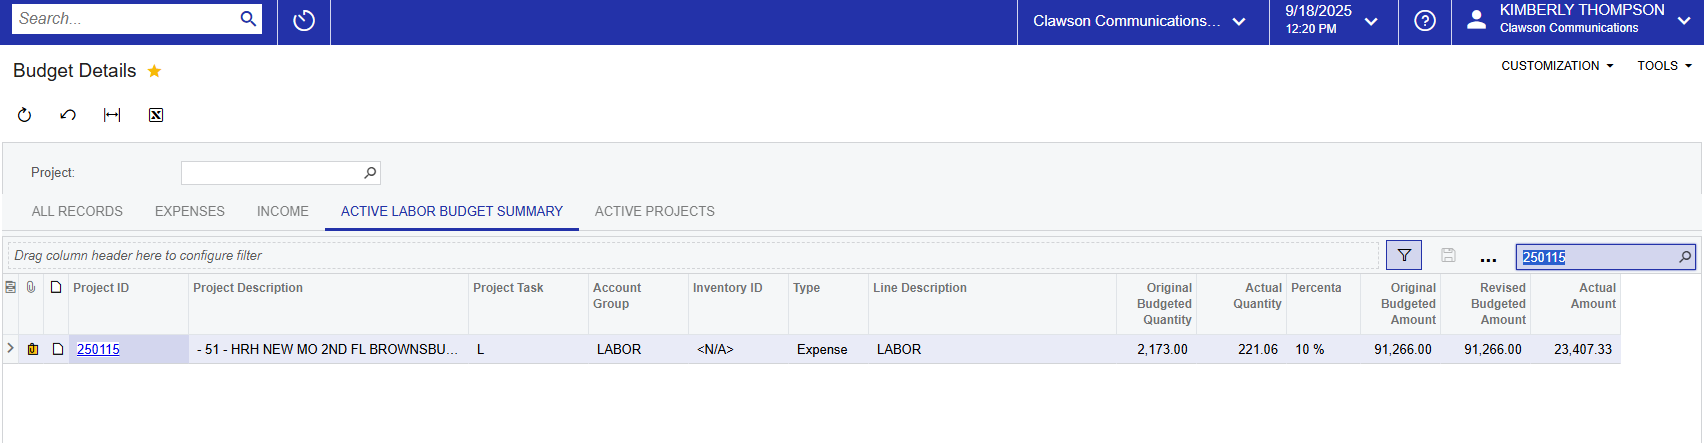
until after payroll has been processed and the transaction has been posted into
Acumatica. Typically this will happen on Wednesday mornings. If you have
temp / non-payroll employees, their time is entered when the invoice from the
placement agency is entered.
will see two lines. The original budgeted quantity will only be on one line but
Actual Quantity will be on two. To get the total hours used to date, you must
add these two numbers together. This is something that we discovered a
few months ago and has to do with how temp agency invoices are entered. We have
since changed our processes so all labor hours drop in on the same line, but
there are lingering projects out there. 
Project
Review by Period by Task
under “Inquiries” and is called “Project Review by Period by Task”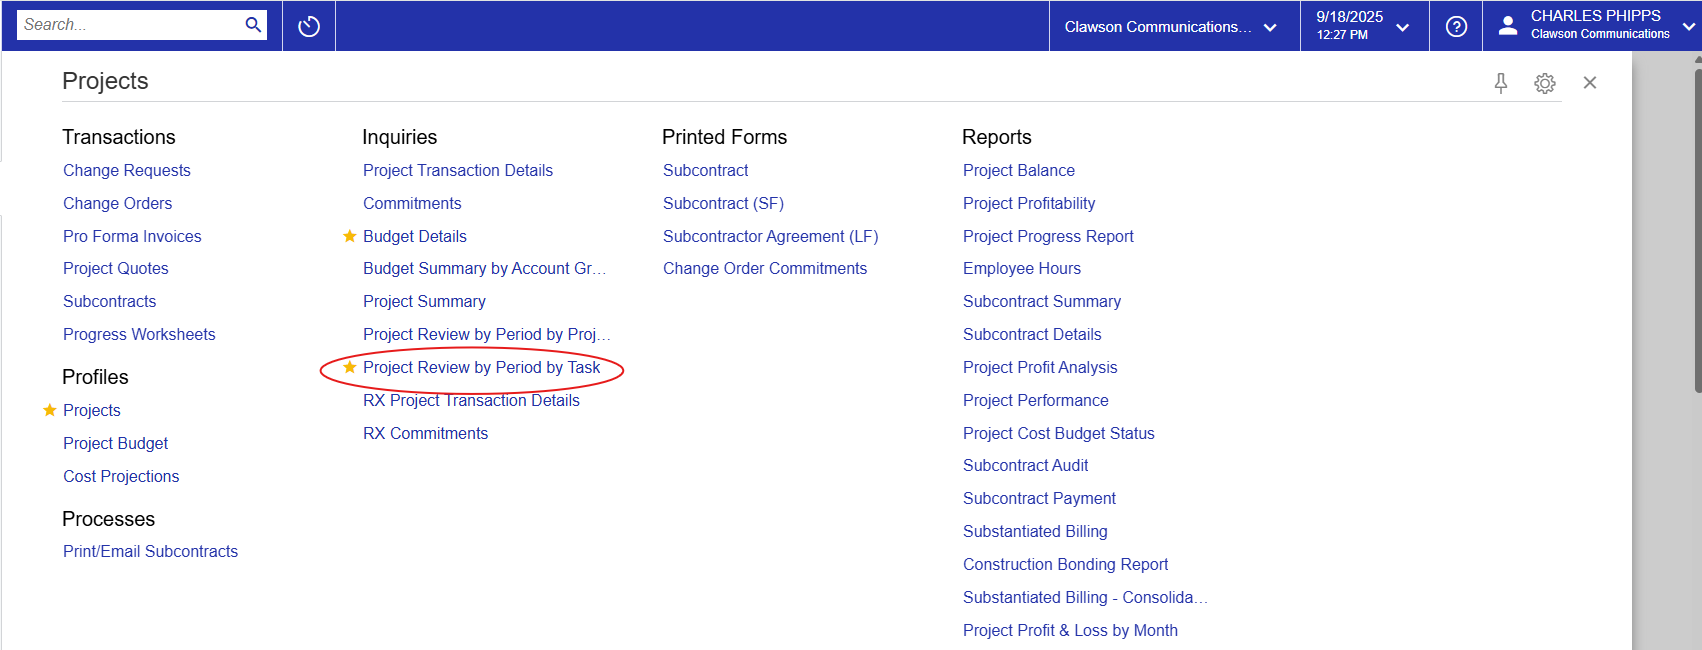
get the data, you must first select a “As of Period” at the top of the page.
Select the most recent month/year
complete. To locate your project, search it in the tool bar at the top right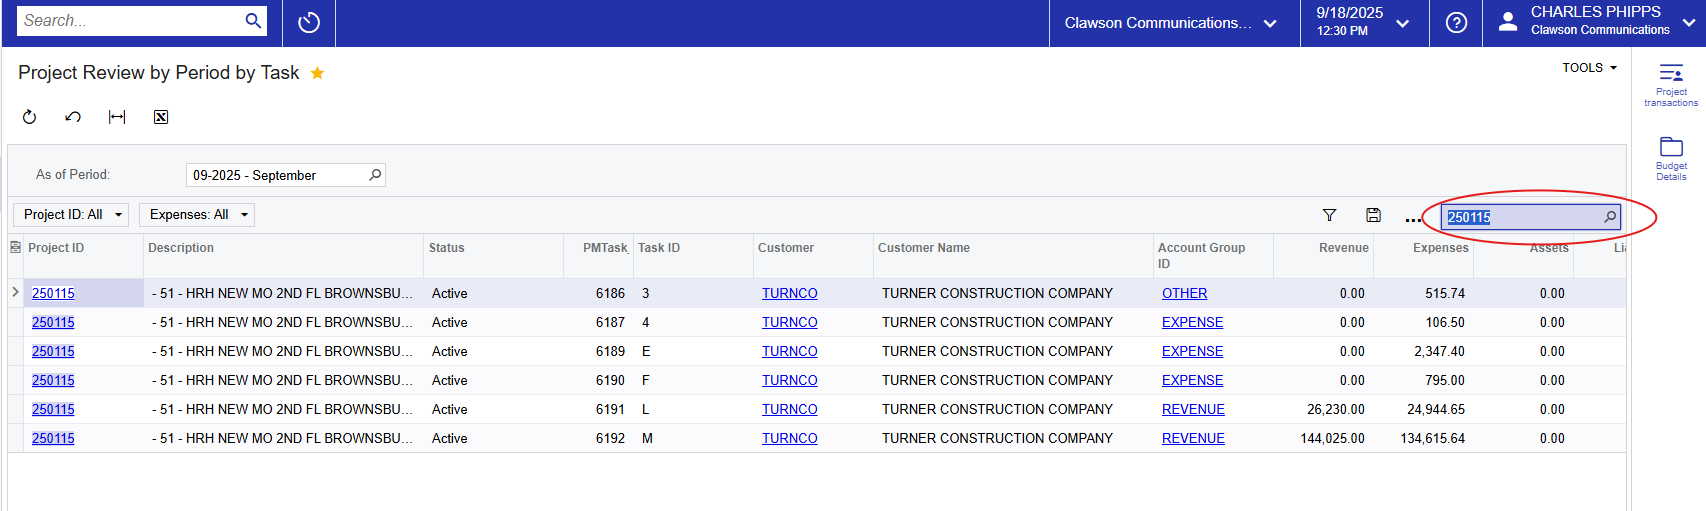
breakdown of revenue and expenses to date, by task. Here is a quick guide to
the “Task ID”:
invoiced) and our expenses to date by task. At the bottom you will find a
summary of each. 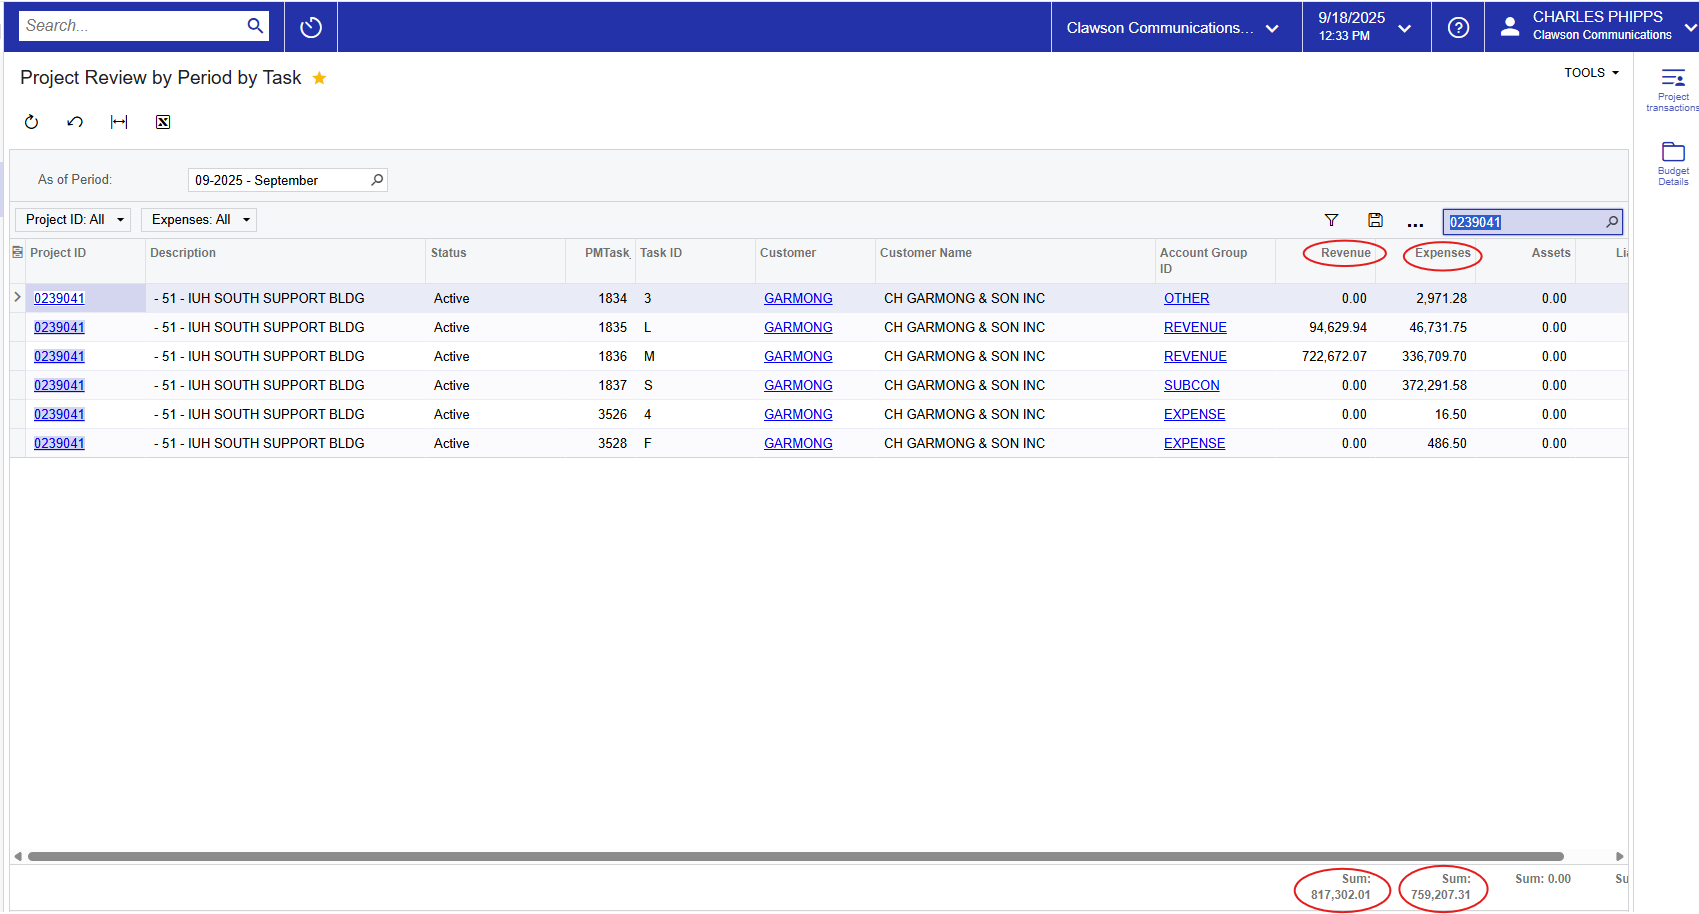
Purchases
PO’s. Under “Transactions, click on “Purchase Orders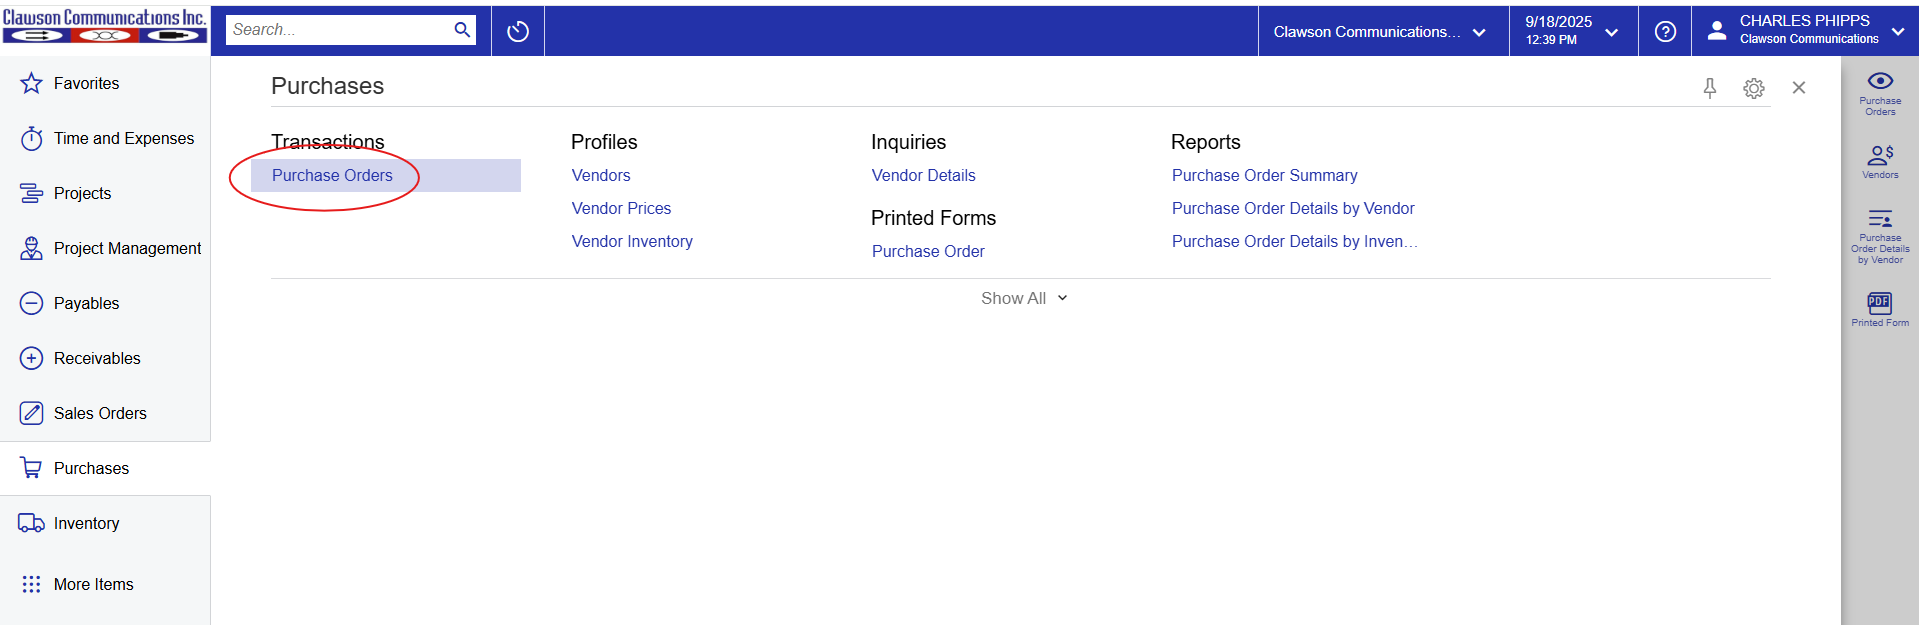
project in the search bar at the top right 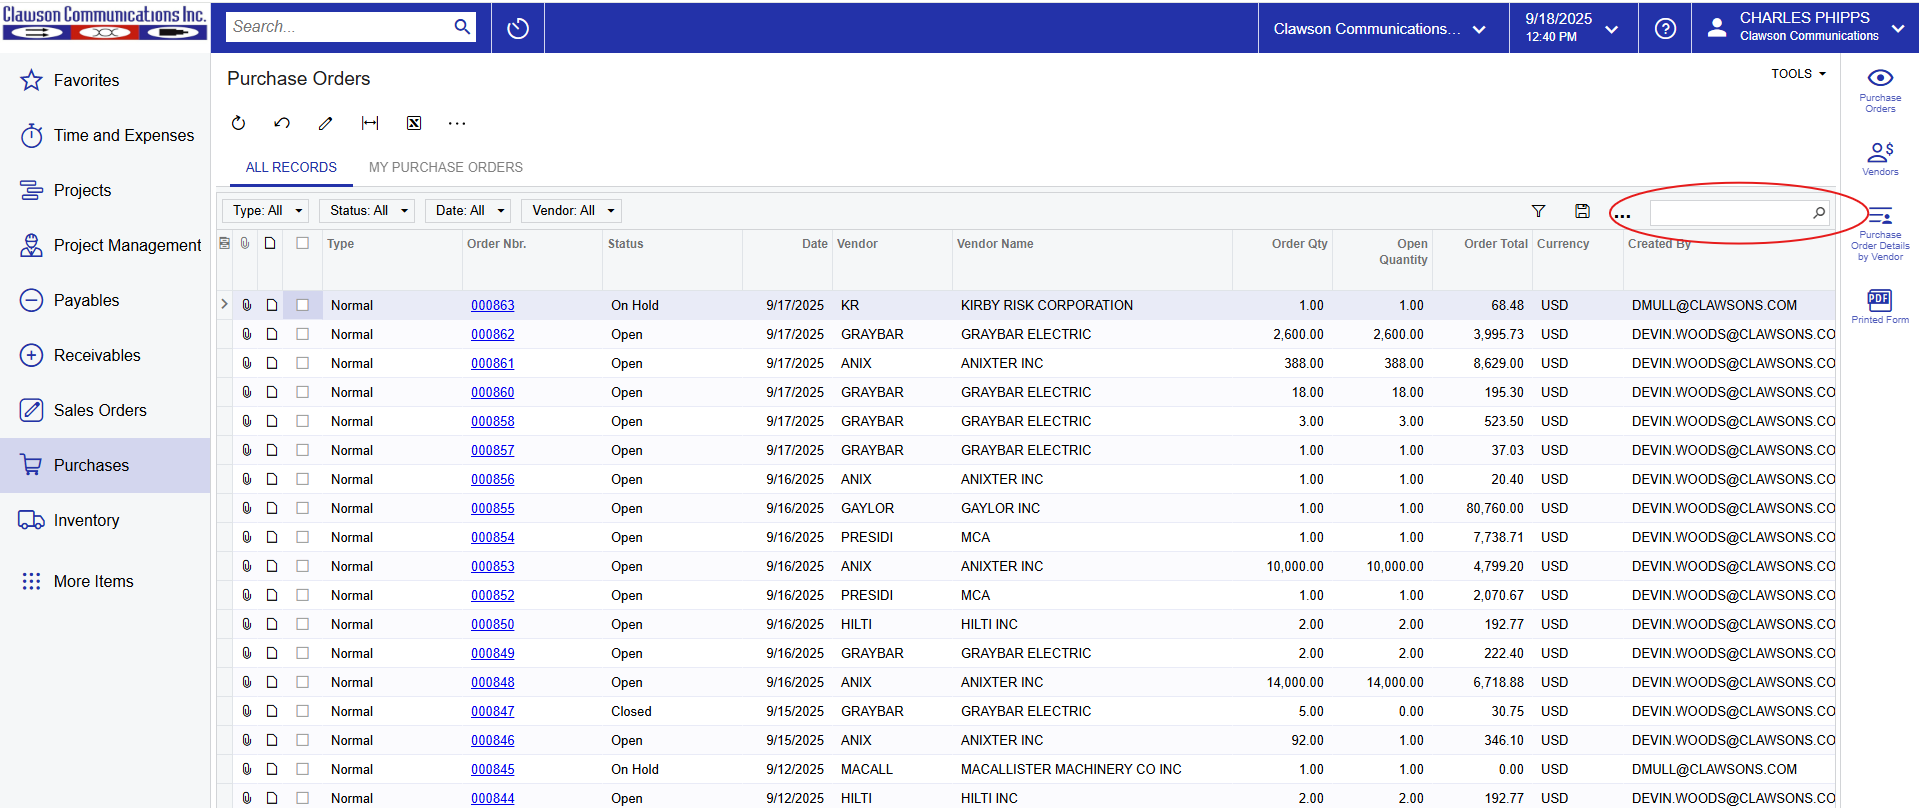
also locate these in “Projects” under “Commitments”
informational only and should never be edited or deleted.